Installation – Montigo 34FID - Linear User Manual
Page 23
Page 23
XG0514-150204
I-Series Indoor Gas Fireplace
Installation
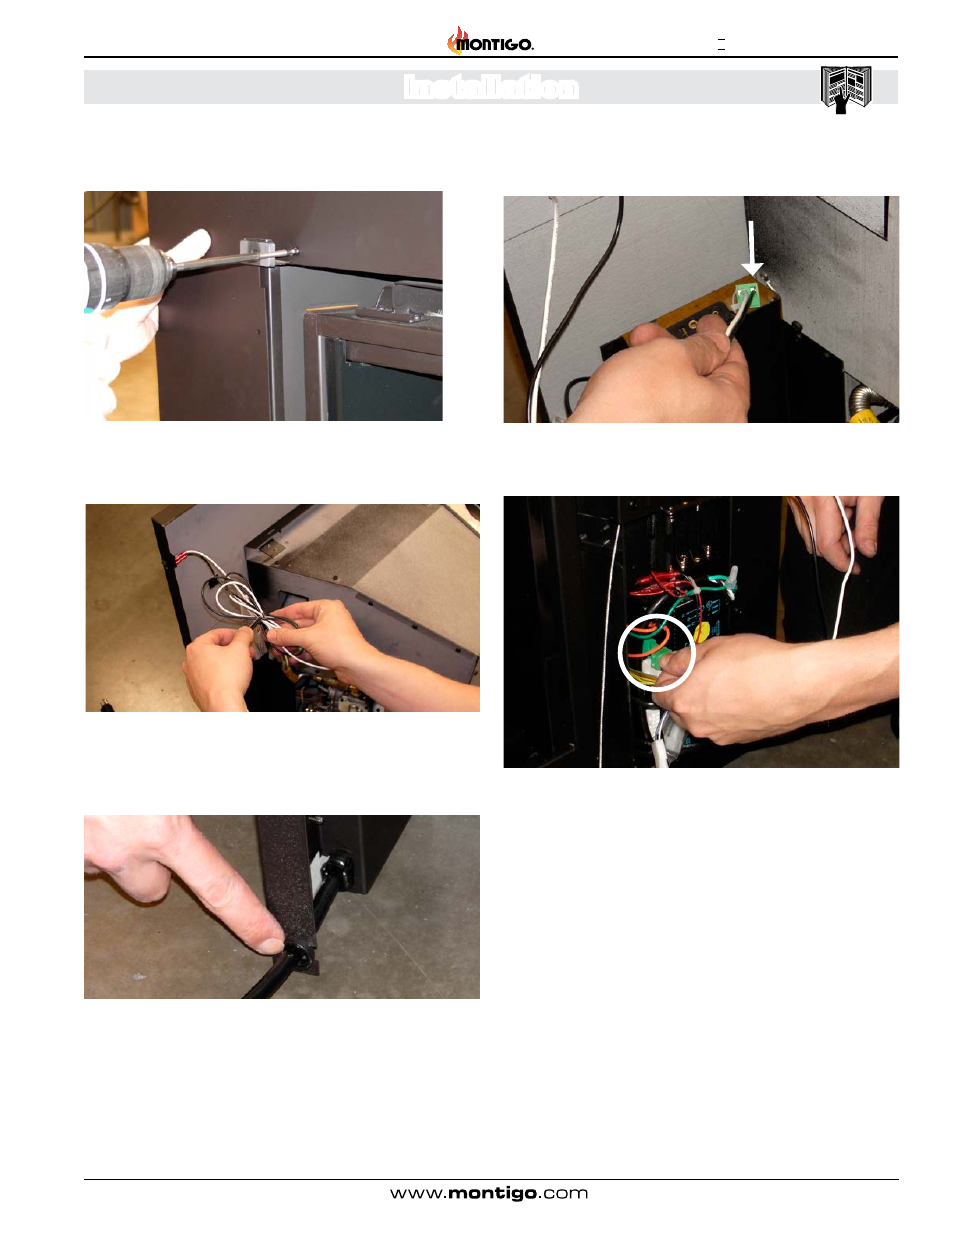
5). Attach the Rear Faceplate to the Firebox using the screws
provided (13 locations)
Figure 51 Sec.4
6). Remove the twist tie and Zip Strap that is on the On / Off
Switch wire harness.
Figure 52 Sec.4
7). Slip the Split Plastic Grommet, found in the plastic bag attached
to the master override switch, around the Power Cable and then
press it into the provision on the right lower side of the Rear
Faceplate to secure the Power Cord.
Figure 53 Sec.4
8). Thread the On/Off Wire Harness through the gap between the
Control Board Mounting Bracket and the Rear Faceplate Panel.
Figure 54 Sec.4
9) Connect the Plug to the appropriate terminal on the Control Panel.
Figure 55 Sec.4
See also other documents in the category Montigo For Home:
- H36PVN (40 pages)
- H42VO (22 pages)
- L38DF (40 pages)
- L42DF (40 pages)
- HL34DF (42 pages)
- P42DF (34 pages)
- R820 (44 pages)
- P52DF (34 pages)
- Flush Face (DF) Door Removal (1 page)
- Flush Face (DF) (14 pages)
- B38DV (26 pages)
- L52DF-ST (34 pages)
- HL38DF ST (38 pages)
- HL42DF ST (36 pages)
- RP620 (48 pages)
- HL38SVO-ST (20 pages)
- HP38DF-CLCR (38 pages)
- HP38DF PFC (38 pages)
- HP38DF PRC (38 pages)
- R620-ST (38 pages)
- DHS (22 pages)
- R324-ST (22 pages)
- 34FID Traditional (70 pages)
- 1001-A (6 pages)
- 1001 TH-A (9 pages)
- PF2RK (4 pages)
- RX100 (6 pages)
- H42 (2 pages)
- RX82 (12 pages)
- RX200 (8 pages)
- HFK-Series Cross-Flow Blower (2 pages)
- P-Series Fireplace Surround (2 pages)
- RX88 (20 pages)
- HFK50R (2 pages)
- RFK1080 (2 pages)
- HFK50 (4 pages)
- IOSK3 (2 pages)
- IOSK4 (2 pages)
- IOSK5 (2 pages)
- IOSK6 (2 pages)
- RFK3004 (4 pages)
- RFK3004R (4 pages)
- EPVRW (6 pages)
- EPVRR (6 pages)