Step 4 – test the daqtemp pci board, Step 4 – test the daqtemp pci board …… 2-5, Step 4 – test the pci board … -5 – Measurement Computing DaqTemp User Manual
Page 25: Test the daqtemp pci board
DaqTemp User’s Manual
10-14-02
How to Install DaqTemp 2-5
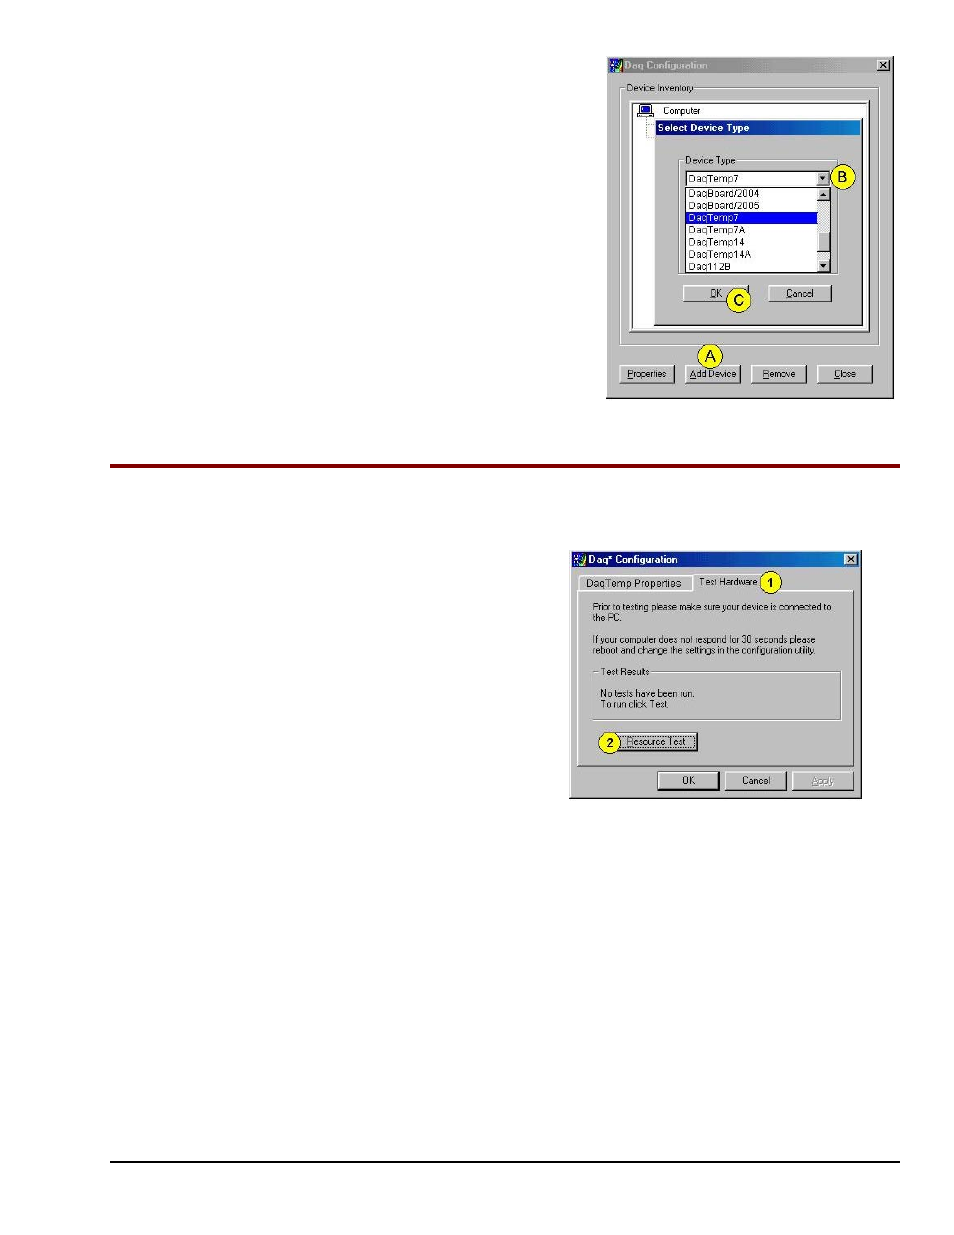
Using “Add Device”
This method is for users who have accessed the Daq
Configuration control panel applet, but have no
DaqTemp icon.
(A) After accessing the Daq Configuration control
panel applet, click on the Add Device button (see
figure, right). The Select Device Type window will
appear.
(B) Using the Device Type’s pull-down list, select the
applicable board. In the example at the right
DaqTemp7 is selected.
(C) Click the OK button. The DaqTemp Properties tab
will appear.
At this point, complete steps 3 through 5, above.
Using “Add Device”
Step 4
– Test the DaqTemp PCI Board
Use the following steps to test the DaqTemp. Note that these steps are continued from those listed under the
previous section, “Configure the DaqTemp PCI Board.”
1. Select the “Test Hardware” tab.
2. Click the “Resource Test” button.
3. After the test is complete, click “OK.”
System capability is now tested for the
DaqTemp PCI board.
Test results will be displayed on the screen.
At this point we are ready to connect the
DaqTemp module to the PCI board.
Test Hardware Tab
(Condensed Screen Image)