Measurement Computing DaqTemp User Manual
Page 23
DaqTemp User’s Manual
10-14-02
How to Install DaqTemp 2-3
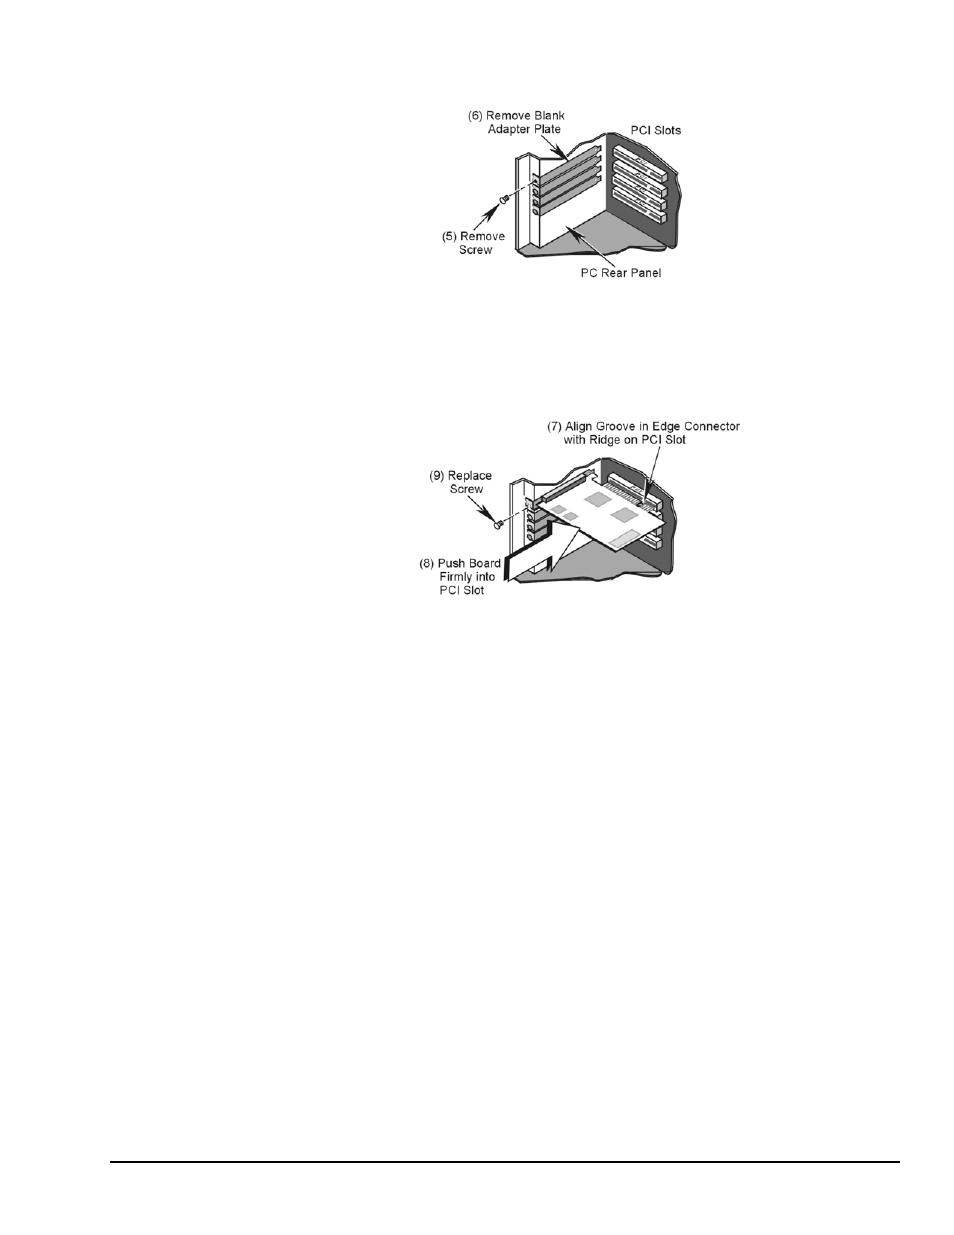
5. On the PC’s rear panel, loosen and remove the screw for the blank adapter plate that corresponds with
the chosen PCI bus. See the following figure.
Removing a Blank Adapter Plate from
the Host Computer’s Rear Panel (Steps 5 and 6)
6. Remove the adapter plate. Refer to your PC Owner’s Manual if needed.
7. Align groove in the DaqTemp PCI board’s edge-connector with the ridge of the desired PCI slot, and
with the corresponding rear-panel slot on the PC. See following figure.
Installing a DaqTemp PCI Board (Steps 7, 8, and 9)
8. Push the board firmly into the PCI slot. The board will snap into position.
9. Secure the board by inserting the rear-panel adapter-plate screw.
10. Replace the computer’s side cover and plug in all cords and cables that were removed in step 1 of this
procedure.
11. Apply power to, and start up the PC.
Note: At this point some PCs may prompt you to insert an installation disk. While this is rare, if you do
receive such a prompt simply place the install CD-ROM into the disk drive and follow additional
screen prompts.