MacroSystem Quick-Photo User Manual
Page 7
As mentioned earlier to use Quick Photo on launch you should “Read images” with (1) to
import all photos and / or stills from the Scene Bin that you want to edit with.
If you want to pre-determine the new scene / photo’s run “time” use Stand time (13) so that
each individual image appears later with this length when rendered. This can be adjusted
(individually or en- mass) later if required.
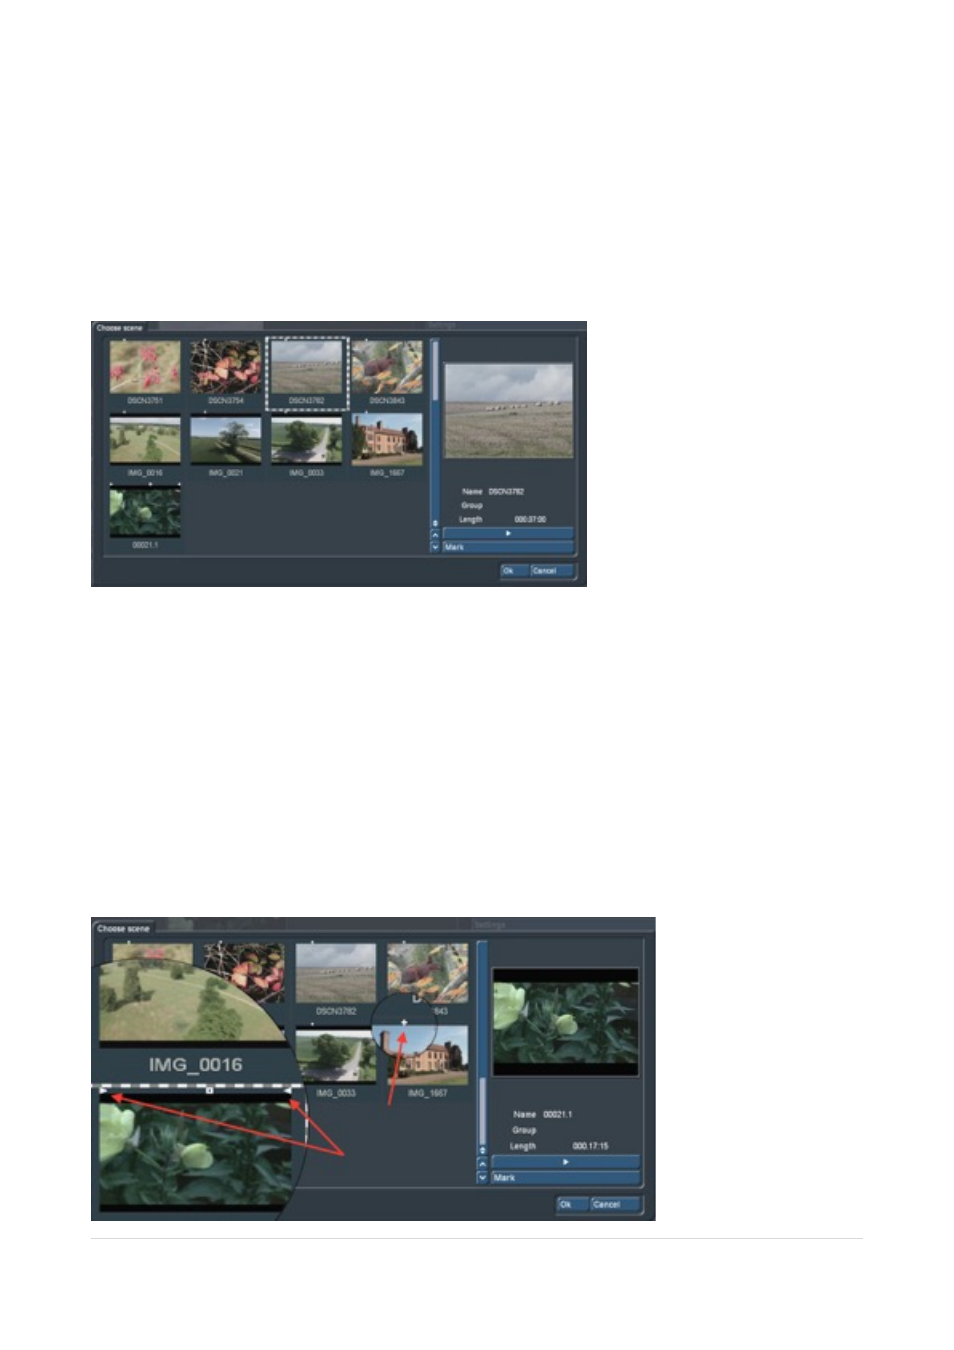
If you clicked “no” earlier you can use “Read image” and in the window displayed you will
see the entire scene bin – Picture 4.
!
Picture 04
Here you can see the high-resolution photos marked with little white crosses seen in
Picture 04 (Scene DSCN3843 ) or IMG_1667 enlarged (one red arrow) - Picture 5.
Scenes that have no cross are the first frame from a video clip as in Scene 00021.1 in
Picture 4. You can see if it has already been “trimmed” by the little white triangles to the
left/right (trim from beginning or trimmed from the end) shown in the enlarged section (two
red arrows) - Picture 5.
You can play individual scenes or still images as necessary and select Ok to add to Quick
Photo. To add “more at a time” you can select the scenes you want (Dashed box) and click
on “mark”. In this way, you can select a number of images that then all have a white
square at the top and add them to the Quick Photo project area with the ok button.
!
Picture 5
|
P a g e
7