2 using your eflash, 1 using the eflash as an esata device – Kanguru e-Flash User Manual
Page 14
14
2.2 Using Your eFlash
There are 2 ways to use your eFlash depending on the way it is connected. If you are connecting the
eFlash through Power over eSATA or eSATA + USB, the eFlash will operate as an eSATA device. If
you are connecting the eFlash through USB only, the eFlash will operate as a USB device.
2.2.1 Using the eFlash as an eSATA device
When you connect the eFlash through Power Over eSATA or eSATA + USB, the eFlash will appear
in the Hard Disk Drives section under My Computer if you are using Windows or as a drive icon on
your desktop if you are using Mac OS.
Your system may not automatically recognize that the device has been connected. Although SATA
was designed to be hot-swappable, not all systems support this feature. For more information, please
refer to Appendix A: eSATA Hot Swap, p.21.
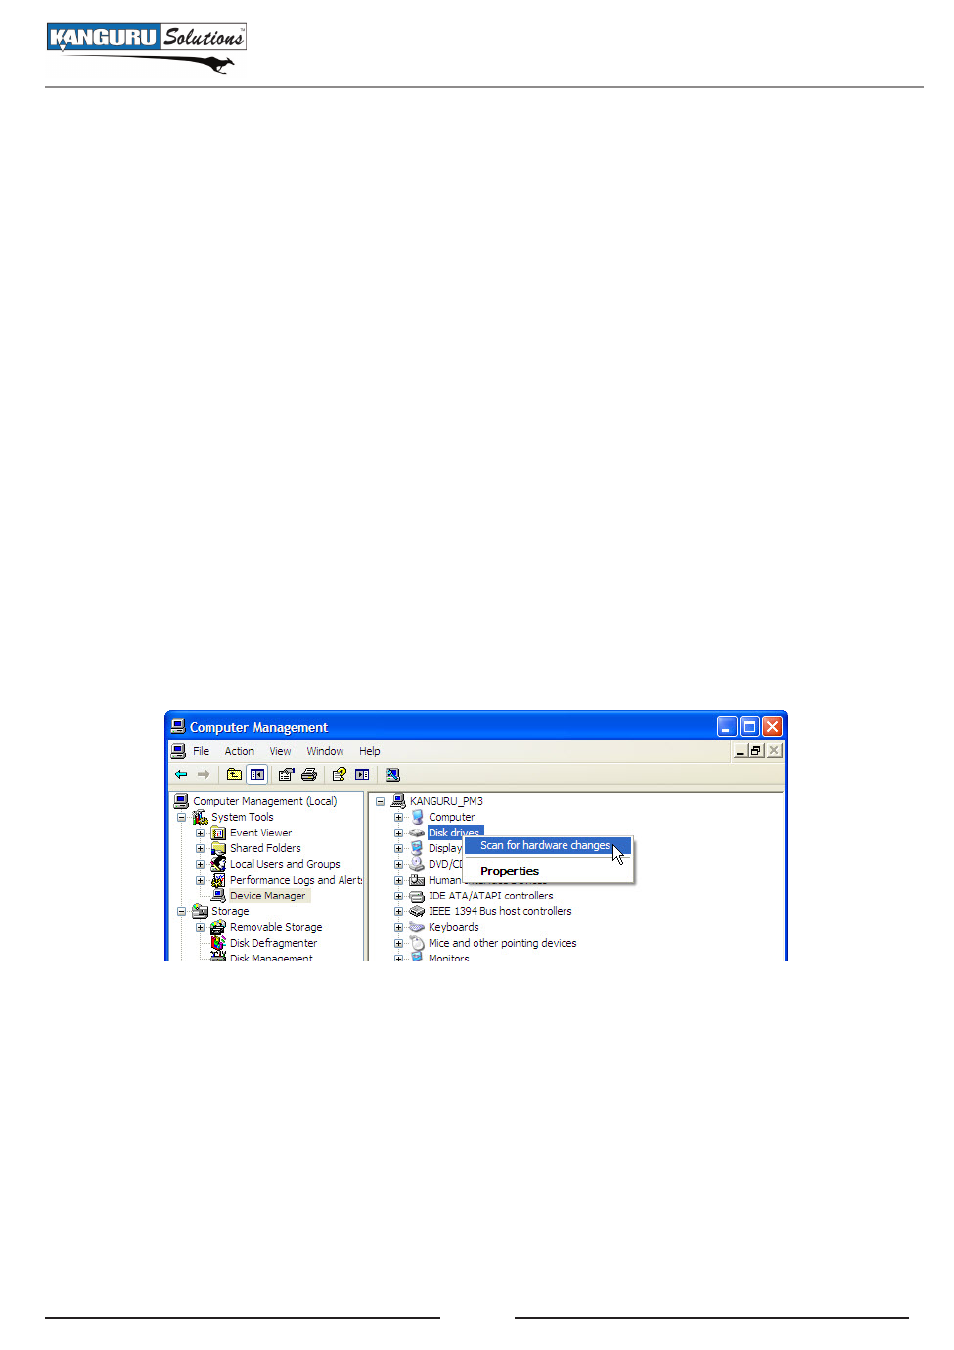
If you do not see the device right away:
1. Right click on the My Computer icon on your desktop and then select Manage from the popup
menu. The Computer Management window appears.
2. Under System Tools in the left window, select Device Manager.
3. In the right window, right click on Disk drives.
4. Select Scan for hardware changes.
You should now be able to see your device in My Computer. If you still are not seeing the device,
please see section 4. Troubleshooting, p.19 for possible solutions.
Note: The eFlash comes preloaded with a third party application, HotSwap!. HotSwap! allows you
to easily add and remove eSATA devices with a few clicks of your mouse. We recommend using the
preinstalled HotSwap! application to scan for hardware changes. If you are using HotSwap! you can
right click on the HotSwap! icon in the taskbar and then select Scan for hardware changes from the
popup menu. For more information on using HotSwap!, see section 2.2.1.1 Using HotSwap!, p.16.
Connecting and Using Your Kanguru eFlash