ikan KVM-2450W User Manual
Page 31
Shenzhen Konvision Technology Co,.Ltd www.konvision.com
31
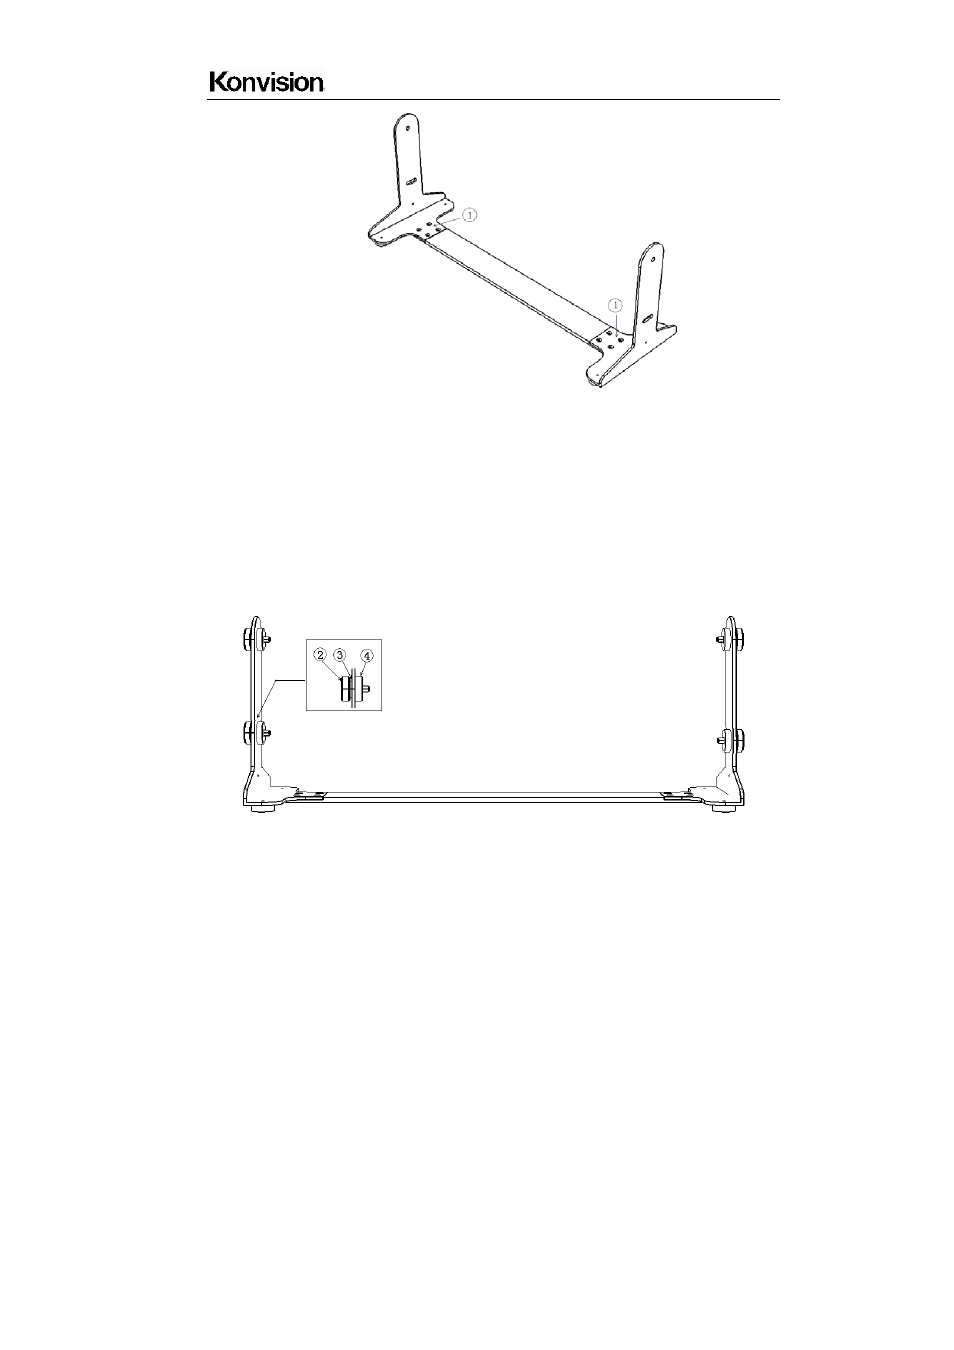
Picture 1
2. See Picture 2, Picture 3 and Picture 4:
Use the screw the bolt (Mark 2) with black thin gasket (Mark 3), screw through the side
bracket, then put a black thick gasket (Mark4). Then screw this bolt to the monitor side
screw hole accordingly, same as other 3 holes.
Please note that in Picture 3, the L1 length is shorter than L2. L1 is for the front side and
L2 for the back side.
Picture 2
See also other documents in the category ikan Monitors:
- SH17 (29 pages)
- SH17 (7 pages)
- SH17 (3 pages)
- SH17 (2 pages)
- SH17 (4 pages)
- SH17 (5 pages)
- Director (1 page)
- ELE-MS-S (4 pages)
- KVM-7050W-2 (33 pages)
- MR7 Quick Start (2 pages)
- MD7 (35 pages)
- RM2-65 (1 page)
- RM3-43 (2 pages)
- RM7000 (1 page)
- RM7Ki (4 pages)
- MR7 (51 pages)
- RM8000HDMI (1 page)
- RM7Xi (2 pages)
- V8000W (1 page)
- SH56 (2 pages)
- SH809 (2 pages)
- V17-FK (1 page)
- V17e-FK (3 pages)
- V17e-FK (3 pages)
- TL2000HD-CO (18 pages)
- V3800 (2 pages)
- V2500 (2 pages)
- V5600 (1 page)
- V8000T Quick Start (1 page)
- V8000T (13 pages)
- VH7-DK (1 page)
- VH7e-DK (3 pages)
- VH8-2 (4 pages)
- VH8-DK (4 pages)
- VK5-DK (4 pages)
- VH7i-2 (4 pages)
- VK7-DK (5 pages)
- VK7i-2 (5 pages)
- VL5 (2 pages)
- VL5-DK (2 pages)
- VL5-KIT-1 (3 pages)
- VL7-DK (1 page)
- VL7e (5 pages)
- VX9-DK (3 pages)