Pneumatic static pressure kit, Keypad mounting, Keypad mounting diagram – Greenheck Vari-Flow Air Management Systems (472966) User Manual
Page 4
4
Vari-Flow Air Management System
®
Pneumatic Static Pressure Kit
1. Locate the Dwyer static pressure sensor outside
of the building in a secure location free from as
many obstructions as possible.
2. Refer to the instruction manual with the static
pressure sensor for installation and operation
details.
3. Once the static pressure probe is mounted, run
vinyl tubing from the probe back to the control
panel and coil the excess tubing. Do not kink or
trim the tubing.
4. If the control panel is located in the space to be
controlled, go to the next section. If the control
panel is mounted remotely from the space to be
controlled, continue to step 5.
5. Run 1/4 inch virgin poly tubing (by others) from
the sensor in the control panel to a secure
location in the space to be controlled.
NOTE
The keypad may be factory mounted. If so, continue
to the next section.
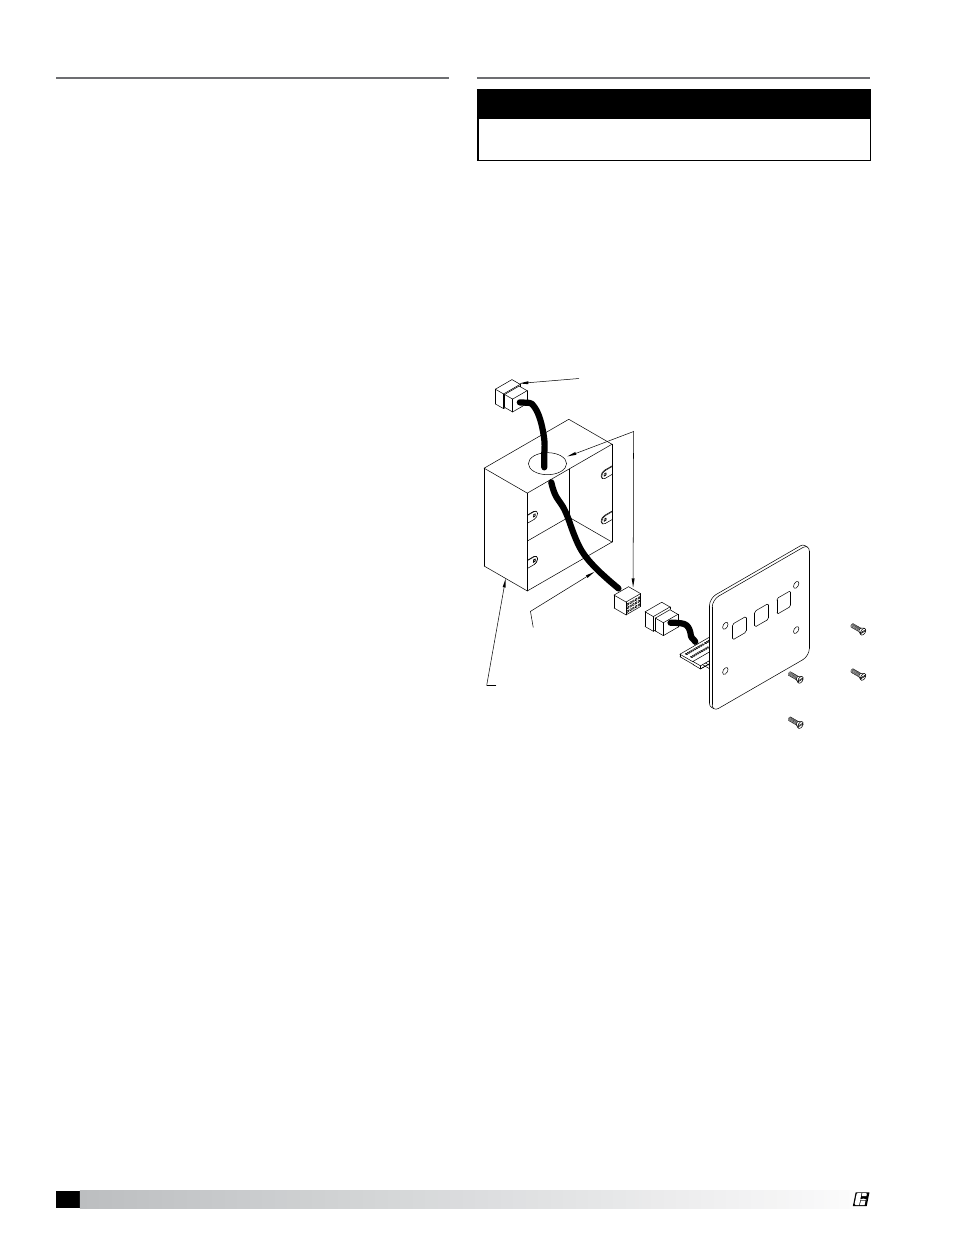
1. For systems with remote controls or keypad, a
25 ft. cable is supplied to connect the keypad
to the controls. The cable is plenum rated and
does not need to be run through conduit unless
required by local codes. If the keypad is to be
mounted further than 25 ft. from the control
box, additional cable will be needed. Cable is
available in 25 ft. lengths from the factory.
Keypad Mounting
Keypad Mounting Diagram
Keypad, screws and wire harness
supplied by the factory
25 ft. cable assembly
supplied by the factory
Two-gang switch box
supplied by the factory
KEYP
AD
Connection made at top of Control Panel
If desired, conduit and fittings supplied by
others in field. One-inch conduit needed
to allow smaller connector to fit through.