Prior to installation, Wall or single island canopy hoods – Greenheck Canopy Hoods (452413 IOM) User Manual
Page 5
Kitchen Hoods • Type I and Type II
5
®
Prior to Installation
Prior to installation, check with the Authorities Having
Jurisdiction (AHJ) on clearance requirements to
structures surrounding the hood and other equipment.
Verify there is enough space to safely lift hood up into
its operating position and enough clearance around
the hood for components like fire system connections,
hood lights, hood control components, etc. Consider
access for servicing the equipment and the different
components when locating the hood.
If the hood is a grease hood (Type I), the UL label
located on the end panel on the inside of the hood
will provide pertinent information regarding the hood
installation. Information includes:
• Allowable cooking surface temperatures of the
cooking equipment
• Front and side overhang/underhang requirements
• Minimum exhaust (and possibly supply) airflow
requirements
• Hood lighting load information and restrictions
• Filter
information
• Fire damper fusible link replacement information, if
applicable
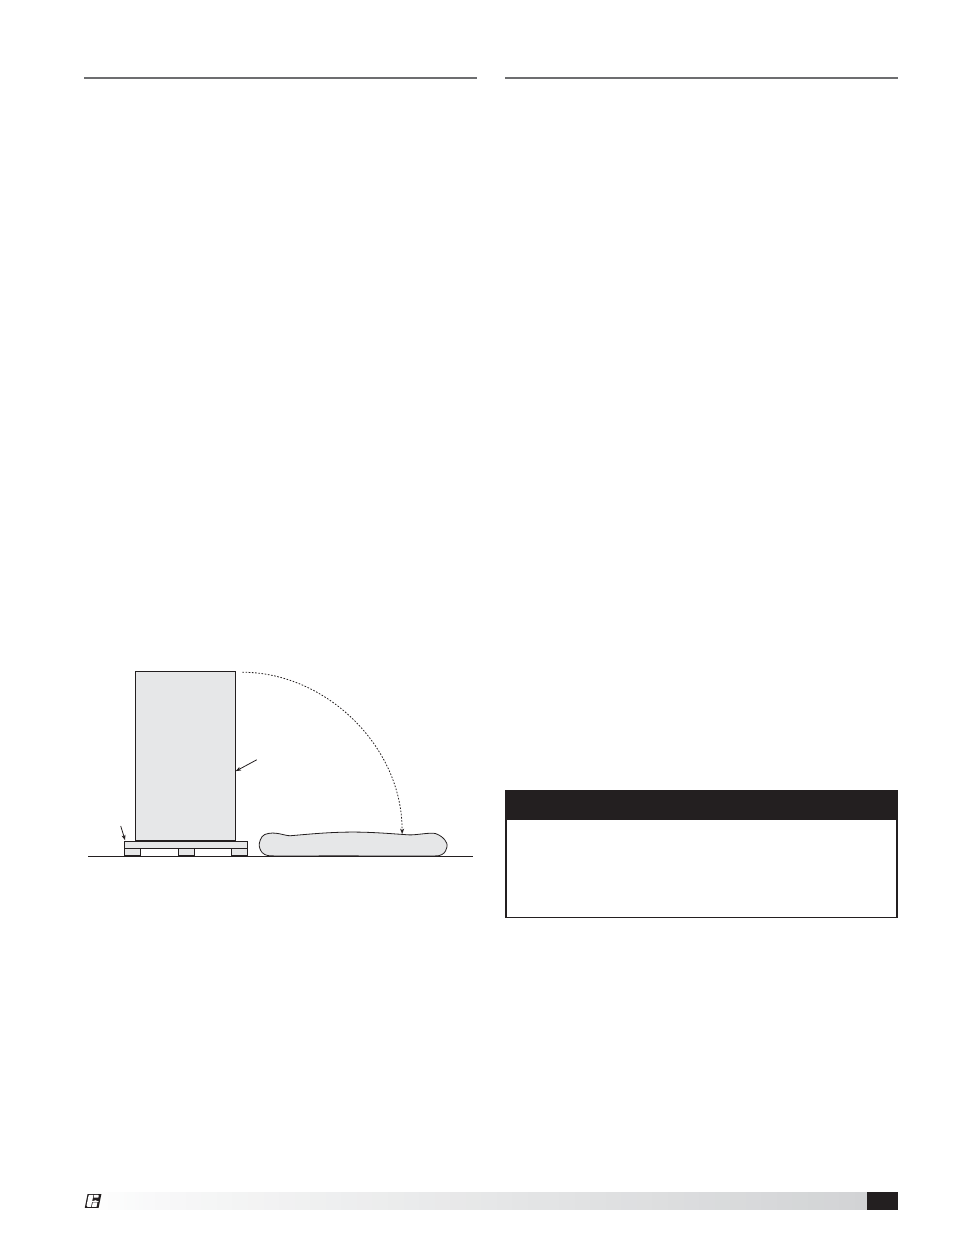
With the hood still inside its packing crate, position the
unit beneath its installation location. Carefully remove
the packing crate and place some protective material on
the floor next to the crate to avoid damaging the hood
as it is tipped on its side. Tip the hood carefully onto the
protective material.
Bottom of Hood
Pallet
Protective Material
Hood Installation Overview
1. If the hood is provided with filler panels, shipped
loose, install them now. See page 7, Filler Panel
Installation. Filler panels may be integral to the
hood, which requires no additional installation.
2. If the hood is equipped with Clearance Reduction
Methods, refer to pages 7 and 8 for special
considerations with hanging the hood.
3. If the hood is provided with hood/duct sensors or
thermostats, install them now. See the Installation
and Operations guide provided with the control
panel.
4. If the hood was provided with either exhaust
collars or supply collars that have shipped loose,
it is recommended that the exhaust and supply
openings are cut and collars are attached now,
prior to hanging the hood. See page 8, Installing
Duct Collars.
5 If the hood is provided with a back supply plenum
(BSP) install it now. See page 9, Installing the Back
Supply Plenum.
6. If possible, connect (weld) exhaust duct to the
hood while on the floor, unless it prohibits the hood
from being raised into place. For information on
ductwork, see page 9, Ductwork.
7. At this point, drill holes in the building structural
support system or utilize uni-strut to match up with
the hanger bracket holes. Then slowly and evenly
raise the hood into position and insert 1/2-inch
(12.7 mm) diameter threaded rod (provided by
others) between the hanger brackets and structure.
For Type I hoods, the hood hanging height
requirements are given on the UL label. Typical
canopy hood hanging height will be 80 inches
(198.12 cm) off the finished floor.
Wall or Single Island Canopy Hoods
NOTE
If the hood is supplied with ceiling enclosures, the
height of the enclosures will typically be the distance
from the ceiling to the top of the hood. Use this
dimension to find the hood’s hanging height off of the
floor.
For questions regarding the supporting structure and
its integrity, either the contractor or structural engineer
needs to be consulted.