Phase 1 - installation and hardware setup – Genee World ClassComm User Manual
Page 4
4
Phase 1 - Installation and Hardware Setup
NOTE: For the rechargeable GeneePads, a 7 – 10 hour full charge will be needed before they can be used
with ClassComm.
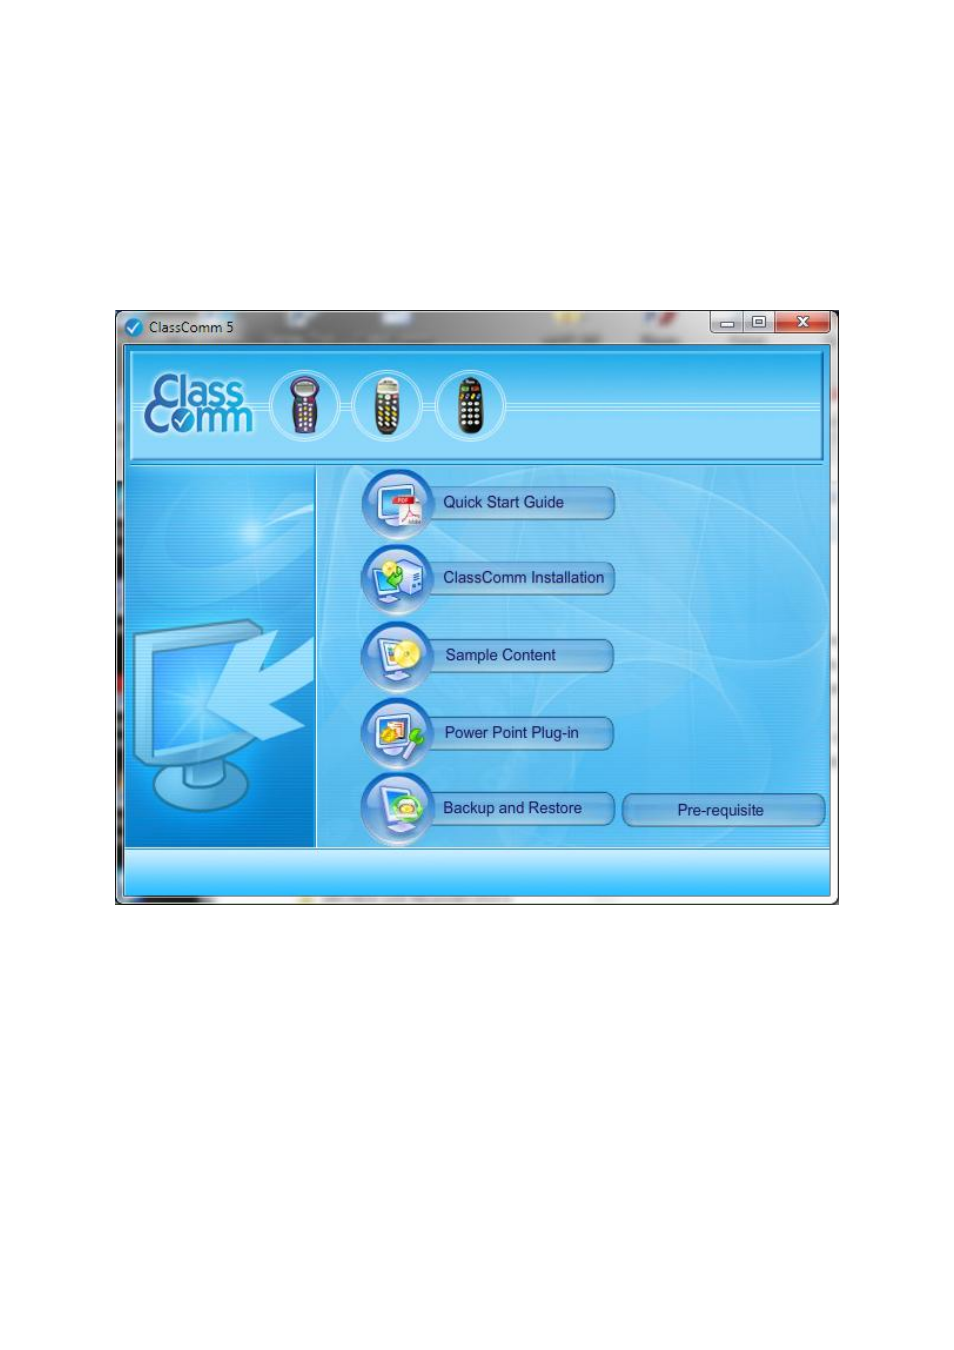
1 – Insert the disk and double-click ClassComm.exe. This will open the ClassComm installation menu
screen:
2 – Click the “ClassComm Installation” option to install the main application. Follow on screen
instructions to complete the installation. Note – You may get a message stating that you need .net
Framework 4.0. If so, please click the Pre-requisite button to install it.
3 – Click “Sample Content” to select and install the required sample educational content which
contains fully mapped PowerPoint presentations. (Optional)
4 – Install the “Power Point Plug-in” module. This will add the Slide Mapper module to MS
PowerPoint allowing for presentation mapping.
5 – The “Backup and Restore” option allows users to take a Backup from older ClassComm
installations and then restore these settings into the latest ClassComm software. (Optional Step).