Installation (cont.) – Fire Magic 36-VH Vent Hood User Manual
Page 16
REV 2 - 1502191555
L-C2-387
16
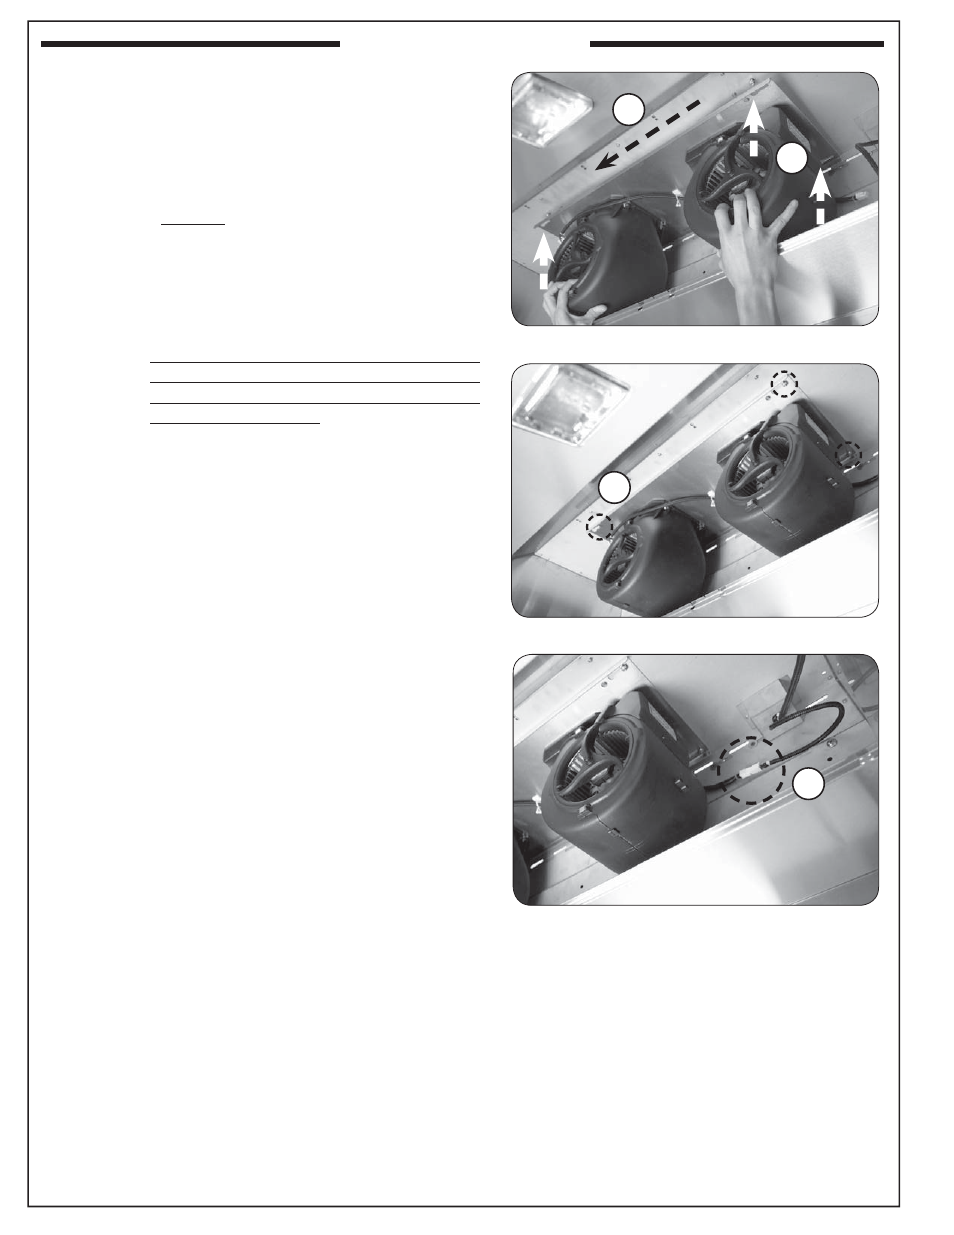
FAN ASSEMBLY
1. Locate the (4) nuts pre-installed to the ceiling of the
vent hood, and using a
3
/
8
" nut driver, loosen (but do
not remove) to allow for the fan assembly to be inserted.
See Fig. 16-1.
2. With the open ends of the fans facing the front of the
vent hood, carefully position the fan assembly, aligning
the keyholes to the loosened nuts. See Fig. 16-1, A.
3. Mount the fan assembly fl ush against the vent hood
ceiling ensuring the nuts protrude through the keyholes,
then slide the assembly to the left so that it to hangs
from the nuts. See Fig. 16-1, A and B.
CAUTION: TO PREVENT INJURY OR DAMAGE TO
THE FAN ASSEMBLY, THE FAN MUST
BE SUPPORTED UNTIL IT IS PROPERLY
SECURED IN PLACE.
4. Fasten the (4) nuts to secure the fan assembly in place
(see Fig. 16-2, C).
WIRING CONNECTIONS
1. A wire connection exists toward the right rear of the fan
assembly. This is to be connected to the wire harness
coming out the right rear of the vent hood. See Fig.
16-3, D.
INSTALLATION (cont.)
Fig. 16-1 Insert fan assembly
Fig. 16-2 Fasten (4) nuts to secure
A
B
C
Fig. 16-3 Connect fan assembly wire
D