Installation (cont.) – Fire Magic 36-VH Vent Hood User Manual
Page 12
REV 2 - 1502191555
L-C2-387
12
INSTALLATION (cont.)
Custom Spacer:
Construct the spacer frame according to your individual
install preference, while following the guidelines found in
the INSTALLATION REQUIREMENTS section. The front of
the spacer (that is exposed to the rear of the vent hood);
must include a solid wall to allow for the vent hood to be
properly secured into it.
When designing the spacer; account for the thickness of
your fi nishing substrate so that overall dimensions are fl ush
with the vent hood.
The spacer should be installed 30-33" above the grill,
centered, and level. See Fig. 12-1.
Important: Be sure to allow for the proper clearance
above the spacer for the soffi t / duct cover that
is to be installed at a later time.
1. Locate and mark the REAR WALL studs.
2. Determine the install location of the spacer (30-33"
above the grill).
3. Using appropriate mounting hardware for the spacer
and rear wall construction; secure it into the rear wall.
Important: THE SPACER MUST BE SECURED INTO
MULTIPLE WALL STUDS, USING THE
APPROPRIATE HARDWARE, TO ENSURE
PROPER SUPPORT. METAL FRAMEWORK
WILL REQUIRE ADDITIONAL WALL
STUDS AND SCREWS FOR PROPER
SUPPORT. CONSULT A PROFESSIONAL
CONTRACTOR FOR YOUR INDIVIDUAL
SETUP.
4. Install fi nishing substrate to left and right sides, and
bottom of spacer as appropriate.
TRANSITION
1. Rest the vent hood on its rear panel.
2. Apply a bead of silicone along the bottom of the
mounting fl ange of the transition before installation
(see Fig. 12-2, A).
3. Position the transition in place and secure using a power
drill with a
1
/
4
" hex driver (or a
1
/
4
" nut driver) and the
(4) supplied #6 x 3/8" hex head screws. Reach into
and fasten the screws from inside the vent hood. (An
additional person should hold the transition in place
while it is being fastened.) See Fig. 12-2, B-C.
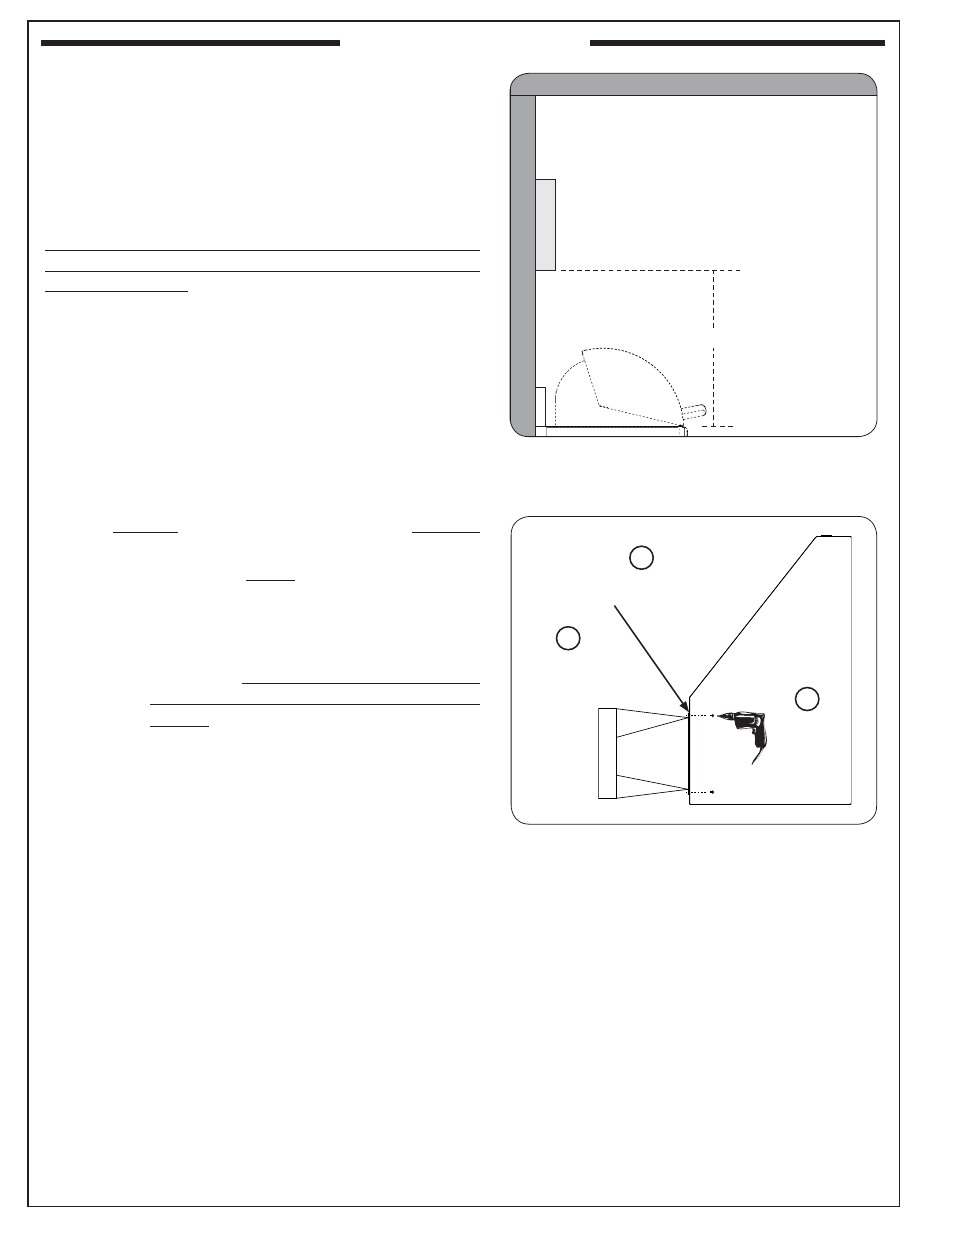
Fig. 12-1 Custom spacer orientation
• Allow for proper soffi t / duct cover
clearance above
R O O F
S
P
A
C
E
R
R
E
A
R
W
A
L
L
30 - 33"
• Spacer must be properly secured
into REAR WALL studs.
•
Spacer must have a solid front wall
(remove grill
if possible)
Fig. 12-2 Install transition
Drill 4
screws
from inside
Hold transition
in place from
outside
Apply silicone between
transition and hood
A
B
C