Installation (cont.) – Fire Magic 36-VH Vent Hood User Manual
Page 15
REV 2 - 1502191555
L-C2-387
15
INSTALLATION (cont.)
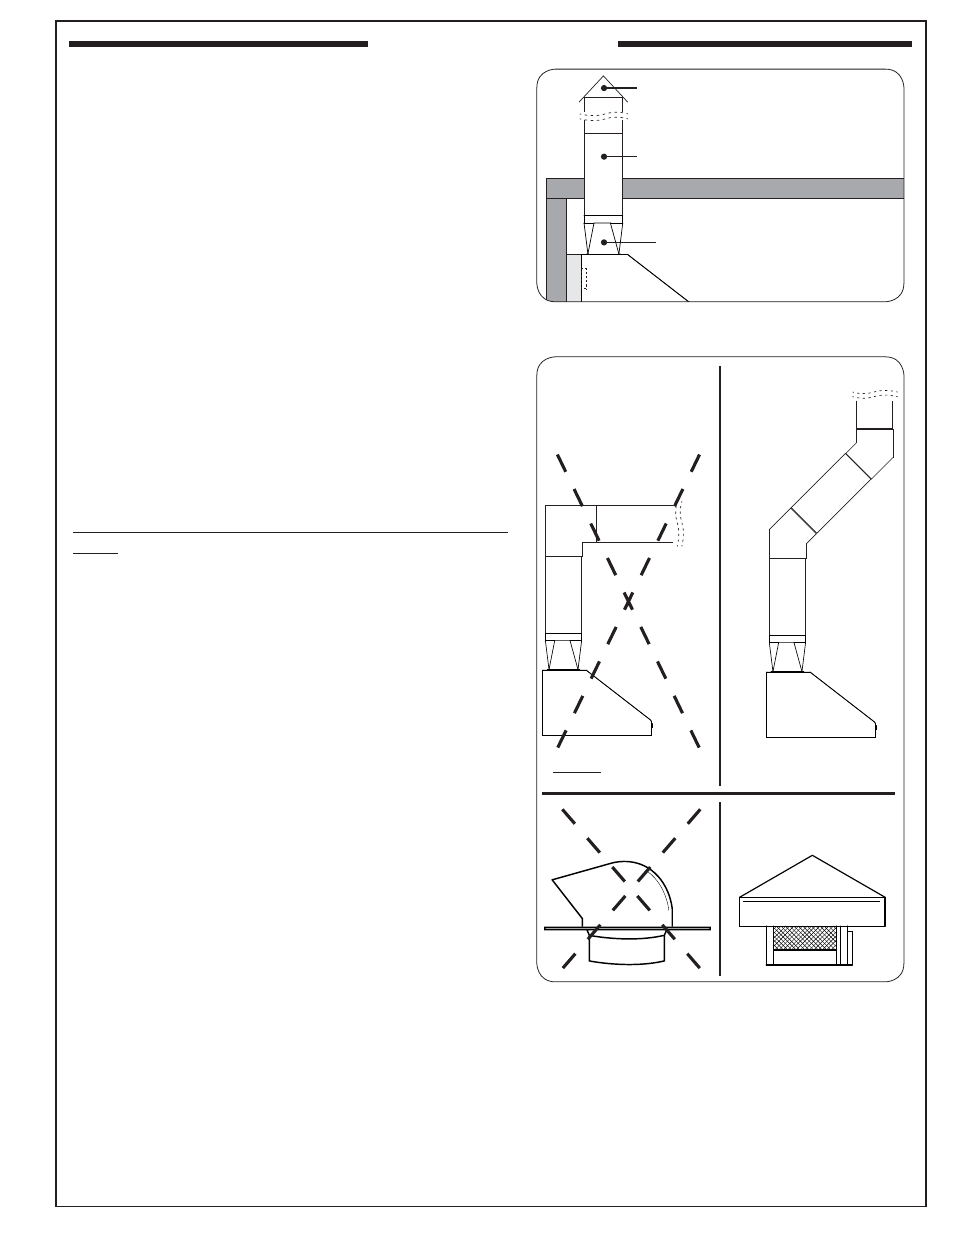
VENT PIPING
A cutout will need to be made in the roof to route the piping
through; and must be sealed with silicone to prevent leaks.
1. Install 10" round galvanized rigid (single wall) vent
piping from the transition on, as required. All joints
must be sealed using duct tape.
Important: Vent piping should be installed as straight
as possible to prevent back-pressure on the
fans.
Important: If an offset is required for your installation, a
maximum of two 45˚ elbows may be used.
Do not use 90˚ elbows for this installation.
See Fig. 15-2.
2. Using duct tape and the appropriate hardware; install
a termination cap on top of the vent piping to prevent
water and debris from entering the vent hood.
Important: A non-restrictive termination cap must be
used. Do not use a restrictive cap for this
installation. See Fig. 15-2.
Installation will depend on roof construction and individual
setup.
Exceeding a 20 foot total vent piping length will reduce the
effectiveness of your exhaust system.
Fig. 15-1 Common Installation
( R O O F )
Transition
Install 10" round vent piping as needed
Cap
(vent hood)
Fig. 15-2 Incorrect/Correct Piping Examples
INCORRECT
CORRECT
90˚
elbow
45˚
elbow
45˚
elbow
NEVER use 90˚ elbows
Ok to use a max of two
45˚ elbows
Only use non-restrictive
termination caps