Fire Magic Echelon Diamond Stand Alone Grill User Manual
Page 42
42
POWER BURNER
The fl ames from a properly adjusted power burner
will touch the burner ports and appear mostly blue.
If they are orange, “lazy,” or lift off the burner ports,
then adjust the air shutter using the following steps.
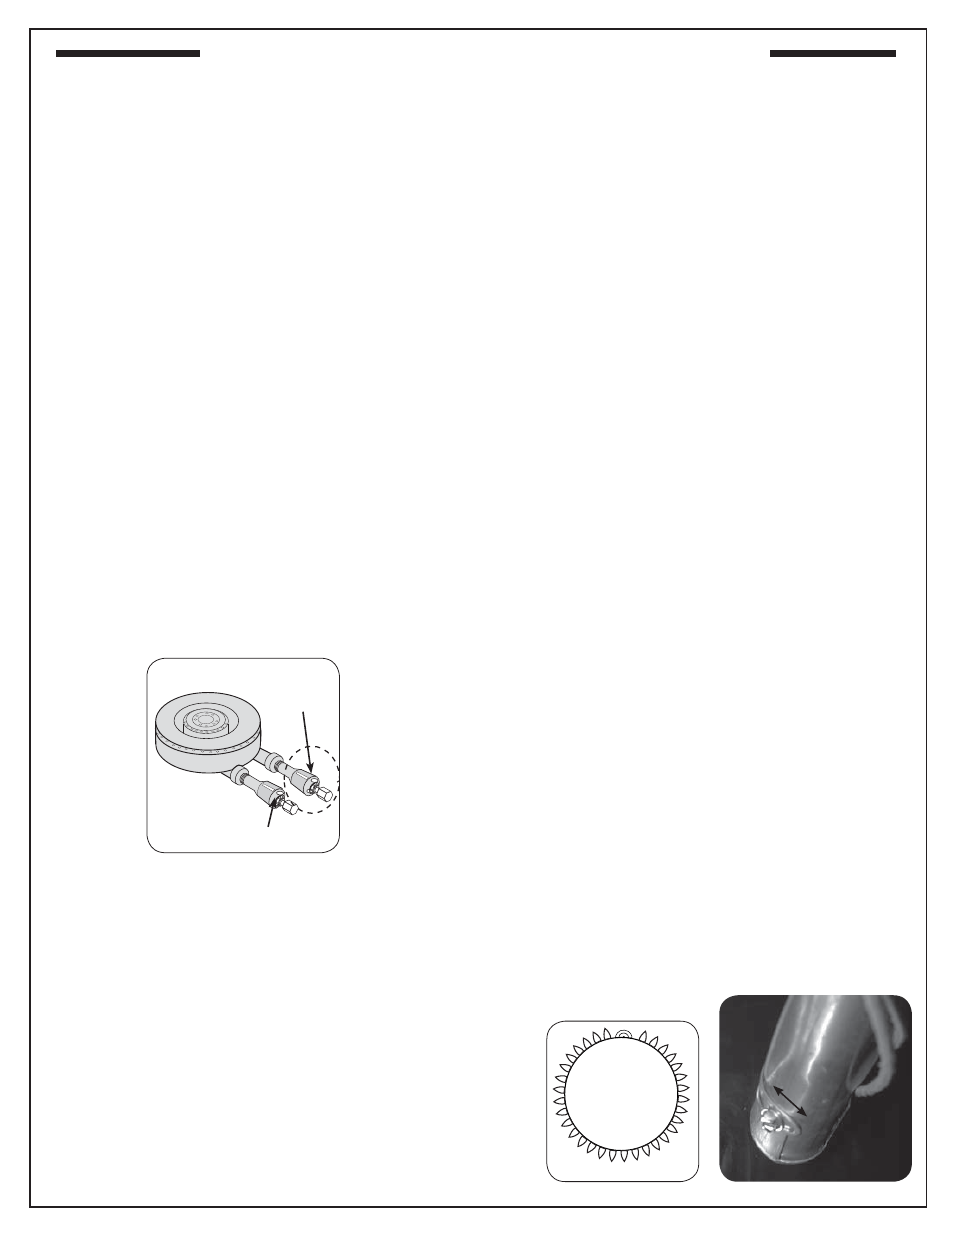
Power burner air shutter adjustment is located on
dual necks of the power burner where they connect
with the gas manifold and orifi ces, as show in Fig.
42-1.
CAUTION: NEVER handle a hot burner.
To adjust the air shutters:
1. Remove the cooking grid and collimator.
2. Lift the back of the burner upward so that the pin
in the bottom back clears the hole in the burner
rest.
3. Move the burner back away from the front of the
grill while continuing to lift the back upward so
that it clears the rear fi re wall.
4. Turn the shutter to the desired opening size
and replace the burner to test the effect on the
fl ame.
Burner fl ames should be mostly blue.
ADJUSTING THE LOW FLAME SETTING
After changing gas orifices and adjusting the
regulator to burn a new gas, adjust the height of the
fl ame with a valve in LOW position so that is is
low without going out. Use the small adjusting
screw in the center of the valve stem. This screw is
accessible by removing the valve knob, which pulls
straight off the end of the valve stem.
Fig. 42-1
Inner
burner
Outer burner
Air shutters
DOUBLE SIDEBURNER
The fl ames from a properly adjusted sideburner will
touch the burner ports and appear mostly blue.
If they are orange, “lazy,” or lift off the burner ports,
then adjust the sideburner air shutter using the
following steps.
The air shutters are located at the end of the burner
assemblies, behind the control panel. They can safely
and easily be adjusted while the unit is lit.
CAUTION: D o n o t t o u c h t h e s i d e b u r n e r
surrounding top area, as it will be hot
while adjusting the air shutter.
1.
Remove the double sideburner knobs, bezels, and
control panel (only). (Reference IDENTIFICATION
OF GRILL CONTROLS section for details.)
2.
Replace the two double sideburner control knobs
back on to the corresponding valve stems.
3. Light the sideburner following the LIGHTING
INSTRUCTIONS section.
4. Loosen the front burner air shutter adjustment
screw, then use the tip of a screwdriver to open
or close the air shutter until the fl ames appear
blue and touch the burner ports.
5. Retighten the adjustment screw.
6. Repeat for rear burner air shutter.
Should you have diffi culty accessing the
rear burner air shutter, you may shut down,
remove the rear burner (when cool), then
adjust the air shutter to the same opening
as the already adjusted front burner. (See
DOUBLE SIDEBURNER ORIFICE section
to remove rear burner.) Be sure to properly
reinstall rear burner when complete.
7. Once all adjustments are complete; be sure
the unit is off and remove the knobs, then
replace the control panel, bezels, and knobs.
Fig. 42-3
Close
Open
Fig. 42-2
BURNER AIR SHUTTER ADJUSTMENT (Continued)