Fire Magic Echelon Diamond Stand Alone Grill User Manual
Page 39
39
6. Carefully pull out the elbow. It will have the smoker
orifi ce attached to it. Remove the orifi ce using
a
7
/
16
" open end wrench and replace it with the
correct orifi ce for the gas being converted to (See
Table 1 for size). See Fig. 39-3 for a complete
orientation of the smoker assembly, shown outside
of the grill for clarity.
7. Once the new smoker orifi ce is installed onto the
existing elbow, reinstall the elbow and orifi ce into
the grill, being sure the orifi ce properly fi ts into the
smoker burner pipe. See Fig. 39-3 for detail.
8. Refasten the elbow using the two hex nuts.
9. Reconnect the fl ex connector to the elbow.
10. Reinstall the control panel, smoker drawer, bezels,
and control knobs.
Important: When re-installing the control panel,
set
it back over the front lip of the grill so that
the lid-closed-sensor plunger protrudes
through the hole on the upper right of the
control panel.
P
rior to opening the gas
shutoff valve, be sure the control knobs
are in the OFF position.
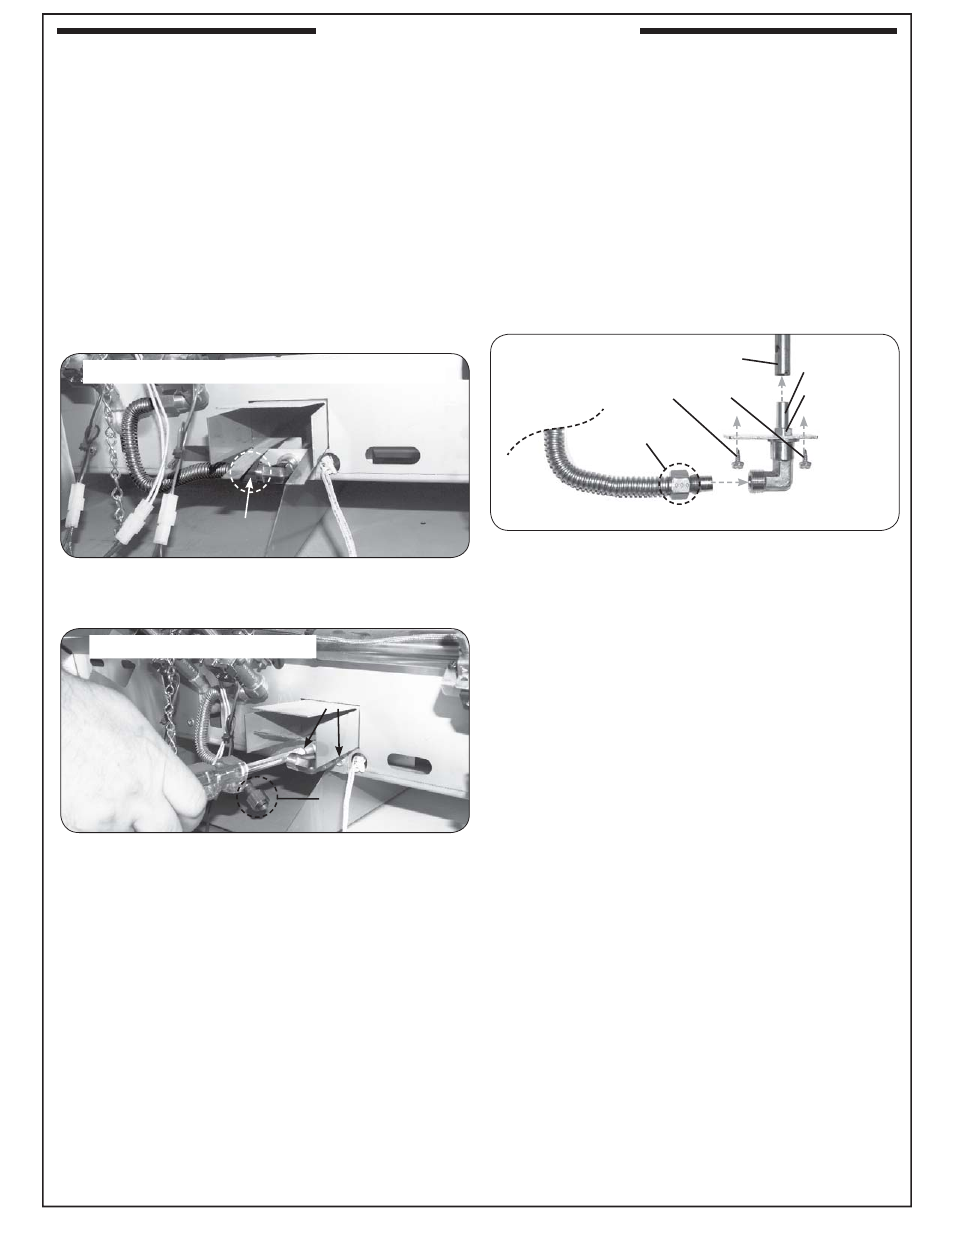
Fig. 39-3 Orifi ce removal (exploded view)
1/4" hex screws
5/8" nut
Smoker burner tube
Orifi ce
7/16" nut
CHANGING A SMOKER BURNER ORIFICE
1. Turn off the gas shutoff valve.
2.
Pull off the control knobs. Slowly lift away the lighted
bezels to clear the valve stems, and carefully disconnect
the wires found on the back of the bezels (use your
fi ngernail.) Remove the smoker drawer. Unscrew and
remove the control panel screws and washers.
3.
Lift the control panel up and outward, allowing it to
rest on the internal chain(s).
4. Use a
5
/
8
" open end wrench to remove the fl ex
connector attached to the elbow coming out of the
smoker burner tube (see Fig. 39-1 and 39-2).
5. Use a
1
/
4
" hex nut driver to remove the two hex
screws surrounding the elbow (see Fig. 39-2).
CONVERTING THE GAS TYPE
Fig. 39-1 Open face & Remove fl ex connector
Unscrew and detach
fl ex connector
Fig. 39-2 Remove hex nuts
Remove hex nuts
from plate
Flex connector
Removed