Optional power hood – Fire Magic Echelon Diamond Stand Alone Grill User Manual
Page 21
21
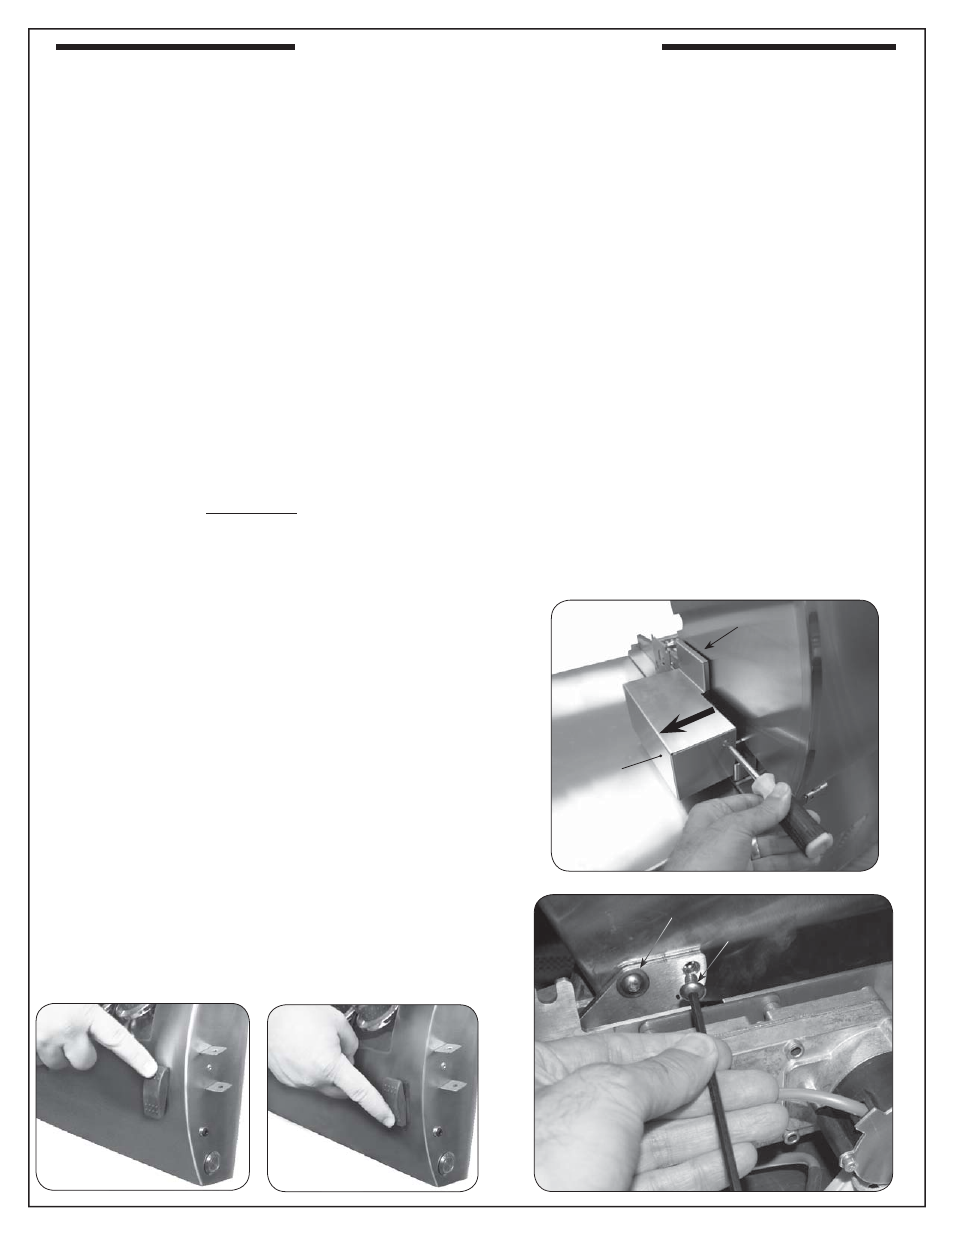
2. Use a Phillips screwdriver to remove the stainless-
steel motor assembly housing screw. Pull the top
of the housing fi rst up and then outward away
from the lid until the top of the shroud clears the
lip of the motor mount beneath, then remove the
housing completely and set it aside (Fig. 21-3).
3. Use the Allen wrench to loosen and remove the
lid motor assembly locking bolt and washer (see
Fig. 21-4).
Important: Keep this bolt and washer for later use
in converting the unit back to automatic
lid operation.
4. Replace the motor assembly housing and
refasten.
CONFIGURING THE LID FOR MOTORIZED
OPENING AND CLOSING
The unit is shipped in this confi guration, but if you have
confi gured it for manual operation and wish to use the
motorized open/close function again, follow this procedure:
1. Follow steps 1-4 except screw in the locking bolt
in step 3.
The Fire Magic
®
Power Hood is available as a factory
shipped option. Read the following before using the
grill.
Important: Grill must be connected to electrical
power to open and close lid by motor.
OPENING AND CLOSING THE LID
While set up for motorized opening and closing, the
lid may be controlled using the black rocker switch on
the right side of the control panel.
The rocker switch will lock in any one of three positions:
up–commanding the lid to open, down –commanding
the lid to close, and center–allowing the lid to hold its
current position.
CONFIGURING THE LID FOR MANUAL OPENING
AND CLOSING
WARNING
If the grill has been on recently, all Power Hood
components are potentially hot. Wait for grill to
cool before beginning this procedure or wear
heat-resistant gloves.
CAUTION: Do not push or pull on the lid or its handle
while it is configured for automatic
operation. This could result in damage
to the grill.
To confi gure the lid for manual opening and closing,
simply remove the locking bolt using the following
procedure. This procedure requires the use of the
Allen wrench supplied with this option.
1. Open the lid completely, then set the rocker switch
to the center position and disconnect electrical
power to the unit.
Fig. 21-1
Fig. 21-2
UP
DOWN
Fig. 21-3
Gear cover plate
PULL
Motor
assembly
housing
Fig. 21-4
Locking bolt
Hinge bolt
UP
DOWN
Fig. 21-1
Fig. 21-2
OPTIONAL POWER HOOD