Power burner – Fire Magic Echelon Diamond Stand Alone Grill User Manual
Page 29
29
WOK COOKING
When using a wok for stir fry or other cooking,
remove the cooking grid and place the wok directly
on top of the collimator.
CAUTION:
A wok has a rounded bottom and may
slide on the collimator, causing hot liquid to spill out
of it.
Fig.
29-2
4. Consult Table 1 at the beginning of this document
to determine the proper orifi ce size for each of
the inner (right) and outer (left) burners based
on the type of gas being used.
WARNING
YOU MUST USE THE SPECIFIED ORIFICE (SEE
TABLE 1) FOR THE GRILL TO OPERATE SAFELY
AND EFFECTIVELY.
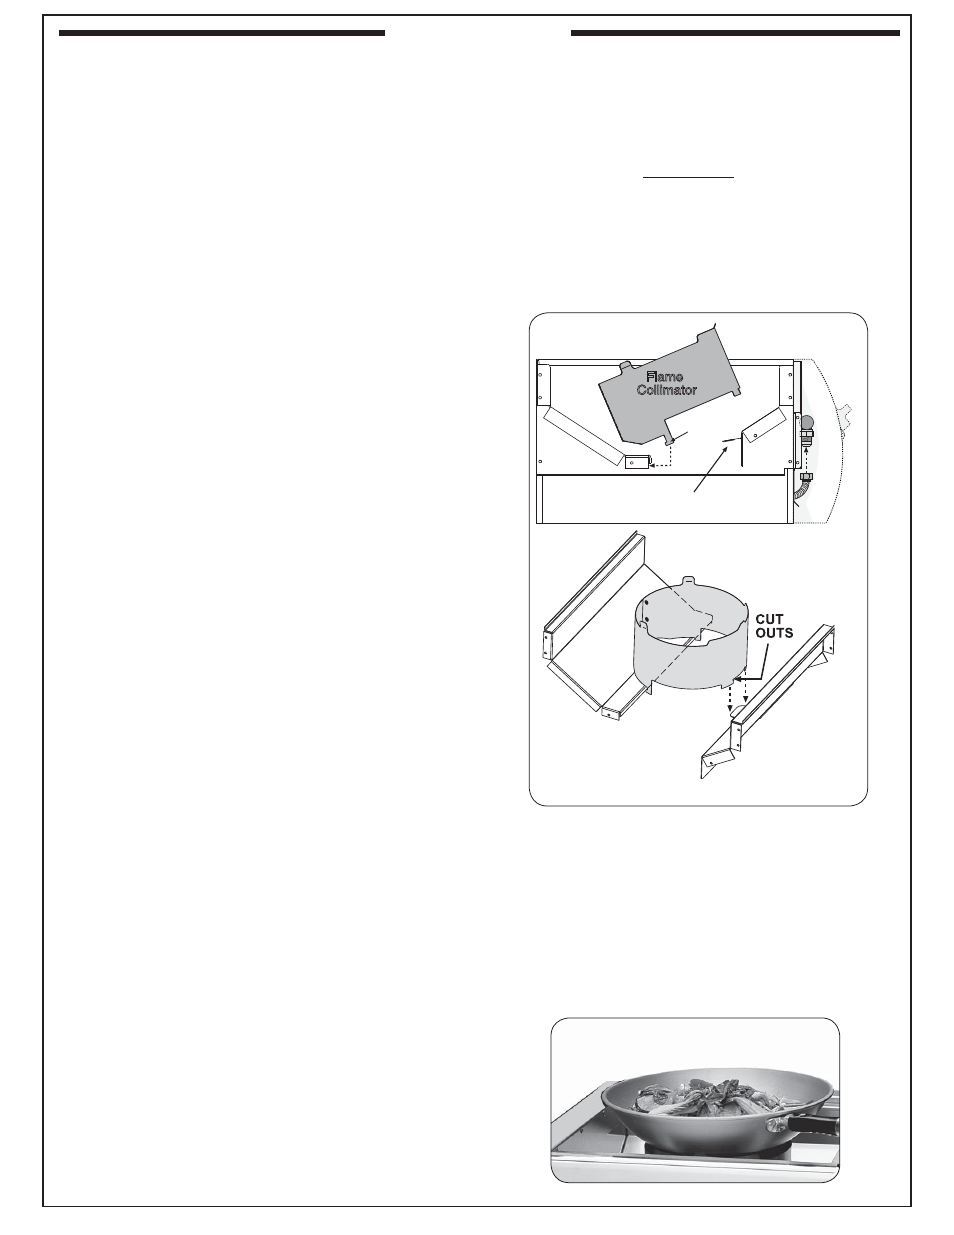
POWER BURNER INSTALLATION
1. Place the fl ame collimator over the burner
with the tabs and cutouts resting on the inner
shell, as shown in Fig.
29-1
. Flex the front
of the collimator towards the burner until
the cutouts fi t down around the collimator
support. This will lock your collimator into
place. The fl ame collimator acts as a barrier
for windy conditions and creates higher BTU
concentration to the support grid.
2. Place the cooking grid and the cover over
the power burner.
POWER BURNER SAFETY
The left knob controls the inner burner and the
right knob controls the outer burner
CAUTION: THE POWER BURNER IS HOT. DO
NOT TOUCH WITH BARE SKIN.
Be sure the power burner has good ventilation and is
free of debris and away from fl ammable substances
before lighting.
Properly burning fl ames are mostly blue and are
steady and spread evenly around the burner.
STAINLESS STEEL POWER BURNER COVER
Note: The cover is free-standing and is not
hinged in the back.
Use the built-in handle to remove the cover.
ORIFICE INSPECTION, AND REPLACEMENT
1. Remove the cover, cooking grid, and flame
collimator. Compress the collimator front to back
to release the front lock then rotate up as shown
in Fig. 29-1.
2. Lift the back of the power burner up out of the
locator hole while moving the two necks of the
burner toward the back of the grill, away from
their respective gas orifi ces.
CAUTION: THE POWER BURNER IS HEAVY.
3. Use a
3
/
8
" socket driver to reach into the empty
burner space from the top and remove each of
the two gas orifi ces protruding from the front
fi re-wall of the grill in turn. Take care that the
springs near the orifi ce remain attached.
Fig.
29-1
Placing the fl ame collimator
Flame
Collimator
Ignitor support
T abs
Collimator support
Flame
Collimator
Collimator support
Collimator support
Tabs
Collimator support
POWER BURNER