Configuring nat/upnp, Settings – Exacq exacqVision E-Series User Manual User Manual
Page 34
34
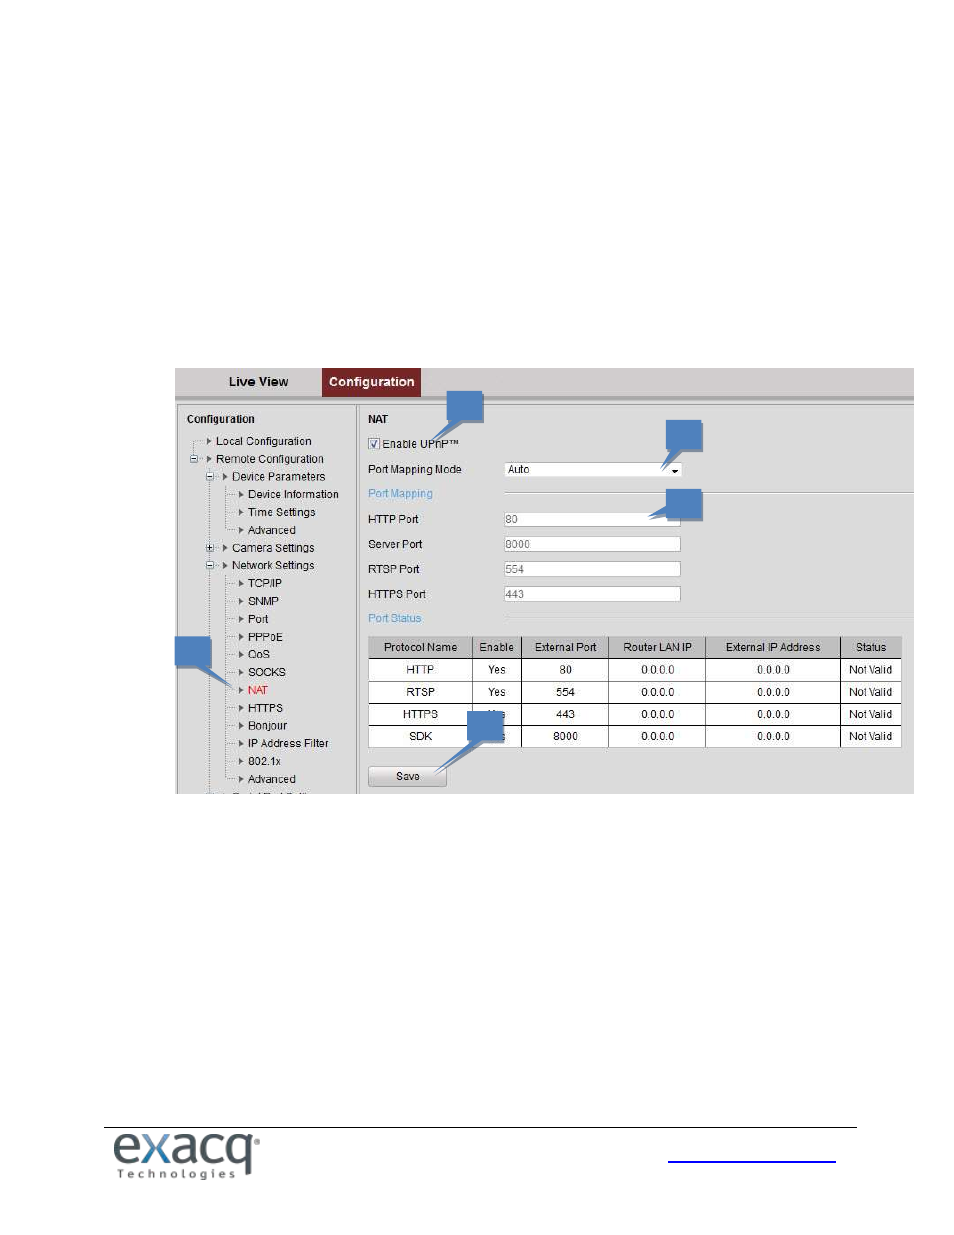
Configuring NAT/UPnP
TM
Settings
UPnP™ can permit the device to seamlessly discover the presence of other network devices on the network and establish
functional network services for data sharing, communications, and more. If you want to use the UPnP™ function to
enable the fast connection of the device to the WAN via a router, you should configure the UPnP™ parameters of the
device. UPnP™ must be enabled for exacqVision to discover the encoder.
If you want to enable the UPnP™ function of the device, you must enable the UPnP™ function of the router to which your
device is connected. When the network working mode of the device is set as multi-address, the Default Route of the
device should be in the same network segment as that of the LAN IP address of the router.
1.
From the Remote Configuration menu, select Network Settings and then NAT to open the NAT settings
interface.
2.
Select the Enable UPnP
TM
checkbox.
3.
Select the Port Mapping Mode:
Auto: The mapping ports are automatically assigned by the router.
Manual: Continue with the following steps to edit the mapping ports.
4.
Configure the HTTP Port (for access by WEB browser), SDK Port Mapping (for access by client software), RTSP
Port, and HTTPS Port.
NOTES:
You can use the default port No., or change it according to actual requirements. The Ports indicate the
port NUMBER for mapping in the router.
5.
Click Save to save the settings.
2
3
4
5
1