4 exit menus and return to main display, 5 sensor start up – Electro-Chemical Devices (ECD) T80 User Manual
Page 29
o
Delay OFF: The amount of time the PV must remain above/below the hysteresis point before
the relay deactivates.
o
STATE: Energize (relay is energized on activation)/De-energize (relay is de-energized on
activation)
TIMER activates the relay periodically for a specific duration, user configured period and duration
FAULT sets the relay condition to a de-energize state and NC relay closes in response to a Fault
condition.
DISABLE turns off the relay and removes it’s icon from the HOME screen
Setting up an Alarm Relay
Choose ALARM
Press CHANGE to enter new values
Choose ON Set Point, Press OK
Enter value using
▲ or ▼and NEXT to move to the next digit, press OK, press BACK (Min –Max values
indicate the range of acceptable values)
Choose Expiration, Press OK,
Choose time from drop down menu using
▲ or ▼, press OK, press BACK
Choose OFF Set Point, Press OK
Enter value using
▲ or ▼and NEXT to move to the next digit, press OK, press BACK
Choose Delay ON, Press OK
Enter value using
▲ or ▼and NEXT to move to the next digit, press OK, press BACK
Choose Delay OFF, Press OK
Enter value using
▲ or ▼and NEXT to move to the next digit, press OK, and press BACK when done to
exit Relay 1.
Repeat for Relay 2 and Relay 3.
3.3.4
E
XIT
M
ENUS AND
R
ETURN TO
M
AIN
D
ISPLAY
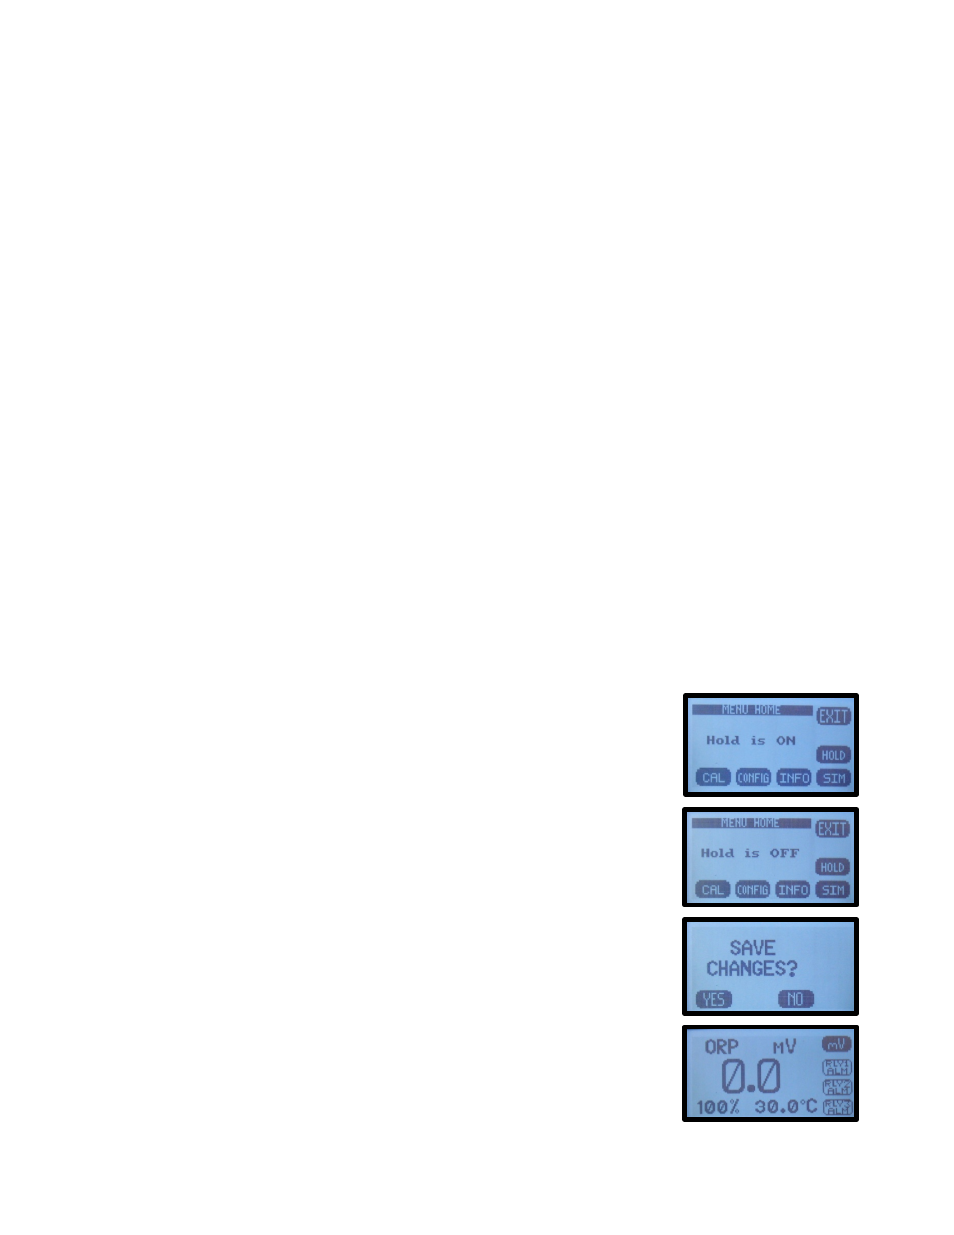
Press HOME Key to return to the Home Menu Screen
Press Hold to turn OFF Hold
Press EXIT Key to exit the menu
“Save Changes?” press YES
Choose Display Mode, DATA, mV or GRAF by pressing selection Key. The
selection key displays which screen will be displayed next.
o
The type of graphical display used, Line, Bar or Gauge is selected in
CONFIG → XMTR → LCD → GRAPH → LINE, GAUGE, BAR
3.3.5
S
ENSOR
S
TART
U
P
All sensors are supplied with protective caps over the sensing end. Remove the
cap(s) from the sensor before installing in the process. All sensors were calibrated
at the factory before shipment, no calibration should be necessary before use.
Allow the sensor to equilibrate to the process solution conditions for ½ hour before
verifying the reading against a grab sample. If calibration is required follow the
instruction in Section 4.0 below.
28