Installing the road towable kit – DR Power Dual Action 15-Ton Gas (Aug 2011 - Present) User Manual
Page 26
26
DR
®
DUAL-ACTION GAS LOG SPLITTER
Chapter 6: DR DUAL-ACTION GAS LOG SPLITTER Road Towable Kit
Tools and Supplies Needed:
Two 7/16" Wrenches
Two 1/2" Wrenches
Two 9/16" Wrenches
Two 3/4" Wrenches
15/16" Wrench
15/16" Socket with 1/2" Ratchet
Installing the Road Towable Kit
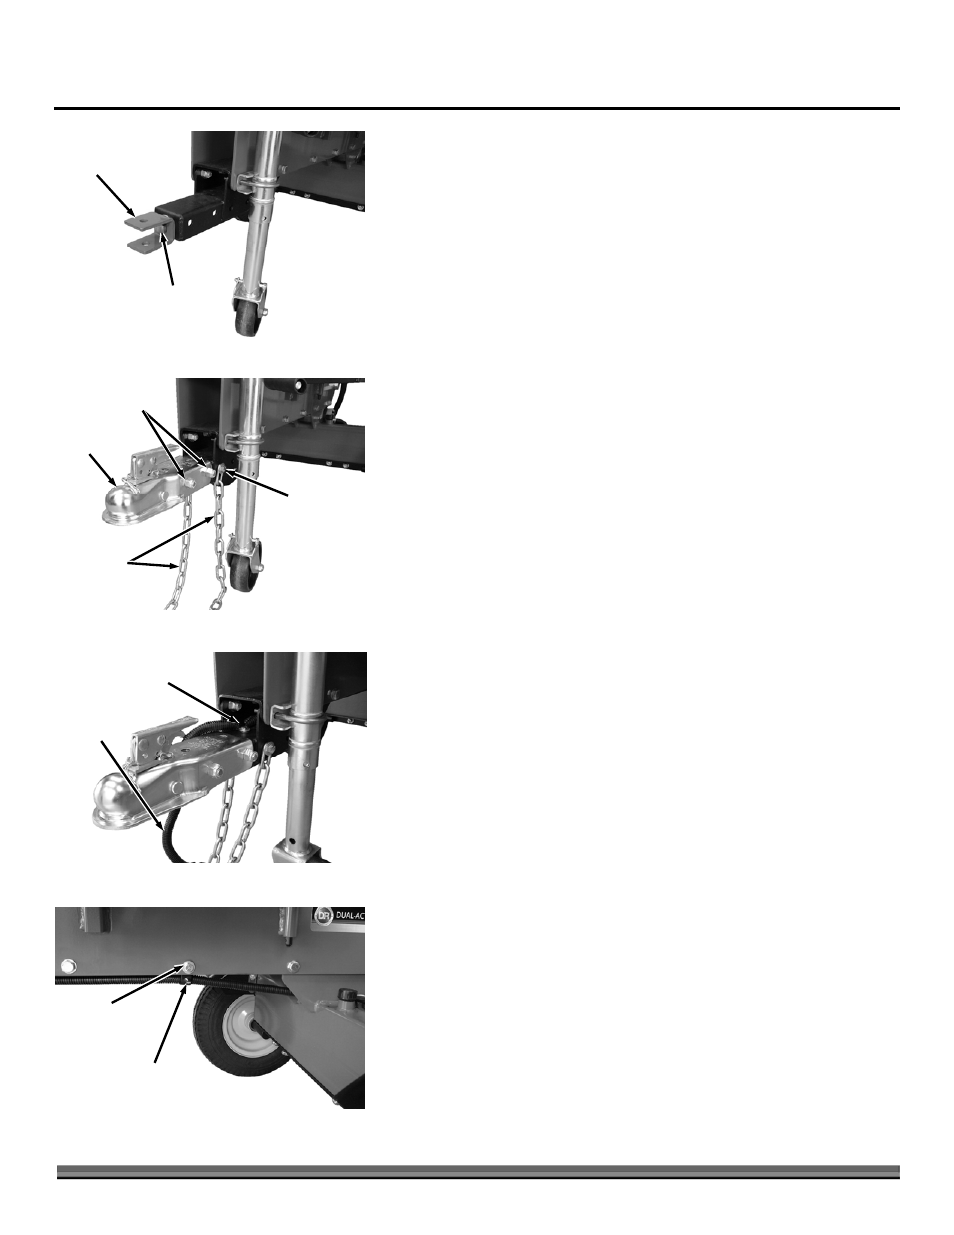
1. Remove the existing Hitch from the Log Splitter by removing the large Bolt,
Washers and Locknut using a 15/16" Wrench and Ratchet with a 15/16"
Socket (Figure 39).
2. Attach the new Tow Hitch to the Frame with the two 1/2-13 x 4" Bolts and
Locknuts using two 3/4" Wrenches (Figure 40).
3. Position the Safety Chains at the holes in the Frame and secure with two 3/8-
16 x 1-1/2" Bolts, four Washers (one on Bolt side and one on Locknut side)
and Locknuts using two 9/16" Wrenches.
4. Place the Vehicle Connector end of the Wire Harness near the Tow Hitch and
let it extend about two feet past the Hitch. Place the 7/16" Tube Clamp
around the Harness and secure the Clamp to the Frame using two 7/16"
Wrenches (Figure 41).
Note: Make sure there is enough of the Harness past the Tube Clamp to be
connected to the tow vehicle.
5. Guide the other end of the Harness behind the Hitch and under the Frame.
Feed the Harness over the center of the Hydraulic Tank so it is at the Back of
the machine.
6. Remove a Bolt, Washer and Locknut at the center of the Frame on the Left
side with two 9/16" Wrenches (Figure 42). Place the large Tube Clamp over
the Harness and secure to the Frame with the Bolt, Washer and Locknut
from the kit. Tighten the Clamp Hardware with two 1/2" Wrenches.
Original
Tow Hitch
Figure 39
Hardware
Safety
Chains
Figure 40
Chain
Hardware
New Tow
Hitch
Hitch
Hardware
Hose
Clamp
Figure 42
Tube Clamp
Hardware
Vehicle Connector
This End
Figure 41
Small Tube
Clamp