Assembly of the antenna – DH Satellite 1PC or 4PC 3m, 3.7m, & 3.8m 48 Polar/Fixed Mount User Manual
Page 5
ASSEMBLY OF THE ANTENNA
(On Ground: Lift As One Piece Antenna)
See page 4A for installing antenna as sections to the ring
FIG. #9
FIG. #10
Page 4
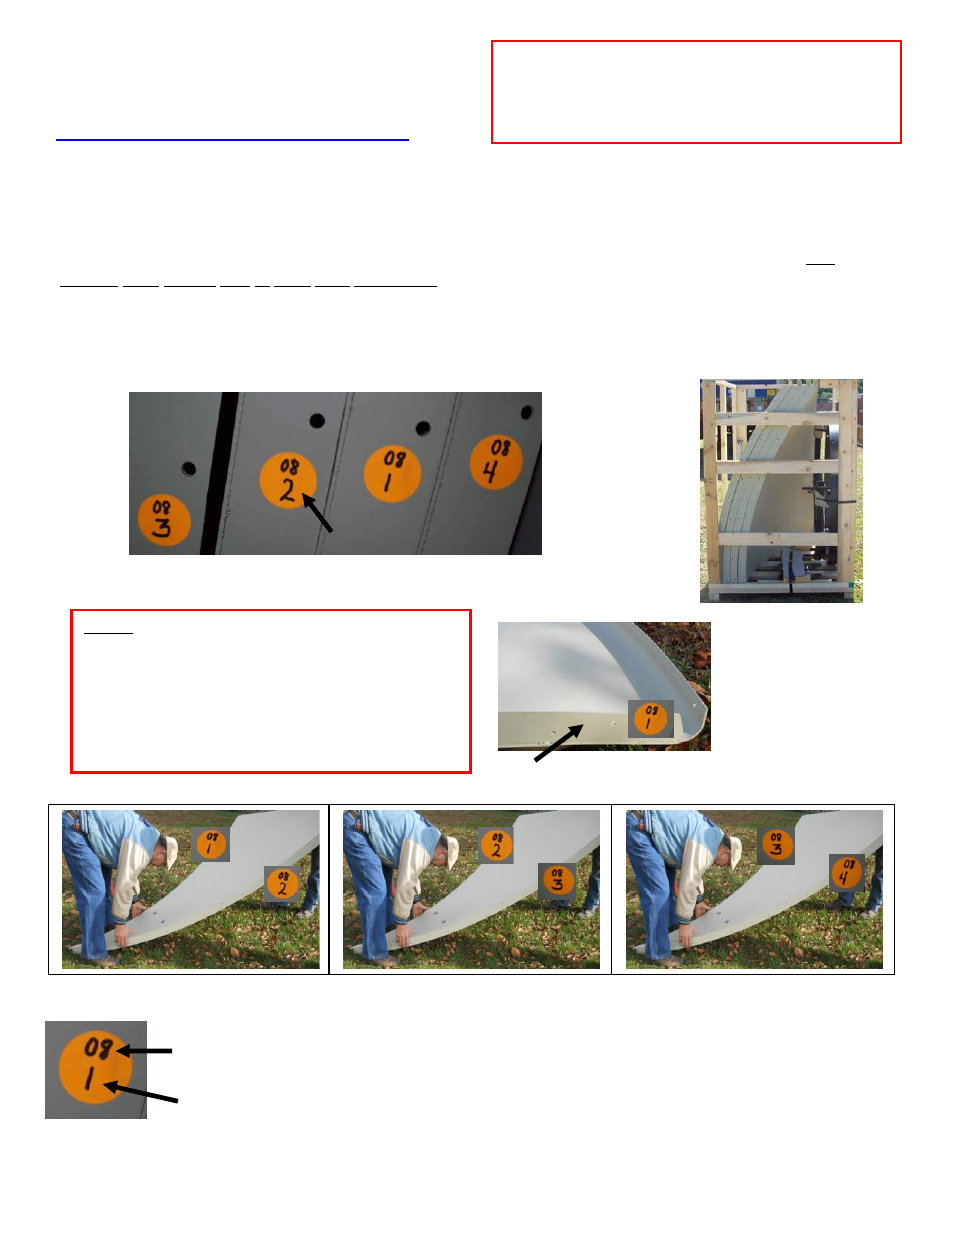
The antenna will come in 4 pieces each having a color coded dot on the rib (see FIG. #9). NOTE: After
complete installation you will no longer see the colored dots. You must take the two sections and place
them on a flat surface face down allowing for the installer to work on attaching the numbered ribs. The
antenna must always stay in crate until assembled. (see FIG. #10). Take panel one labeled 08/1 and 08/2 and
attach it to panel 2 which is labeled 08/2 on one rib and 08/3 on the other rib. Connect panel 1 with rib #2
(labeled 08/2) to panel 2 with rib #2 (labeled 08/2), matching the #2 on each rib of the two panels (See
photos below). Install 1/4" x 3/4" bolts in all holes, finger tight. Continue on to the next panel in the same
manner until finished with all panels. Now tighten all hardware.
Match 2 with 2
The top number represents the serial number of the antenna. *Example: In FIG. #9 you will see 4
sections with the top number 08. You will take all four pieces of 08 to make one complete antenna.
Rib number. *Example: On a 4 piece 3.7m antenna the dot will have a 08 on the upper part of
the dot (serial number) and the lower number of 1, 2, 3, 4 are the rib numbers.
Rib
IMPORTANT!!
Disregard this page if you have purchased a 1 PC
antenna and proceed to page 5.
NOTE:
The aluminum antenna is also stamped in the lip. This
number reflects the position of the panel.
The number stamped on the rib reflects the antenna as a
whole for bulk shipping. Each section has one rib stamped.
The number will be the same on all ribs making it one
complete antenna.