Mounting instructions, Flow direction, Base mounting – Bronkhorst Mini CORI-FLOW User Manual
Page 17: Mounting position general, 4 mounting instructions, 1 flow direction, 2 base mounting, 3 mounting position general
BRONKHORST CORI-TECH B.V.
2.4 Mounting instructions
2.4.1 Flow direction:
Install the mini CORI-FLOW in accordance with the direction of the FLOW arrow.
The arrow for flow direction is indicated on the mini CORI-FLOW, between process
fittings.
FLOW
2.4.2 Base mounting:
Mount the mini CORI-FLOW instrument, with screws in the body, to a rigid, stiff base body or heavy
mass on a vibration-free position, such as a wall, heavy rig or stable construction.
This is essential to achieve optimal accuracy with the mini CORI-FLOW instrument.
Examples: M1 M2 M3
If there is no firm, steady, vibration-free base available, Bronkhorst Cori-Tech can offer a special
mounting block for achieving optimal accuracy with the mini CORI-FLOW instrument.
This mounting block has a mass and stiffness precisely tuned for the specific mini CORI-FLOW model
and can be used as a base. Please contact your local sales representative.
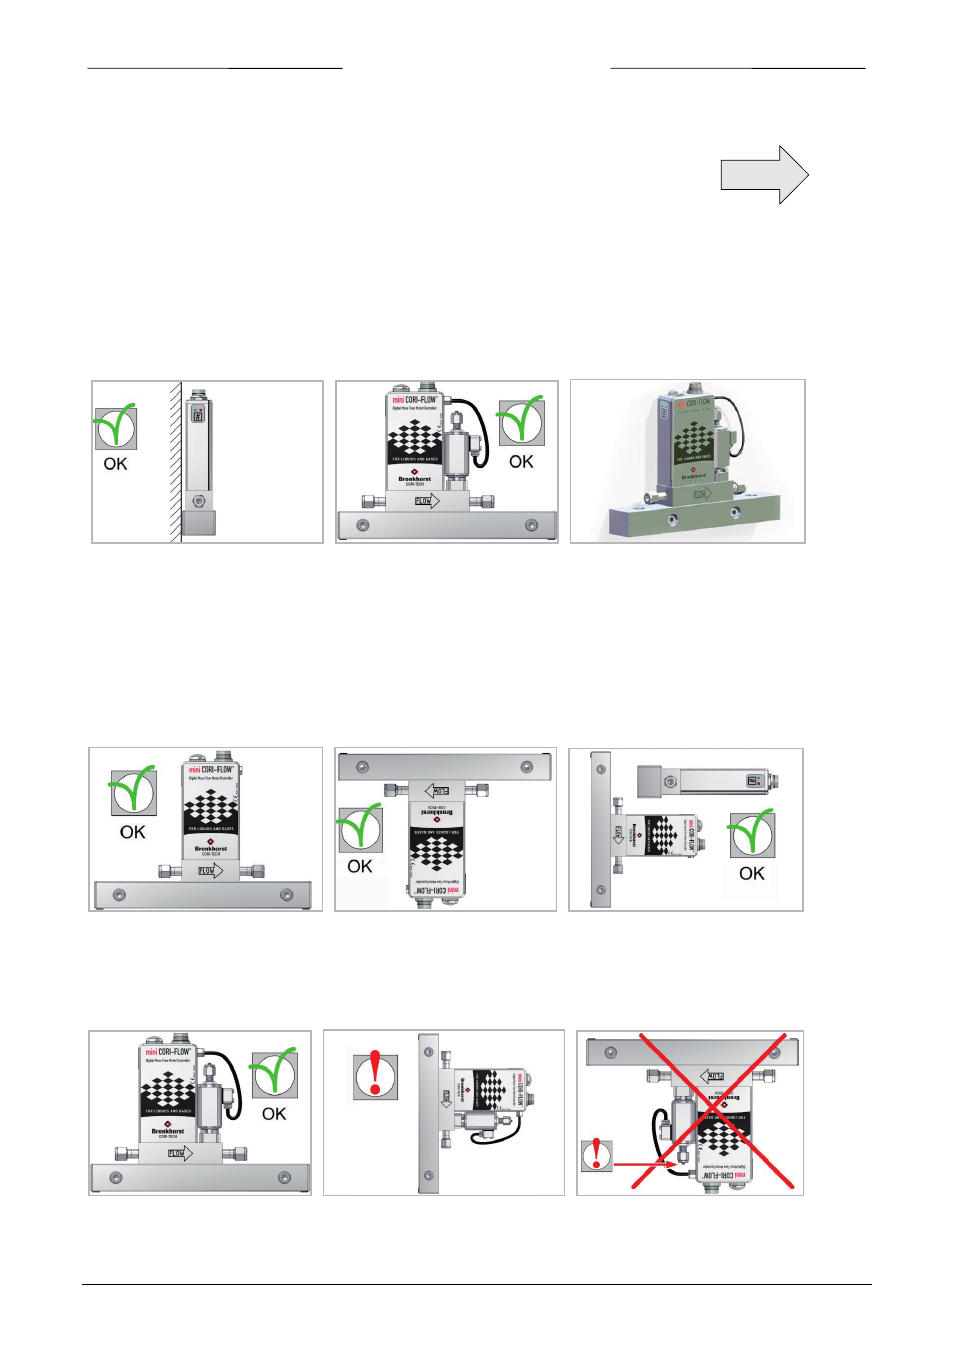
2.4.3 Mounting position general:
For gas and liquid mini CORI-FLOW meters can be mounted in any position for a proper measurement.
M4 M5 M6
2.4.4 Mounting position (integrated) valve with purge connector:
Only for mini CORI-FLOW instruments with (integrated) liquid valve with purge adaptor, mounting
position can be critical for a good quality of de-gassing.
M7 M8 M9
Gas bubbles might collect in sensor !
+ Prevent running dry !
9.17.050
page 17