1 main fuse configuration – Avery Dennison LOKPRINT I User Manual
Page 9
Users Manual LOKPRINT™
1. Operation •••• 9
1.4.1 Main Fuse Configuration
The main fuse(s) on the LOKPRINT are located inside the AC power entry
receptacle. The entry has a fuse drawer that holds the fuse(s) and selects the
appropriate line voltage. If the number in the window DOES NOT match the AC
line intended to be supplied to the LOKPRINT, DO NOT plug the power cord in.
Reconfigure as follows:
1) Using a flat blade screwdriver, open the AC entry by lifting the tab just above the
voltage indicator window.
2) Remove the red fuse drawer.
3) Remove all fuses and the fuse jumper if it is present.
4) Insert into the fuse drawer the correct number and style of fuses and fuse jumper
for your application.
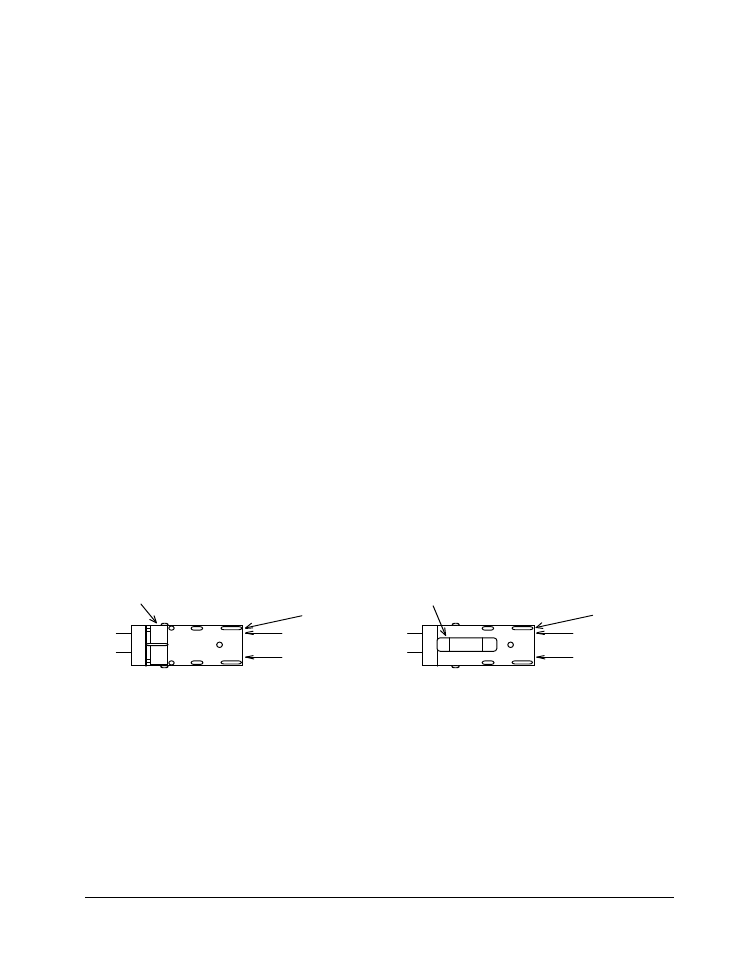
Configuration Number One:
Line voltage between the range of
100 - 132 VAC @ 50 - 60Hz
1) Install one 921122 - 5.0A 250V TD 1/4 X 1 1/4 Fuse
2) Install one Fuse Jumper
See Figure FUSE1
Configuration Number Two:
Line voltage between the range of
180 - 240VAC @ 50 - 60Hz
1) Install two 990688 - 2.5A 250V TD 5X20mm Fuses
NOTE: The fuse jumper must be removed to install both 5 x
20mm fuses.
The fuses must be between points A and B as shown not B and C.
See Figure FUSE2
Location of 115V Text
Location of 230V Text
Two 5 x 20MM Fuses One Each Side
FIGURE FUSE2
One 1/4 x 1 1/4" Fuse Far Side
Location of 115V Text
Location of 230V Text
Fuse Jumper
FIGURE FUSE1
5 x 20 mm fuse
FRONT
FRONT
A
B
C
5) Reinsert the fuse drawer into the AC entry with the desired voltage up.
6) Close the AC entry and verify the correct voltage is now visible.