Optional equipment – Avalon Firestyles Vashon-1998 to 1999 User Manual
Page 31
Optional Equipment
31
Travis Industries
9 3 5 0 8 1 0 2
0 9 1 0 0 2
8
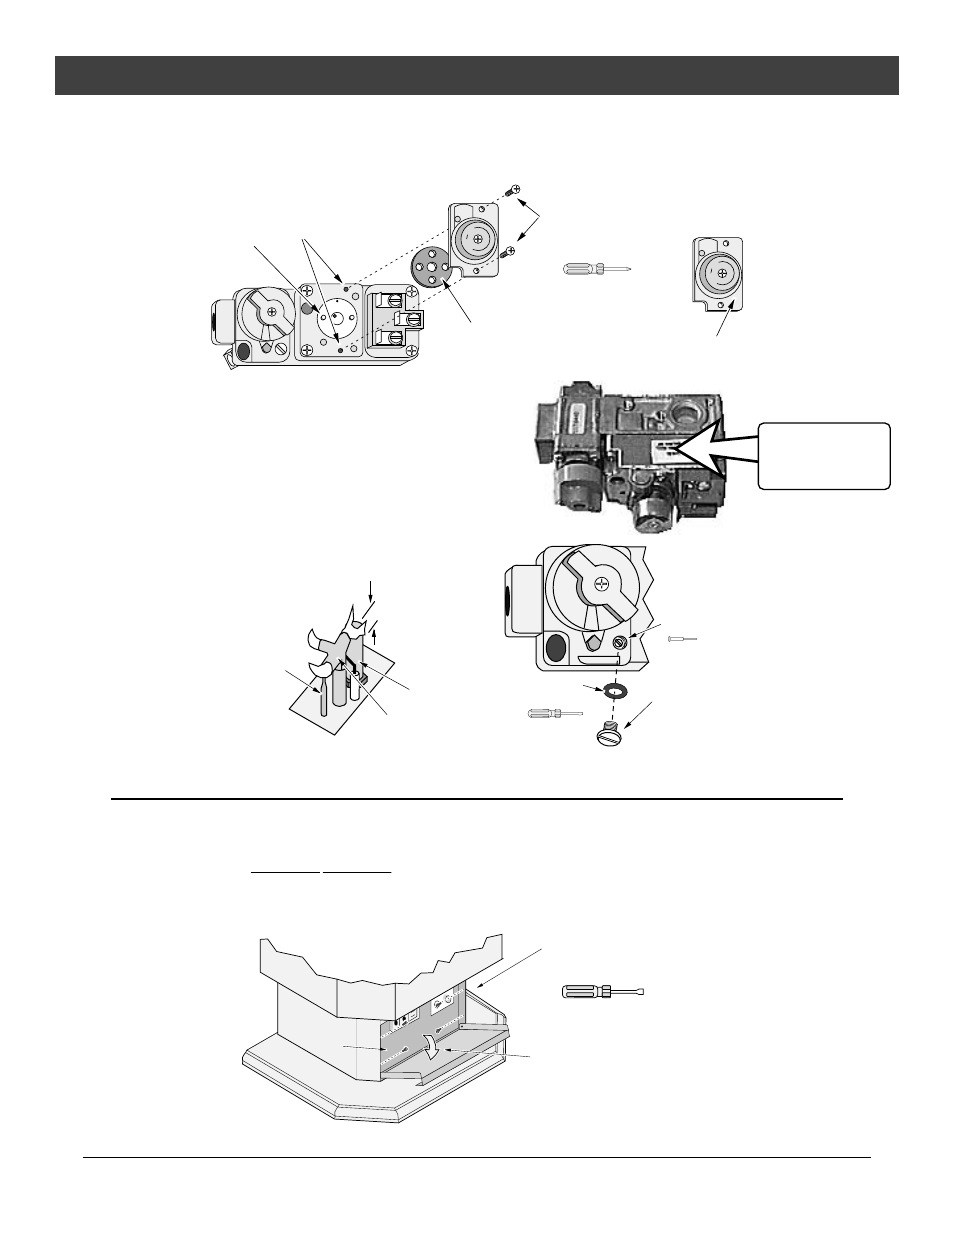
Remove the regulator from the front of the gas control valve. Replace with the propane regulator,
using the new gasket and screws included with the regulator. NOTE: Leak test this area after the
heater is installed, gas is connected, and the main burner is lit.
These screws hold the
regulator in place.
NOTE: use the new
screws included with
the regulator.
Phillips
Screwdriver
PILOT ADJ
T
O
L
PI
ON
OFF
VENT
HI
LO
VENT
HI
LO
Align the regulator
gasket so it is flat
and the two tabs fit
through the two
holes on the
gasket.
Regulator Gasket
NOTE: use the new gasket
included with the regulator.
LP (propane) regulators have a
11.0 2.7 stamped here.
NOTE: These holes strip
easily. Use a hand
screwdriver and tighten
each screw evenly.
9
Place the included propane label over the natural gas
label on top of the gas control valve.
10 Make the gas line connection, start the heater and
thoroughly leak-test all gas connections and the
regulator. Check the pilot. Adjust if necessary.
THIS CONTROL
HAS BEEN
CONVERTED TO LP
PILOT ADJ
T
O
L
PI
ON
OFF
Standard
Screwdriver
Micro (1/16Ó)
Standard
Screwdriver
Cover Screw
Cover Screw Gasket
Needle Valve
Thermopile
Pilot Hood
Thermocouple
3/8Ó
Blower (Part # 98900127)
The optional blower boosts airflow through the convection channel, increasing heat transfer. Follow
the directions below to install.
Hint
We
strongly
s u g g e s t installing the blower prior to installing the stove. It can be
installed after installation, but it is more difficult.
4
Remove the control cover from the front of the stove (see the directions to the right).
Remove the four screws
holding the control panel
in place.
Lay the control panel face
down so the area behind it
may be accessed.
1/4" Nutdriver
Control
Panel