Prism 2 setup instructions, Usb-link 2 8 technical guide, Confi guring prism 2 for the usb-link 2 – Auto-Zone Control Systems USB-Link 2 Technical Guide, Installation Instructions for the USB-Link 2 (Version 01E) User Manual
Page 8
USB-Link 2
8
Technical Guide
Prism 2 Setup Instructions
Confi guring Prism 2 for the USB-Link 2
1. Insert your Prism 2 software CD and follow the steps in the
readme.txt fi le to install the software.
2.
The instructions will tell you to create a
Prism 2.exe shortcut on your desktop. Click
on this icon to open your Prism 2 software.
3.
Click the
button and type in the level
3 User Name and password (default is “admin,
admin”). Click
.
4.
If Prism 2 is online, click the
button to make it go
.
5.
Click the
button to open the Job
Sites Window.
6. Click on any empty location in the Job-Sites Selection
Window and type in a job name in the Selected
Location fi eld. Press
.
Your job site name will now appear in the Job-Sites
Selection Window.
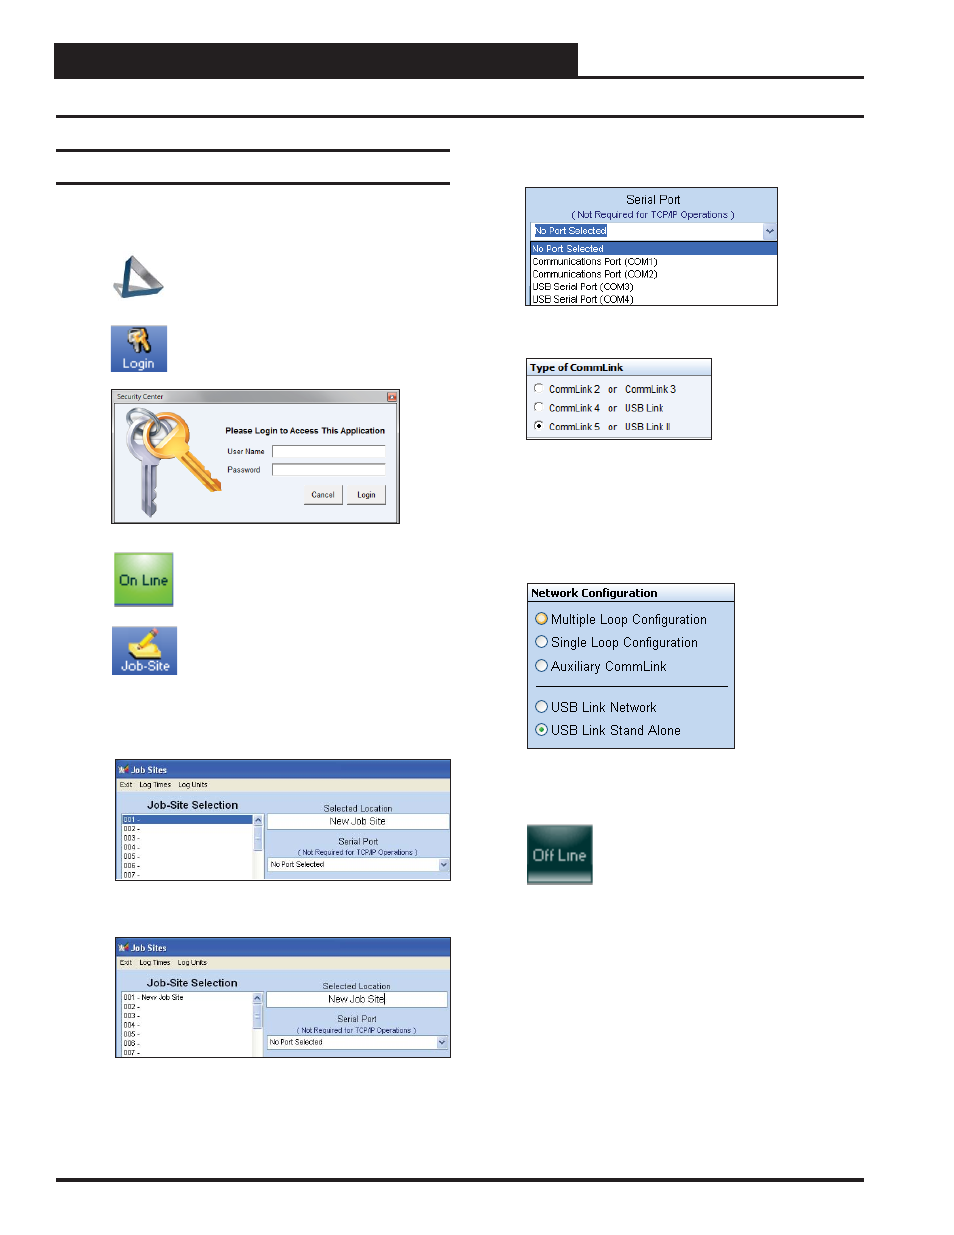
7. In the Serial Port fi eld, click on the pull down box and
select the COM port number that the USB-Link 2 is using.
8. In the Type of CommLink selection box, select the radio
button next to “CommLink 5 or USB Link II”.
9. In the Network Confi guration selection box, select the
mode for the USB-Link 2 you are using. If using stand
alone mode, select USB Link Stand Alone. If using network
mode, select USB Link Network. The position of the slide
switch on the USB-Link 2 must also be set to the mode you
are using (See Figure 3, page 10 for help in setting this
switch).
10. Click
to close out of the Job Sites Window.
11.
Click the
button to go
.
Revised 10/24/14