Troubleshooting the com port number, Usb-link 2 12 technical guide, Changing the usb com port number – Auto-Zone Control Systems USB-Link 2 Technical Guide, Installation Instructions for the USB-Link 2 (Version 01E) User Manual
Page 12
USB-Link 2
12
Technical Guide
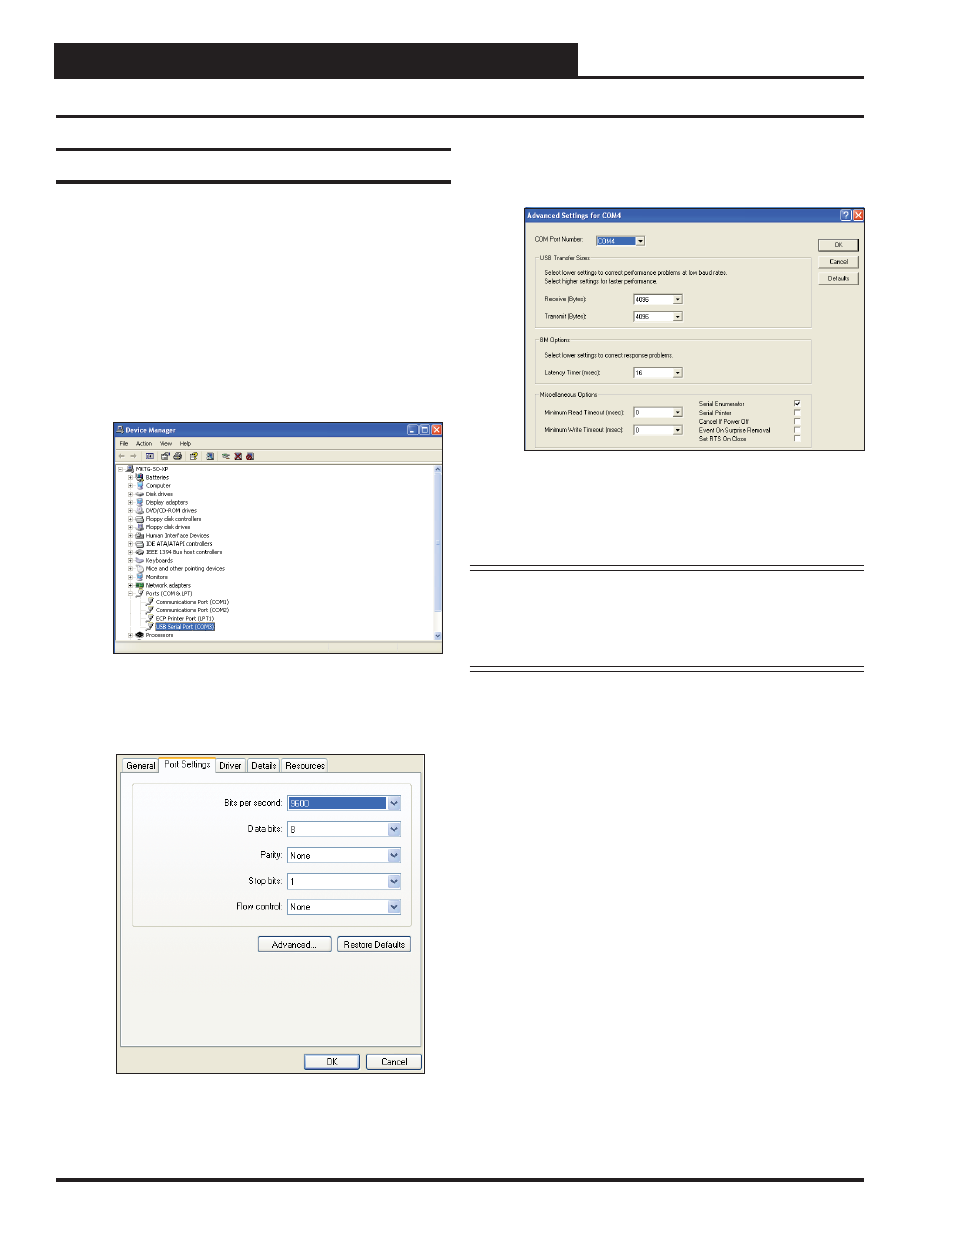
4. To assign a port number less than 10, click on
. The Advanced Settings Window
will appear.
5. In the COM Port Number drop down box, select which
COM port you wish to use. Make sure you select a COM
port number that is not currently in use (you can see the
ports in use in the Device Manager Window). Select a port
that is less than 10.
NOTE:
Windows
®
will assign a port number to every device that
has ever been installed on your computer. So if there are
no available ports below 10, choose a port number less
than 10 for a device listed that you know you are not
currently using.
6. Once you select the correct COM port number,
click
and close any windows opened in the process
of changing the port number. Make note of this number
because you will need it for your Prism setup.
Troubleshooting the COM Port Number
Changing the USB COM Port Number
When the USB-Link 2 is fi rst plugged in, it will be assigned a COM port
number to be used for communicating with the Prism 2 software. If the
port number is 10 or greater, it needs to be changed to a value less than
10 to be recognized by Prism 2.
1. Click
, click
, click
, click the
tab, and then click
to get to the Device
Manager Window.
2. Click on the plus sign next to Ports to see all of the COM
ports.
3. Right-click on “USB Serial Port (COM#)” and select
. In the Properties Window, select the
tab.