Chapter 6: driver installation – NEXCOM VTC 7100-D1K User Manual
Page 76

Copyright © 2012 NEXCOM International Co., Ltd. All Rights Reserved.
62
Chapter 6: Driver Installation
VTC 71-D Series User Manual
Chapter 6: Driver Installation
When you want to install the VTC 71 series driver, please refer to the
following steps, it will help you with the driver installation.
Note: Please change the path according to the product name.
Step 1. Installing the Intel
®
Chipset driver
Please access the folder: \\VTC7110\Chipset Driver
After successful installation, please restart the VTC
Step 2. Installing the Graphic driver
Please access the folder: \\VTC7110\Graphic Driver
After successful installation, please restart the VTC
Step 3. Installing the ME driver
Please access the folder: \\VTC7110\ME Driver
Step 4. Installing the LAN driver
Please access the folder: \\VTC7110\LAN Driver
Step 5. Installing the Audio driver
Please access the folder: \\VTC7110\Audio Driver
After successful installation, please restart the VTC
Step 7. Installing the WLAN module driver
Please access the folder: \\VTC7110\Module Driver\WLAN Module\
Step 8. Installing the WWAN module driver
Please access the folder: \\VTC7110\Module Driver\WWAN Module\
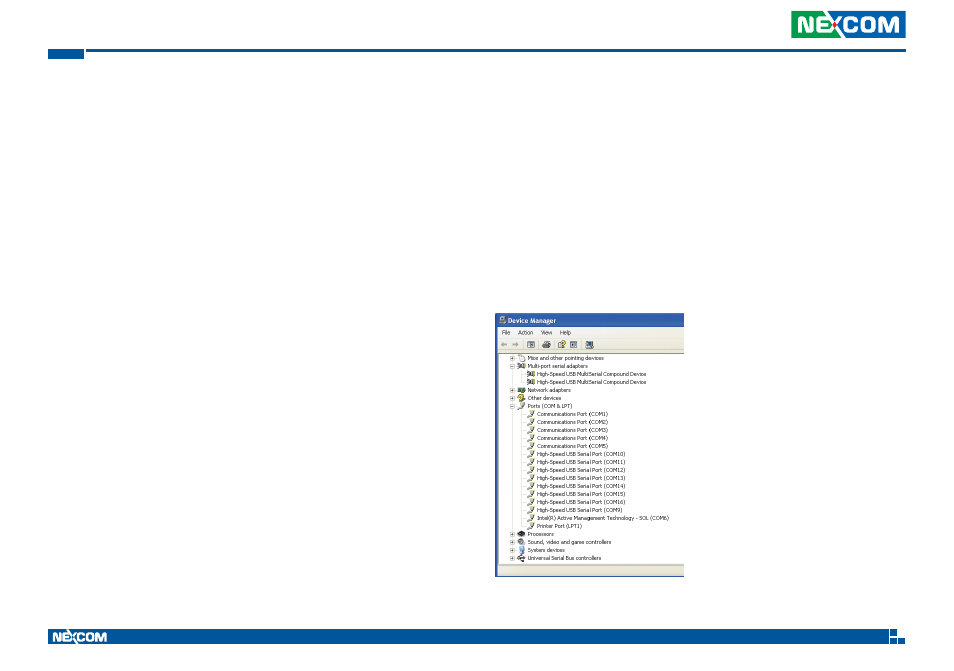
After the driver is sucessfully installed, 8 sets will be added under the COM
ports section in Windows “Device Manager”.
COM9 is for CAN1(9600bps)
COM10 is for CAN2(9600bps)
COM11 is for Analog sensor(115200bps)
COM12~14 is for RS-232(CN5~CN7)
COM15~16 is for RS-422/485(CN8~CN9)
