CRU RAX210-3QJ User Manual
Page 2
PMS 711
2 cyan
85 magenta
76 yellow
10.25.12
CRU Mark
Page 2
Forensic Device User Advisory (3QJp
Models Only)
Before using this tool for accessing sensitive data, verify
the write-blocking function of the product. Attach a
known good formatted drive and verify that the drive
mounts properly on your computer. Copy files to the
drive. Due to the “spoof writing” style of write-blocking
employed by this product, the files will appear to copy
successfully. Next, unmount and remount the drive. The
files that you copied should not appear after the drive is
remounted. If they do appear, there is a problem with
your forensic device and you should contact our support
department for further instructions.
1. Pre-Installation Steps
1.1 Box Contents
The following list contains the items that are included
in the complete configuration for this device. Please
contact CRU if any items are missing or damaged:
Accessories
Quantity
RAX 3QJ or 3QJp Unit
1
Power Cord
1
Key Set
1
Screw Kit
1
Quick Start Guide
1
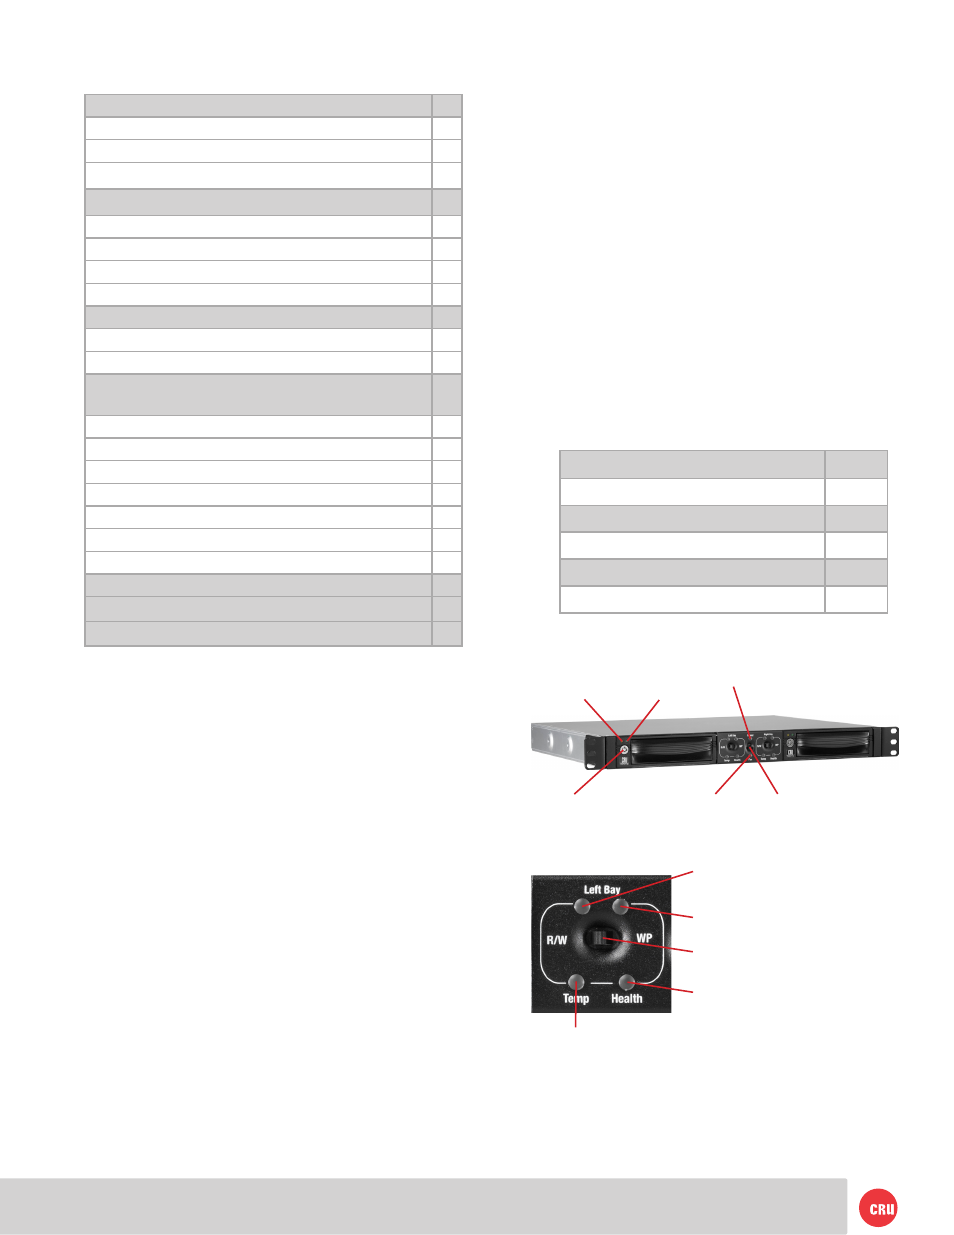
1.2 Identifying Parts of your RAX Enclosure
Power
Switch
Fan LED
Power LED
Bay Keylock
Drive
Activity LED
Drive
Power LED
R/W Mode
Activation LED*
WP Mode
Activation LED*
Drive
Health LED
Drive
Temperature
LED
Operation
Mode Switch*
Table of Contents
1. Pre-Installation Steps
2
1.1 Box Contents
2
1.2 Identifying Parts of your RAX800-TR
2
1.3 Warnings and Notices
3
2. Installation Steps
3
2.1 Installing Hard Drives
3
2.2 Selecting the Operation Mode for Each Bay
3
2.3 Host Connections
3
2.4 Operating Your RAX Unit
3
3. LED Behavior
4
3.1 RAX210-3QJ and RAX210-3QJp
4
3.2 RAX211-3QJ and RAX211-3QJp
4
4. Usage with Mac and Windows Operating
Systems
4
4.1 Usage with Mac OS X
4
4.1.1 Formatting a Drive
4
4.1.2 Mounting and Unmounting Volumes
4
4.1.3 Creating a Boot Drive
4
4.2 Usage with Windows Operating Systems
5
4.2.1 Formatting a Hard Drive
5
4.2.2 Mounting and Unmounting Volumes
5
5. Rack Mounting Warnings
6
6. Frequently Asked Questions
6
7. Technical Specifications
8