Warning – Nexen VC500 837450 User Manual
Page 11
11
FORM NO. L-21156-F-0209
WARNING
1. Apply >4.1 bar [m >60 psi] to open shoes
or manually release the brake (See MANUAL
RELEASE section for details).
2. Remove the shoe pins (Item 8).
3. Remove the friction facing shoe assembly (Items 5,
6, and 15).
nOTe: The machine Screws are assembled with an
anaerobic locking compound. To loosen the compound,
insert a properly fitting screwdriver into the head of
the machine Screw and strike the screwdriver with a
hammer. never use an impact wrench to remove the
machine Screws.
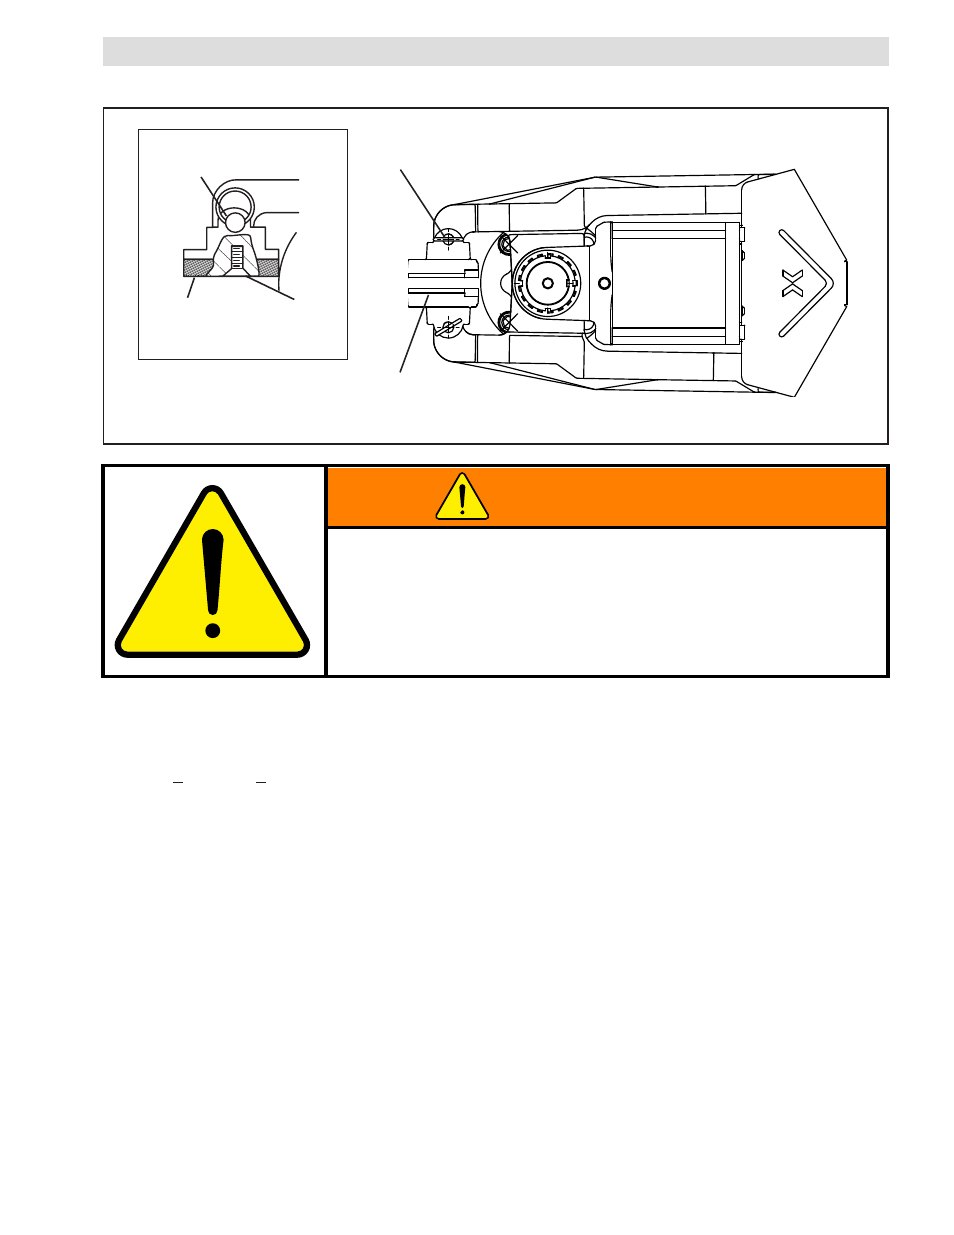
Figure 9
Shoe
Pins
(Item 8)
Friction
Facing
(Item 6)
Machine
Screw
(Item 15)
Shoe
Pins
(Item 8)
Friction Facing
Shoe Assembly
(Items 5, 6, and 15)
ParTS rePlaCemenT
FrICTIOn FaCInGS
nOTe: When replacing Friction Facings, inspect the Friction Disc for scoring or grooves. If necessary, the Friction
Disc may be machined. a maximum of 0.76 mm [0.030 in] may be removed from each side of the Friction Disc
before it is necessary to replace the Friction Disc.
4. Remove the old Machine Screws (Item 15) and old
Friction Facings (Item 6).
5. Using new Machine Screws (Item 15), install new
Friction Facings (Item 6) (See Figure 12).
6. Tighten the new Machine Screws (Item 15) to 12-
16 Nm [8-11 ft-lb] torque.
7. Reinstall the Friction Facing Shoe Assembly (Items
5, 6, and 15) and Shoe Pins (Item 8).
8. Perform Friction Facing clearance adjustment (See
FRICTION FACING ADJUSTMENT section for
details).
Do not wear facings within 0.762 mm [0.030 in] of the iron facing shoe.
loss of clamping torque and machine damage will result. monitor facing
wear closely and replace before worn to this dimension.
adjustment of linkage is required for any disc above or below 12.4 mm
[0.500 in] thick. loss of torque or failure of the manual release function
may result.