Vortech 2003-2005 Lexus 3.0L IS300 User Manual
Page 21
P/N: 4LA020-010
©2007 Vortech Engineering, LLC
All Rights Reserved, Intl. Copr. Secured
11JUL07 v1.1 Lexus(4LAv1.1)
13
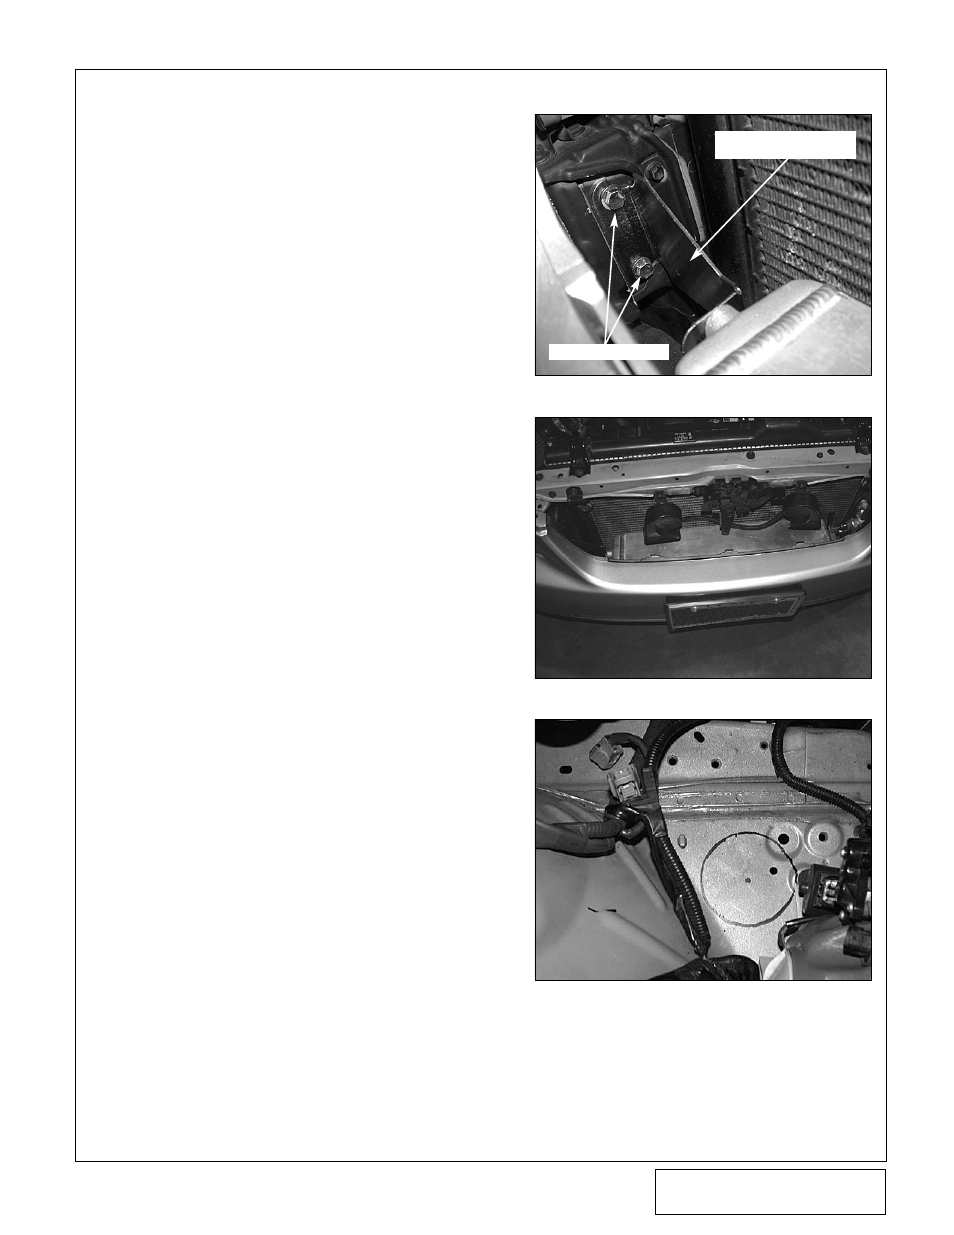
6.
CHARGE COOLER INSTALLATION, cont’d
Fig. 6-j
Fig. 6-k
Fig. 6-l
CAC MOUNTING BRACKET
8N010-210
FACTORY HARDWARE
K.
Secure the CAC (Charge Air Cooler) bracket
8N010-210 to the passenger’s side frame rail
using the factory hardware as shown. (See
Fig. 6-j.
) Loosely install the charge cooler into
its location. (See Figs. 6-j,6-k.)
L.
Using the supplied 1/4-20 x .50 " hardware,
loosely attach the CAC to the mounting
bracket.
M.
Reinstall the A/C condenser, and secure
using the factory hardware.
N.
Install one of the provided Ø2.5-25° sleeves
onto the CAC inlet and secure using #40
hose clamps. (See Fig. 6-e.)
O.
Using a Ø2.5" x 25° sleeve and #40 clamps
provided, secure Tube “C” to the open end of
Tube “B” and the 25° sleeve previously
installed onto the CAC. (See Figs. 6-e, 6-f.)
P.
To provide a path for the discharge ducting,
you must cut a Ø3" hole through the inner
fender behind the passenger’s side headlight.
Using the provided template, mark and drill
the location. Take care not to damage the
headlight assembly or wiring harnesses in
this area. (See Fig. 6-l, 6-m.)
Q.
Install one of the Ø2.5" x 25° elbow onto the
CAC discharge (passenger’s side outlet) and
secure using the provided #40 hose clamp.
(See Fig. 6-m.)