Vortech 2003-2005 Lexus 3.0L IS300 User Manual
Page 16
P/N: 4LA020-010
©2007 Vortech Engineering, LLC
All Rights Reserved, Intl. Copr. Secured
11JUL07 v1.1 Lexus(4LAv1.1)
8
C.
Using Fig. 5-b as a guide and working from
the bottom up, install all the applicable hard-
ware and spacers into position as follows:
1.
With the mounting bracket in position,
place the M8-1.25 x 80mm screw and
washer through the mounting bracket,
1.437" spacer and into the lower water
pump mounting hole.
2.
Then install the factory alternator bolt
(M10-1.25 x 50mm) through the mounting
bracket and into the alternator mount.
3.
Next, install the M6-1.0 x 70mm screw
and washer through the mounting bracket
support spacer (4LA010-021) and into the
water pump.
4.
Install the 3/8-16 x 2.75" screw and wash-
er through the dust shield, Ø3" smooth
idler, idler spacer, and into the support
spacer (4LA010-021).
5.
Install the 3/8-16 x 1" screw and washer
through the mounting bracket and into the
support spacer (4LA010-021).
6.
Install the M6-1.0 x 70mm screw and
washer through the mounting bracket,
1.538" long spacer and into the upper
water pump location.
7.
Tighten the previously installed hardware.
Make sure all mounting surfaces seat flat
against one another and no lines or wire,
etc. are being pinched.
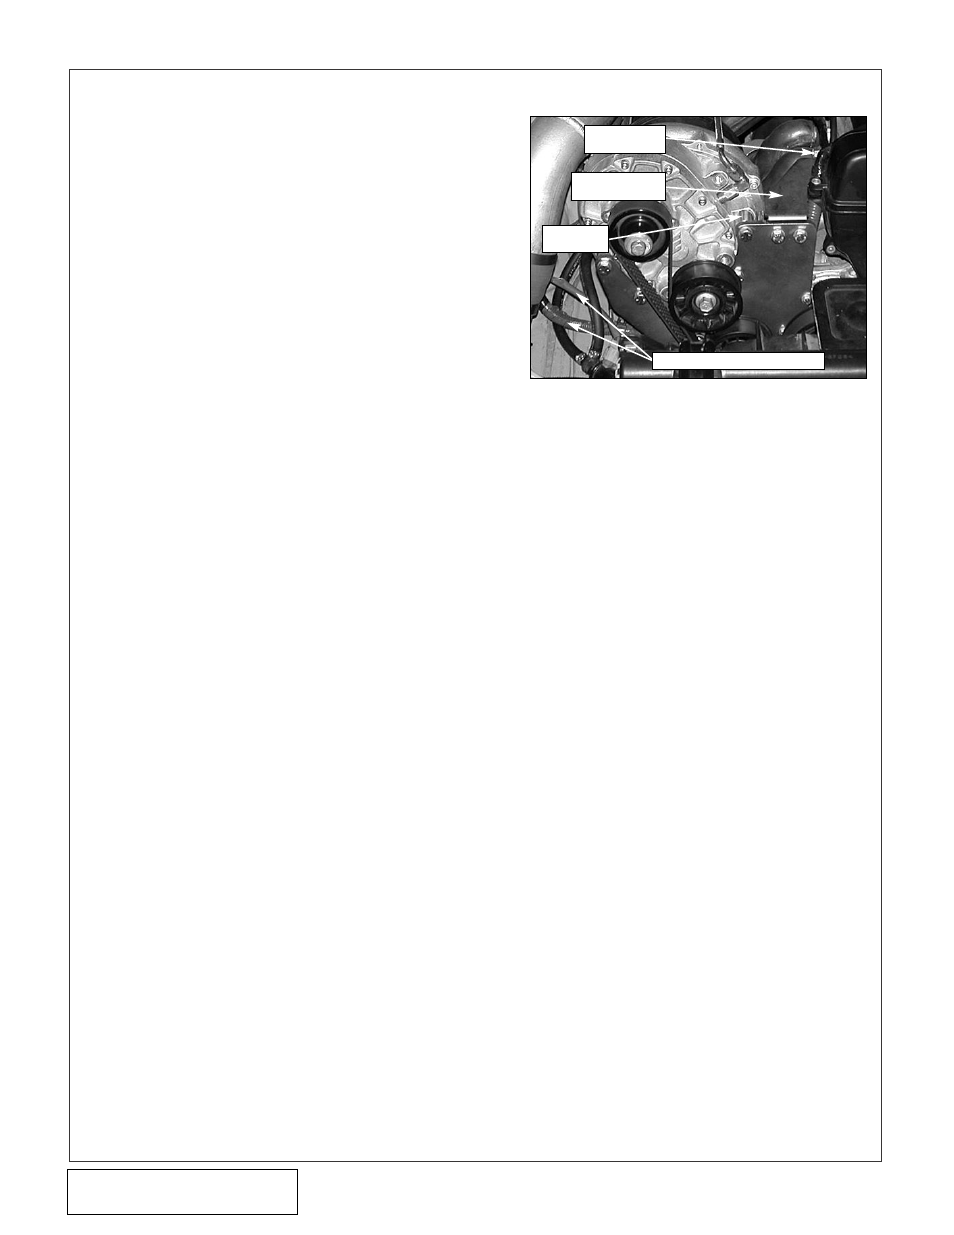
D.
Loosely install the upper support bracket
(4LA010-010) to the S/C bracket using the
two 3/8-16 x 1.0" screws, washers and
Nylock nuts. Install the M10-1.25 x 16mm
screw through the support bracket and into
the cylinder head. (See Fig. 5-c.)
E.
Evenly tighten the previously installed hard-
ware. Ensure the bracket is supported, but
not pulled or the location of the S/C bracket is
not changed.
F.
Remove the blue plastic dust cap located on
the 1/2" oil drain fitting at the bottom of the
supercharger. Attach the supplied 1/2" fabric
braided oil drain hose to the supercharger
drain fitting. Secure with a #8 hose clamp.
G.
Secure the supercharger to the main bracket
using the five 3/8-16 x 1.75" screws, washers,
and .896" long spacers. (See Fig. 5-b, 5-c.)
H.
Reinstall the factory water pump pulley and
secure using the factory hardware.
5.
MOUNTING BRACKET AND SUPERCHARGER INSTALLATION, cont’d
Fig. 5-c
UPPER SUPPORT
BRACKET
M10-1.25 x
15mm SCREW
.895" LONG
SPACER
SEPARATE MAF HARNESS HERE