Vortech 1994-2001 Acura Integra GSR User Manual
Page 25
P/N: 4HC020-030
©2004 Vortech Engineering, LLC
All Rights Reserved, Intl. Copr. Secured
28JAN04v2.1(Acura Integra LS (4HC..030v2.1))
17
19.
TROUBLESHOOTING
A. Supercharger belt is slipping: Belt
slippage is usually accompanied by a
squealing noise at high RPM and a
leveling off or fluctuating boost pressure.
If belt slippage occurs, tighten tensioner
as follows:
1.
Turn engine off.
2.
Loosen the 5/16 nut on the outside of
the belt tensioner plate until the
tensioner stud is just loose. Loosen
the jam nut on the tensioner bolt.
3.
Thread in the tensioner bolt until the
idler moves 1/4".
4.
Tighten the nut securing the idler stud.
Tighten the jam nut on the tensioner
bolt.
5.
Test drive the vehicle and repeat
steps until belt slippage is eliminated
B. Engine detonates (pre-ignition):
1.
If detonation is detected, the ignition
timing should be set to the bottom of
the factory specs (located on the
under hood emissions label) by
following the procedure in the factory
shop manual.
2.
For off-road and high RPM use, the
ignition timing should be set to 12
°
BTDC.
3.
For emissions legality or if more retard
is needed, a boost retard ignition may
be installed.
C. “Check Engine” light illuminates
(P0172) after vehicle is driven: This may
be caused by a number of things, but is
most likely due to the installation of larger
fuel injectors for which the vehicle may
not be able to trim out enough fuel. This
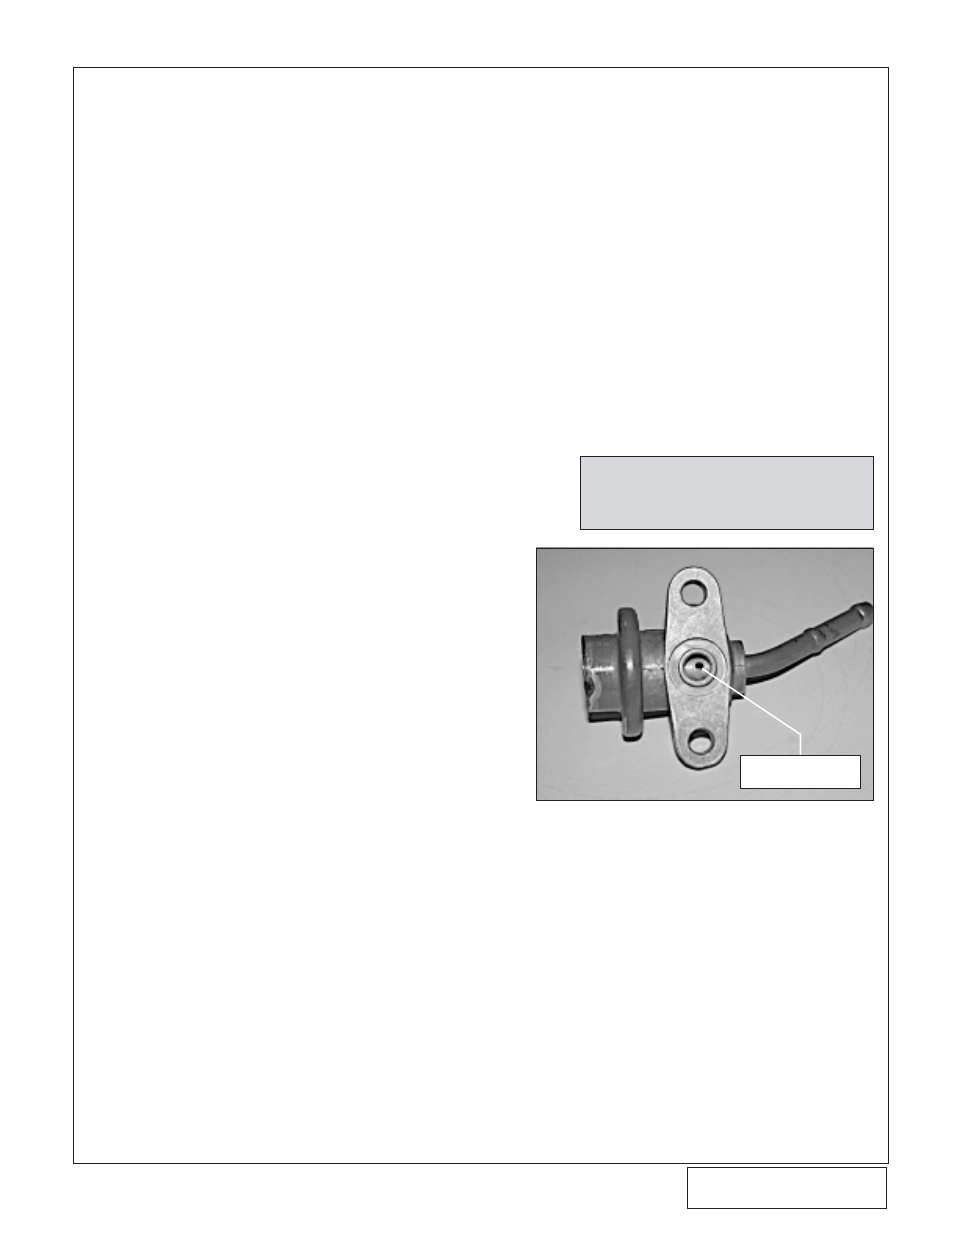
Fig. 19-a
code does not affect the vehicle’s
driveability and may be ignored. To fix do
the following:
1.
Disconnect the battery for 30 minutes
to clear the code.
2.
Remove the fuel pressure regulator
and drill a .075" hole through one side
of the body as shown in Fig 19-a.
3.
Purchase and install a “Maxflow Fuel
Pressure Optimizer” per the instruc-
tions supplied with it.
4.
Turn the adjustment screw counter-
clockwise until it stops.
5.
These two modifications should lower
the fuel pressure at idle to ~30psi
(from ~42).
6.
Re-connect battery and test drive.
DRILL .075" HOSE
THROUGH ONE WALL
NOTE:
If after completing the above steps,
the check engine light is still on,
complete the “Type R” steps outlined
in Section 5-a (steps 1 through 5).