Airfiber configuration, Airfiber, Configuration – Ubiquiti Networks airFibe24 User Manual
Page 8
5
Chapter 2: Installation
airFiber
®
AF24 User Guide
Ubiquiti Networks, Inc.
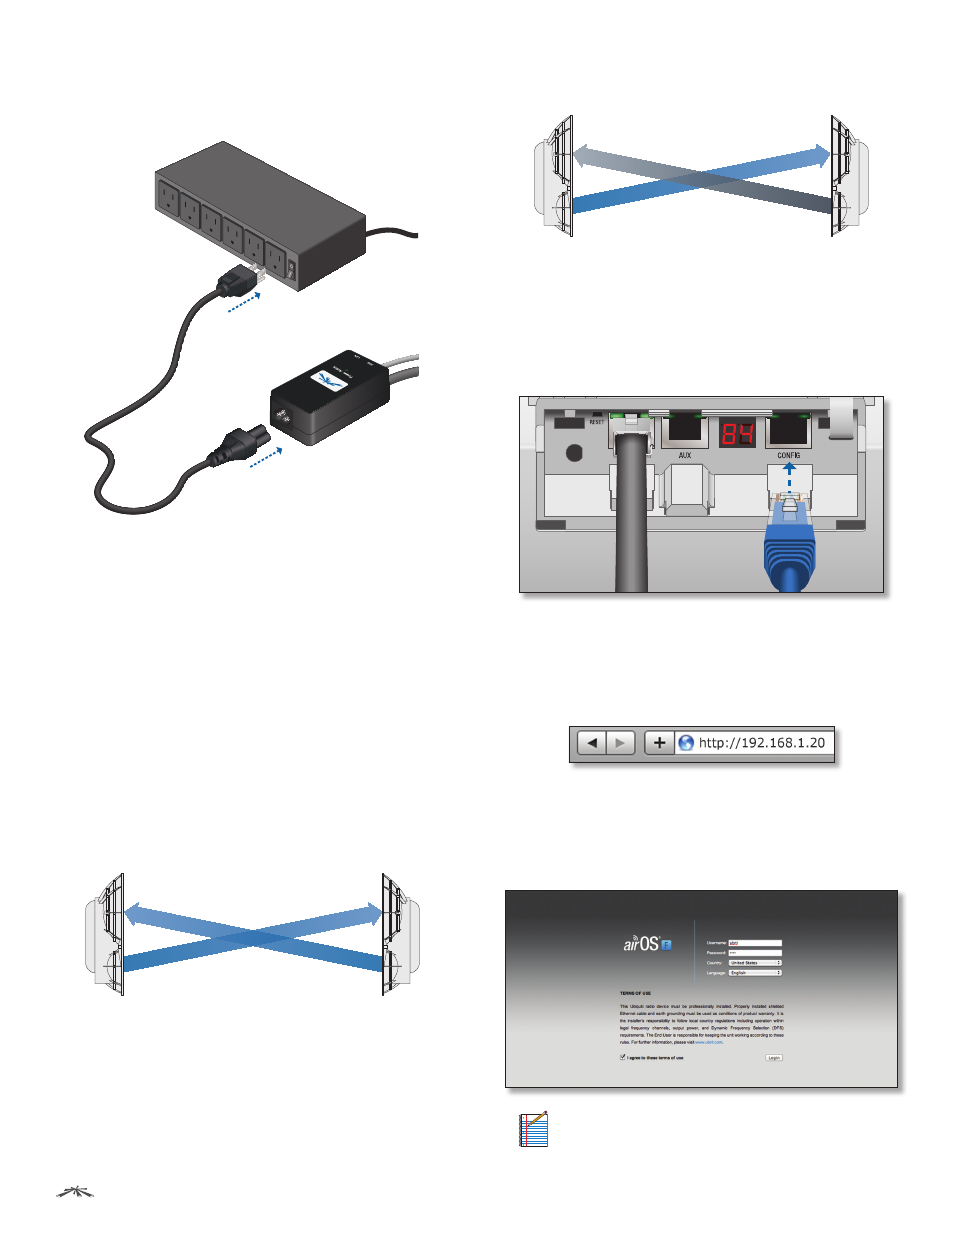
4. Connect the Power Cord to the power port on the PoE
Adapter. Connect the other end of the Power Cord to a
power source.
airFiber
Configuration
The instructions in this section explain how to access
the airFiber Configuration Interface and configure the
following settings:
•
Wireless Mode
Configure one airFiber AF24 as the
Master and the other as the Slave.
•
Duplex
The airFiber AF24 supports both half-duplex
and full-duplex operation. Half-duplex operation
provides more frequency planning options at the
cost of higher latency and throughput. Full-duplex
operation provides the highest throughput and
lowest latency; however, you have fewer frequency
management options.
-
Half Duplex (default)
The TX and RX Frequencies can
be the same or different to suit local interference.
TX
RX
TX
RX
Slave
Master
Frequenc
y A
Frequenc
y A
Half-Duplex Diagram
-
Full Duplex
The TX and RX Frequencies should be
different.
TX
RX
TX
RX
Slave
Master
Frequenc
y A
Frequenc
y B
Full-Duplex Diagram
•
TX and RX Frequencies
The TX Frequency on the
Master must match the RX Frequency on the Slave, and
vice versa.
1. Connect an Ethernet cable from your computer to the
Config port on the airFiber AF24.
2. Configure the Ethernet adapter on your computer
with a static IP address on the 192.168.1.x subnet (for
example, 192.168.1.100).
3. Launch your web browser. Type http://192.168.1.20 in
the address field and press enter (PC) or return (Mac).
4. The login screen will appear. Enter ubnt in the
Username and Password fields. Select your Country and
Language. You must agree to the Terms of Use to use
the product. Click Login.
Note:
U.S. product versions are locked to the U.S.
Country Code to ensure compliance with FCC
regulations.