Opening the torso, Attaching the left leg, Maintenance – Laerdal SimMan 3G User Manual
Page 35: Attaching or replacing limbs, Maintenance tasks
35
MAINTENANCE
Opening the Torso
Open the Patient Simulator torso for the following procedures:
Attaching or Replacing Limbs
− Attaching or dismantling the Patient Simulator legs and arms
− Exchanging default arms for optional IV or trauma arms
Maintenance Tasks
− Changing the Patient Simulator batteries
− Replacing the pneumothorax bladders, chest-rise bladders, lung
bladders, IO modules and chest drain modules
− Replacing the Torso Skin
− Performing a general inspection
− Removing WLAN adapter
To Open the Torso Skin
1 Unzip the zippers on the Patient Simulator’s left shoulder and
torso.
2 Remove the genitalia pad and release the skin flap from the pelvis.
3 Fold the Torso Skin over to one side.
4 Open the Stomach Foam to one side, taking care not to tug on
the connecting tubes and cables.
Note: DO NOT disconnect the tubes and cables connecting the
stomach foam to the Patient Simulator.
5 Replace the Stomach Foam and close the Torso Skin, perform
steps 1- 4 in reverse.
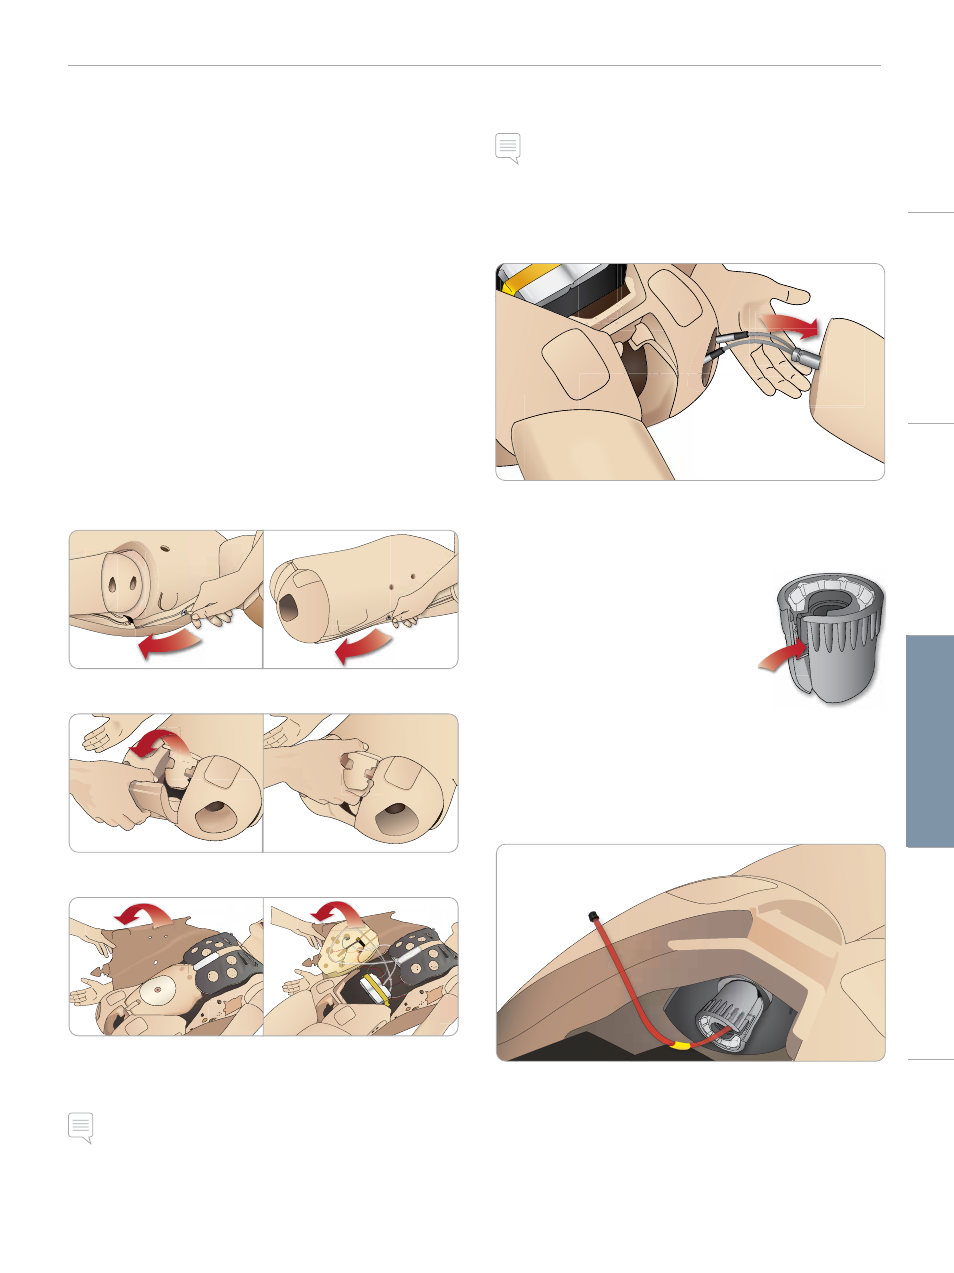
Attaching the Left Leg
Note: Assemble the Patient Simulator on a large flat surface. Attach
the left leg before the right leg.
Open the torso to access the hip joint connectors. To open the
torso follow steps 1 – 4, Opening the Torso.
1 Align the left leg bolt and cables with the pelvis socket.
2 Feed the leg bolt and cables through the socket and into the
torso. Do not pull the leg by the cables and/or tubes.
3 Carefully push the leg in towards the pelvis to form a snug fit.
Hip joint connector with side slot for
inserting cables and tubes (shown right)
4 Position the connector with rounded
end facing downward. Place the leg
cables and tubes into the side slot of
the connector.
5 Slide the connector downwards along
the tubes and cables and onto the leg bolt. Ensure that the nut
and bolt are aligned, and that all cables and tubes are secured
within the connector.
6 Screw the connector onto the leg bolt. Avoid twisting the tubes
and cables. Tighten the connector so that the leg is able to rotate
freely around the hip joint connector.
7 Connect the corresponding leg tubes and cables as shown in the
table on the following page.
Cautions
and
W
arnings
Featur
es
Setup
Maintenance
Spar
e Par
ts
Tr
oubleshooting