Hanna Instruments HI 84430 User Manual
Page 11
21
20
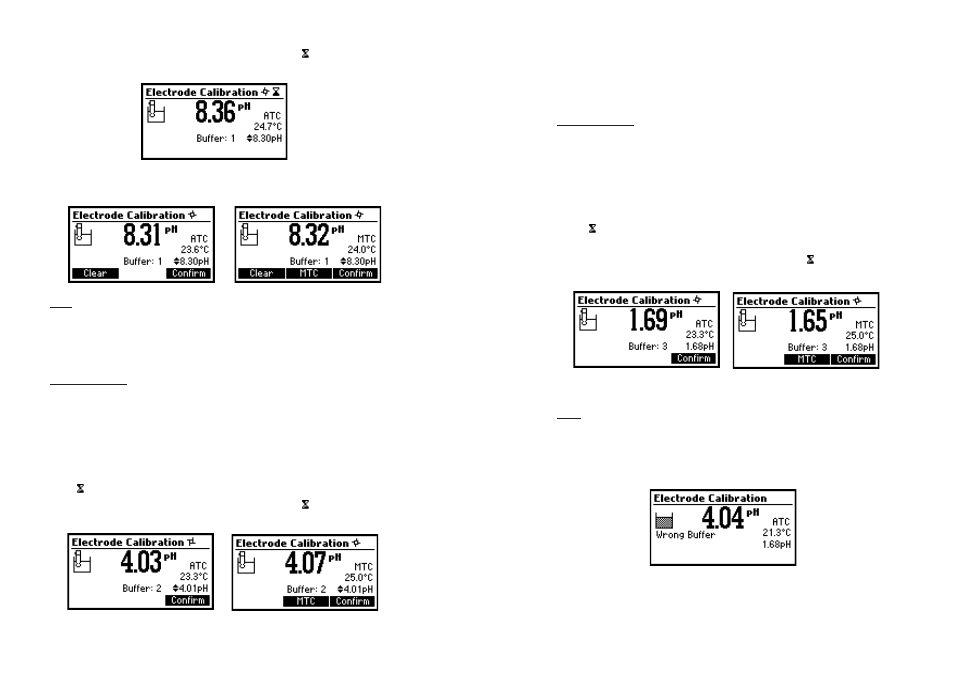
• The calibrated value will be shown on the display and the third expected buffer value will be
automatically selected.
• After the second calibration point has been confirmed, press ESC to exit without performing the
third calibration point.
Point 3 calibration
• Remove the electrode holder with electrodes from the top of the beaker.
• Place the third buffer solution in a beaker and place in beaker holder. Rinse the probes in a
beaker with third buffer rinsing solution.
• Place the electrode holder (with electrode) in the beaker with third buffer and secure top by
locking. Press STIR.
• If necessary press the ARROW keys in order to select correct buffer value.
• The
(unstable measurement) symbol will be shown on the display until the reading
becomes stable.
• When the reading is stable and close to the selected buffer, the (unstable measurement)
symbol will disappear and the Confirm key will become active.
• Press Confirm to confirm the calibration. The instrument stores the calibration value and returns to pH
meter/titrator calibration menu, where the date and time for the last pH calibration will be updated.
Notes:
• A buffer confirmed during the calibration process is removed from the list of calibration buffers
available for further calibration points.
• If the value measured by the instrument is not close to the selected buffer a “Wrong Buffer”
error message will be shown on the display.
Check if the correct buffer has been used or regenerate the pH electrodes by following the
Cleaning Procedure (see the “pH Cleaning Procedure” section). If necessary change the buffer
or the electrode.
• When the reading is stable and close to the selected buffer, the (unstable measurement)
symbol will disappear and the Confirm key will become active.
• Press Confirm to confirm the calibration.
• Press ESC to exit calibration.
Notes: • To clear a previous calibration and to return to the default value, press Clear at any time
after entering calibration mode. The “Calibration cleared” message will be shown for
a few seconds on the display. If Clear is invoked during the first calibration point the
instrument returns to the measurement mode.
• The Clear key is displayed only if a previous calibration exists.
Point 2 calibration
• The calibrated value will be shown on the display and the second expected buffer value will be displayed.
• Remove the electrode holder with electrodes from the top of the beaker.
• Place the second buffer into the beaker and place in beaker holder. Rinse the electrodes in a
beaker containing the second buffer rinsing solution.
• Place the electrode holder (with electrodes) on the top of the beaker, lock cap by turning.
• If necessary press the ARROW keys in order to select a different buffer value.
• The (unstable measurement) symbol will be shown on the display until the reading becomes stable.
• When the reading is stable and close to the selected buffer, the (unstable measurement)
symbol will disappear and the Confirm key will become active.
• Press Confirm to confirm the calibration.