7 one collector extension kit - 22, Roof requirements, 1 installation – Glow-worm Clearly Solar Vertical In-Roof Collector User Manual
Page 24
24
No.1
2380
7 One Collector Extension Kit - 22
0
- 75
0
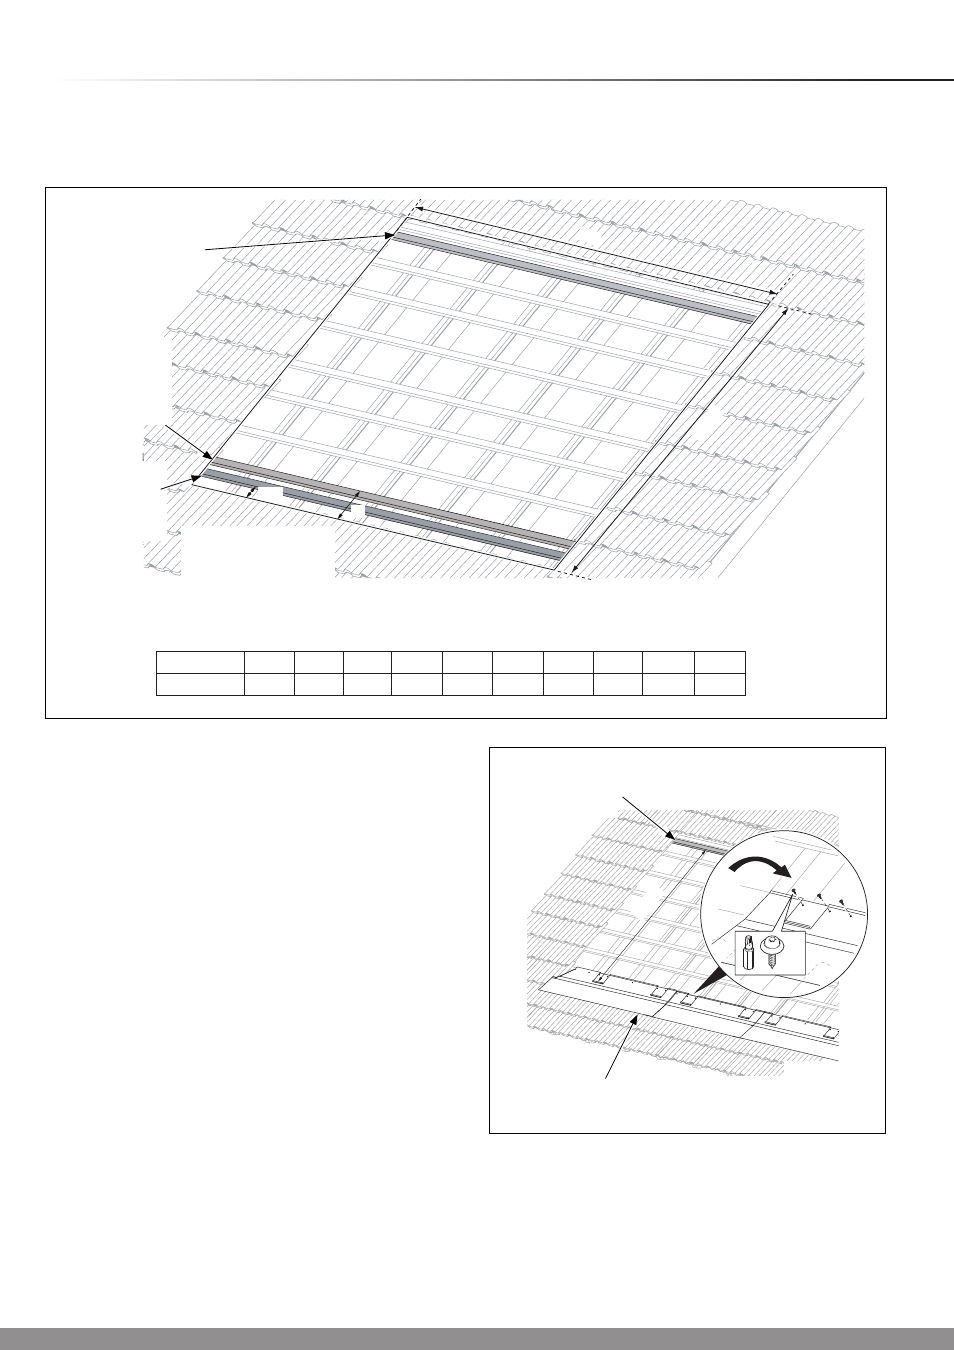
Roof Requirements
Refer to the diagram and table below and confirm the roof
requirements before installation.
IMPORTANT
The one collector extension kit compliments the two collector
kit and is required to complete multi-collector installations up
to twelve.
● Do not remove the protection film until the system is to be
commissioned.
● With due regard to the complete weight of the solar
collector system, (refer to technical data) ensure the
roof rafters and battens are in good condition and have
sufficient load carrying capacity and the battens are
secure.
● If you are using the existing roof battens for fixing, ensure
that they are secured at each rafter.
7.1 Installation
NOTE: Ensure adequate provision has been made for the
flow and return pipes to enter/exit the roof space, dependant
on their location. The preferred hydraulic scheme will
determine their location, refer to Section 3.
Refer to diagram 7.1 and check the contents of the kits prior
to commencing work on the roof.
Based on the dimensions above, remove the roof covering.
Fix the lower flashing support batten, see diagram 7.2.
Position the lower flashing onto the roof batten and secure
with the six screws (No.1) and Torx bit supplied, see diagram
7.3.
15031
PANELS
3
4
5
6
7
8
9
10
11
12
B
4243
5506
6769
8032
9295
10558 11821 13084 14347 15610
Diagram 7.3
Diagram 7.2
15309
B
2725
A
150
Distance ‘
A’ must
be between 280mm
and 309mm. Use an
additional batten if
required
The bottom
flashing is fixed
to this (original)
batten
Additional
batten to
support the
collector
Additional batten
for securing the top
flashing fixings
LOWER FLASHINGS
TOP
BATTEN