Installation – Glow-worm Clearly Hybrid - Universal Module System User Manual
Page 21
0020096317_01 - 02/11 - Glow-worm
- 19 -
3
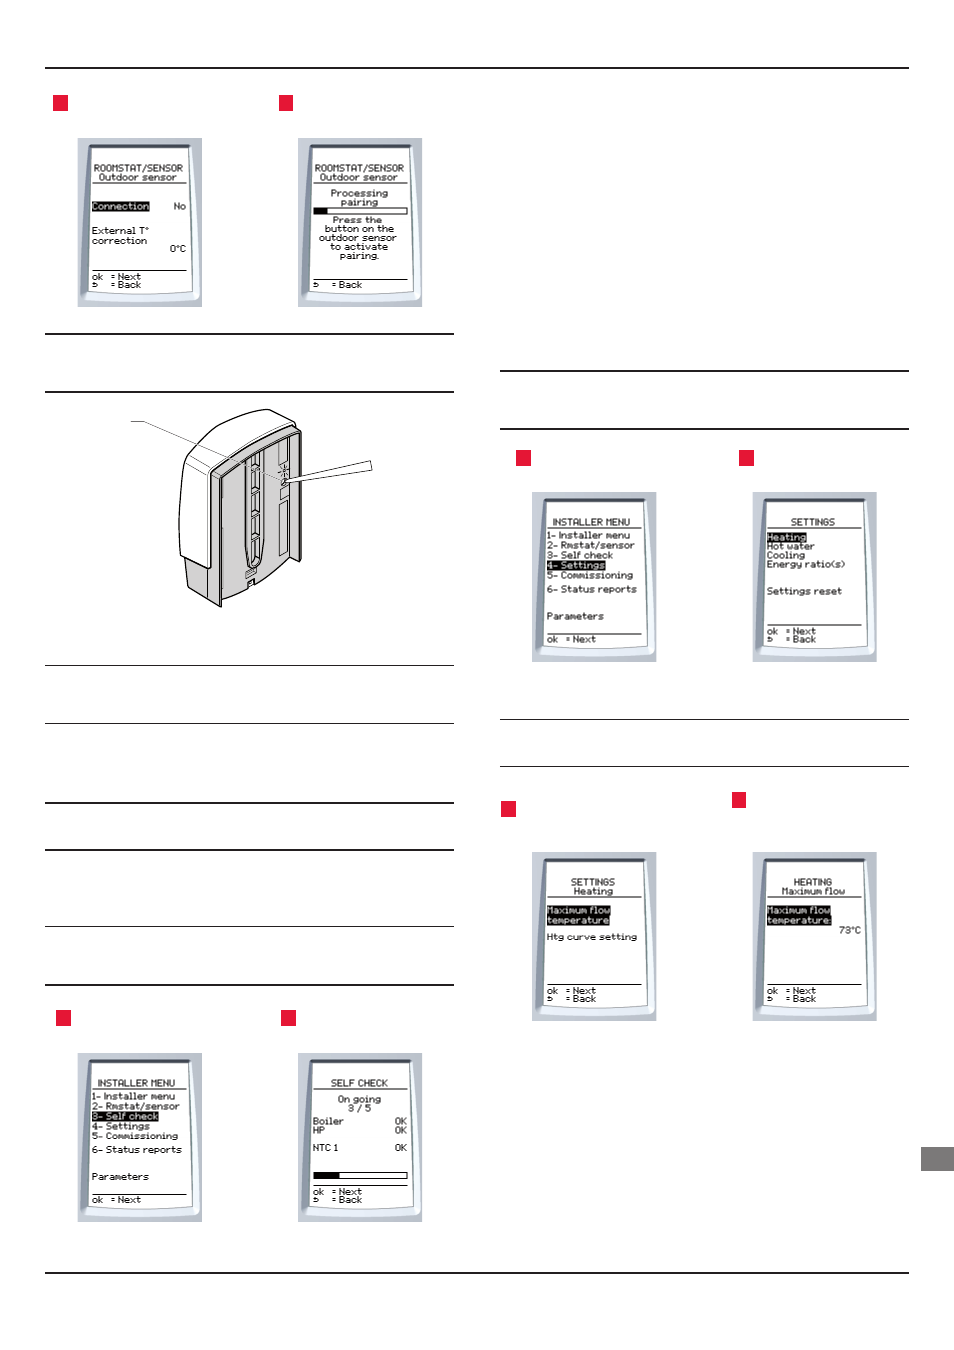
Select Connection on the
screen.
4
Press the button on the
outdoor sensor to connect.
b
The outdoor sensor is operational after 24h of
exposure to light and will therefore not function
immediately after being unpacked.
ON
1
Key
1 Outdoor sensor button
i
The External T°C Correction allows you to correct the
temperature measured by the outdoor sensor
(+/- 5 ° C, at intervals of 1 ° C - factory setting: 0).
5 Self
check
e
Do not modify the cables when connected to the mains.
The automatic test allows you to check EBUS inputs, NTC inputs,
the RF connection with the room thermostat, the outdoor sensor
radio connection.
i
The other connections are not tested and should be
visually inspected during installation or confi guration
modifi cations..
1
Select Self check on the
screen.
2
The automatic test will
start.
- If the connection is correct, the message "OK" appears
opposite the component.
- If the connection is not correct, the message "Not OK" appears
opposite the component.
In this case, check the connections (wired and wireless) .
6 Settings
This menu allows you to adjust diff erent functions in accordance
with the connected appliances and to reset all the parameters.
6.1 Heating
b
The maximum heating output temperature must be
adjusted in accordance with the characteristics of
your installation.
1
Select Settings on the
screen.
2
Select Heating on the
screen.
6.1.1 Max.
heating
fl ow temperature
b
Ensure that the heating curve setting is compatible
with the installation.
3
Select max. heating fl ow T°
on the screen.
4
Adjust the installation's
max. heating fl ow
temperature.
INSTALLATION
EN