5donning the blo w er / cc20 series hood u se, Donning the blower and respirator, Adjust crown straps for vertical fit – Bullard EVA User Manual
Page 5: Warning
EVA Series Powered Air-Purifying Respirator
Blower Assembly User Manual
8
64
7
63
7
62
7
61
7
60
7
59
7
58
7
57
6
56
6
55
6
54
6
53
7/8
3/4
5/8
1/2
3/8
1/8
7/8
3/4
5/8
1/2
SIZE
www.bullard.com
5
Donning the Blo
w
er / CC20 Series Hood U
se
NOTE
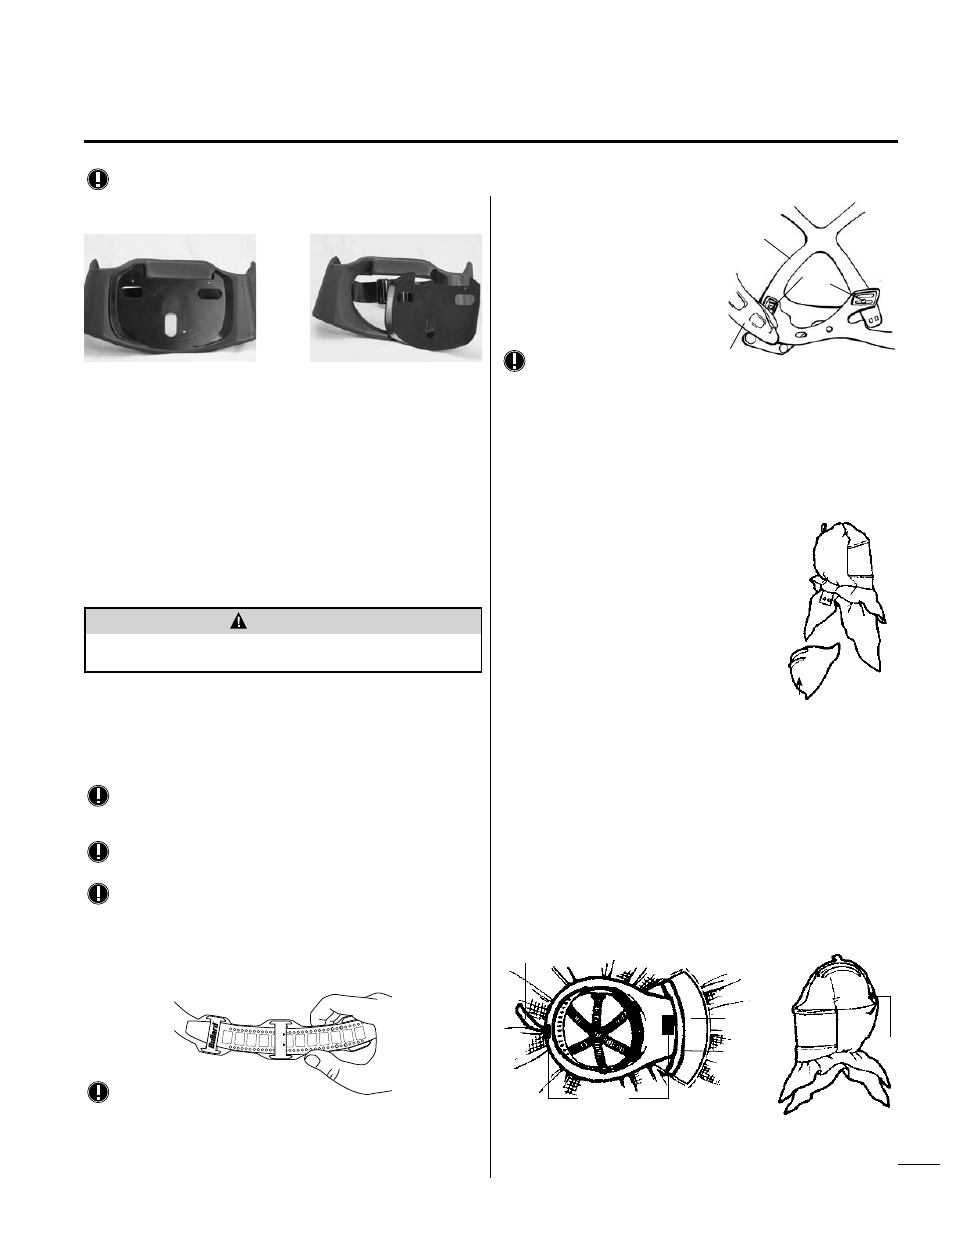
Plastic insert may be removed for cleaning as shown in Figure 14-15 .
See back page for more information on cleaning.
Donning the Blower and Respirator
Initial Donning
Prepare to don the blower, battery and hood in a safe, hazard-free area and do the
following:
• Ensure that the filter/cartridges used are suitable for the contaminant in
question and are compatible with the EVA1 Blower Unit.
• Check that the filter/cartridge is properly mounted on the blower unit.
• Place the battery in the battery compartment on the back of the blower.
• Fit the blower and belt around the user’s waist and adjust the belt for a
comfortable fit (suspenders are also available).
• Remove the belt and blower to install the hood or loose fitting facepiece and
corresponding breathing tube.
Donning the EVA with the CC20 Series or
GR50 Series Hood
Adjusting and Installing Headband Suspension in
Hood
NOTE
20LF and 20LF2 series loose-fitting facepiece hoods have a sewn-in
headband.
NOTE
The 20SICH, 20TICH and GRH Hoods may use a hard hat or suspension.
NOTE
RT Series hoods do not use a suspension.
To change the headband size, unlock the four pins from the sizing holes. Place
the headband on your head. Pull down, allowing headband to expand until it feels
comfortable. The headband will automatically adjust to your size. Lock into place
by pushing the four pins into the sizing holes (Figure 16).
NOTE
If using the optional 20RT ratchet headband suspension, refer to the
instruction sheet provided with the 20RT.
Adjust Crown Straps for Vertical Fit
To improve suspension comfort, adjust crown
straps vertically by repositioning the crown
strap posts in the crown straps. Vertical
adjustment makes the headband ride higher or
lower on the wearer’s head. To adjust, push
crown strap post from slot, move to new slot,
and snap in to secure. Move key to desired
vertical position. Repeat for other crown strap
post (Figure 17).
NOTE
If the hood rises off your head during
use, first verify proper air pressure, then select a different hood for your
application, or use the optional chin strap.
Adjusting and Installing Hard Hat in Respirator
Hood
(20SICH & 20TICH or GRH)
1. Assemble and adjust the standard Bullard hard hat suspensions RS4PC or
RS6PC or the optional ratchet suspensions RS4RC or RS6RC by following the
directions on instruction sheet attached to headband
on hard hat. Read all hard hat warning labels and
instructions. The following Bullard hard hat models are
NIOSH approved for use with CC20 Series and GR50
Series respirator hoods: C30, C30R, S51 and S51R.
2. If desired, install and adjust optional ES42 hard hat
chinstrap.
3. Before inserting hard hat into hood, remove the two
adhesive-backed Velcro
®
strips attached to the Velcro
piece that is sewn into the hood (see Figures 19 & 20).
4. Peel the backing off the longer Velcro tab and apply it
to the inside center rear of the hard hat, about 1/4”
up from the edge. Apply shorter Velcro tab to the
underside of the brim of the hard hat (see Figure 19).
5. Insert hard hat into respirator hood with cap visor facing front of hood (see
Figure 18).
6. Tuck cap brim on top of front elastic Velcro band sewn into hood (see Figure
19).
7. Loop the Velcro strip sewn inside the hood around the back of the cap and affix
it to the corresponding Velcro tab previously installed inside the hard hat in
step 4 (see Figure 20).
8. Remove protective plastic from plastic lens of respirator hood. If desired, apply
optional 20LC or 20LCL adhesive-backed lens covers designed to protect the
respirator’s plastic lens. Apply 2-3 lenses at a time. When lens becomes soiled,
remove by pulling tab at edge of lens cover to clear your vision.
Figure 14
Figure 15
The use of any filter/cartridge not approved with the EVA1 blower unit may
put the user at risk and could result in death or serious injury.
WARNING
Figure 17
Crown strap
Crown
strap
post
Brow pad
Figure 18
Velcro strip
Window
Front
elastic
band
Figure 19
Velcro tabs
Velcro
Strip
Figure 20
Figure 16