Backup recorded files, Qr404 user manual – Q-See QR404 User Manual
Page 20
QR404 User Manual
16
File List
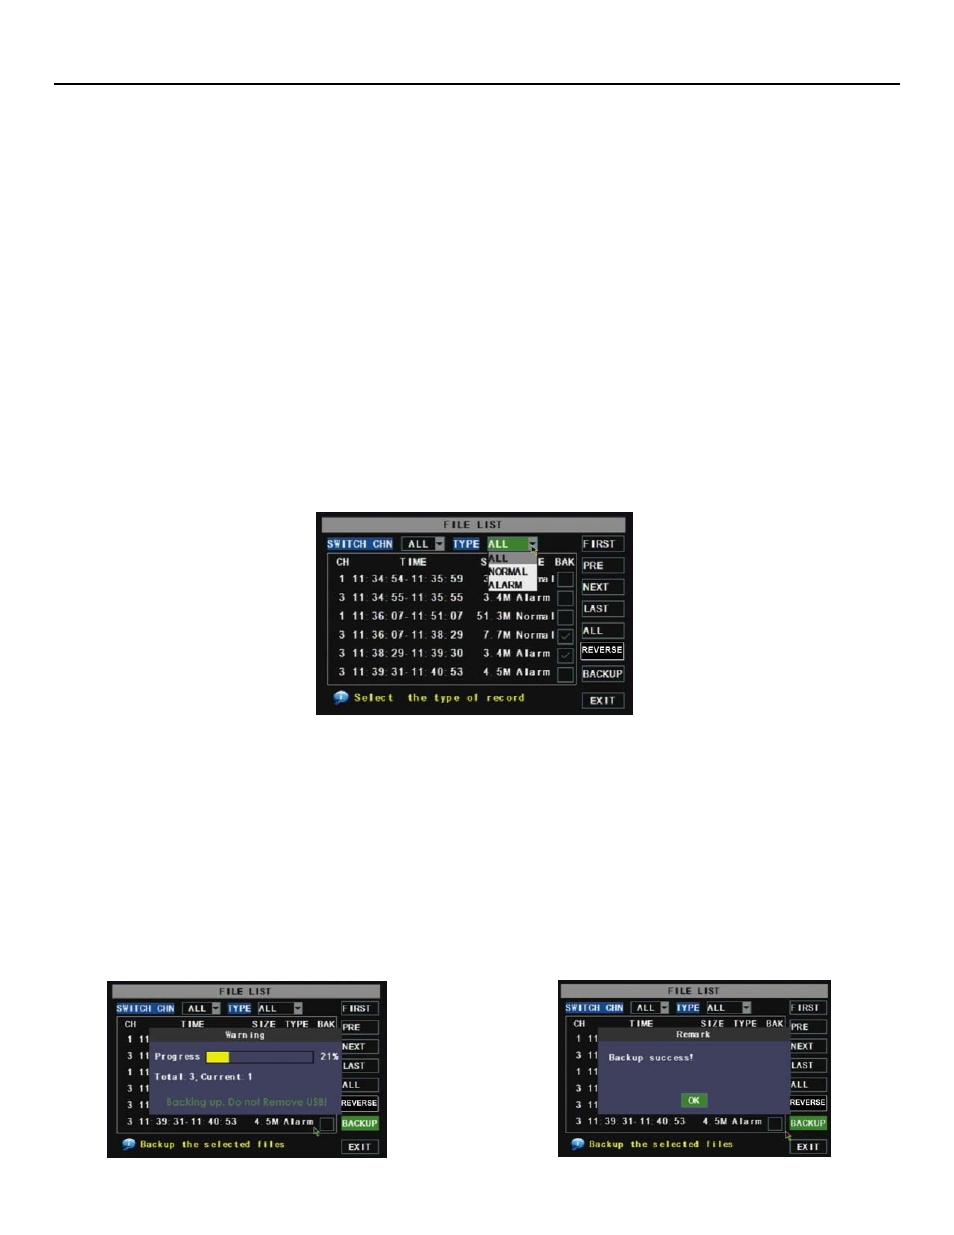
On the [Video search] menu mode, click [File list] and you will get a pop-up menu as shown in Picture 21. From
here, you are able to search through the files associated with all the recorded material each channel has recorded.
This feature allows you to view all of the available files by channel and type (all, normal, or alarm) and you can select
each of these individual files by clicking on the box next to the name of the file. You can also use your system’s
DOWN and FWD buttons to search through the list of recorded files. The files you select can then be backed-up by
clicking on the BACKUP button on your File List (Picture 21). It is possible to backup multiple files should you need
to backup more than one file at a time. As illustrated in Picture 21, the buttons on the FILE LIST interface are:
FIRST: Indicates the first page of recording history you have searched. When you view other pages, clicking [First]
button brings you back to Page one.
PREV: Takes you back to page before the one you are currently viewing (except the first page).
NEXT: Takes you to the page after the one you are currently viewing (except the last page).
LAST: When you view other pages, clicking [Last page] button takes you to the Last page you viewed.
ALL (Select All): Select all the events on current page.
REVERSE: Select the opposite events than your current selection.
5.2.5: Backup Recorded Files
If you want to backup a single recorded file from the file list, from the File List dialog box in Picture 21, select file you
wish to back up by placing a check mark in the accompanying green box and hit the [BACKUP] button on the right of
the screen. You will then receive a pop up screen as illustrated in Picture 22 showing you the progression of your
backup. Once backup is complete, you will then receive a pop up message informing you that you have backed up
your files successfully (Picture 23). Note that all files will be in an H264 format that can be converted to AVI using
the Multi Player program that comes with the DVR or through the net-viewer program. Once converted, you can
then view these files through any program that supports an AVI format.
(Picture 21)
(Picture 22)
(Picture 23)