Pop-up drain, Remove flange, Tighten locknut – American Standard 2506.011 User Manual
Page 2: Flange gasket
Attention! The text in this document has been recognized automatically. To view the original document, you can use the "Original mode".
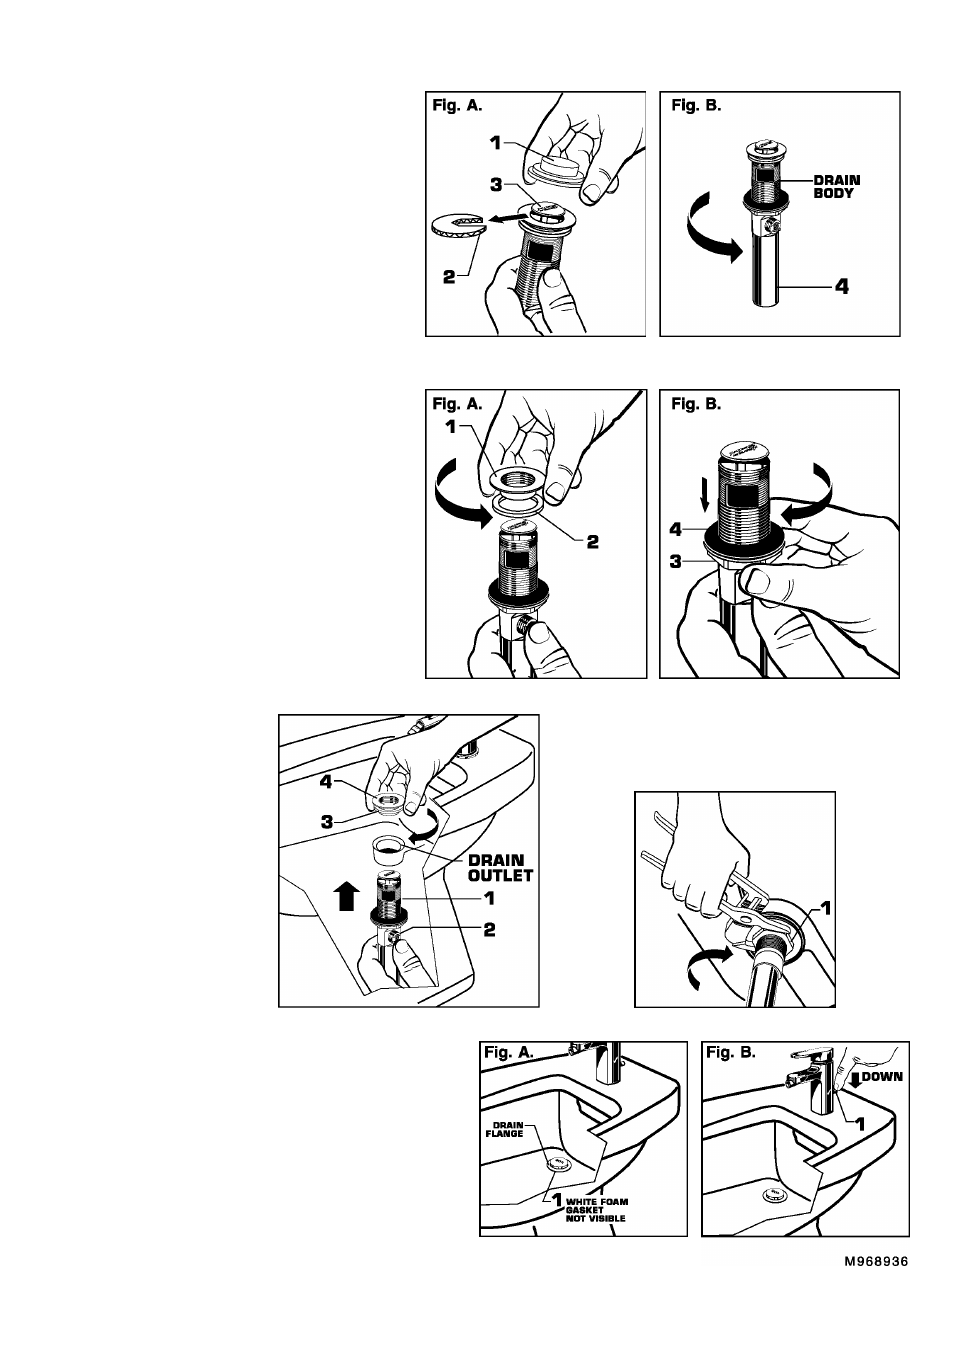
POP-UP DRAIN
Remove CLEAR PLASTIC COVER
(1].
Remove CARDBOARD SPACER
(2)
from under
DRAIN POP-UP
(3).
Tighten TAILPIECE
(4)
on DRAIN BODY before
installing DRAIN BODY.
Fig. B.
REMOVE FLANGE
Thread FLANGE (1J counter-clockwise and remove
FLANGE
(11
and FOAM GASKET
(2)
from drain
body.
Fig. A.
Thread LOCKNUT
(3)
clock-wise to bottom of
drain body. Push GASKET
(4)
down against
LOCKNUT
(3). Fig. B.
El
INSTALL DRAIN FROM
BELOW FIXTURE
From under side of BIDET
install DRAIN BODY (1) up
through drain outlet.
Note:
No plumber's putty
or caulk is required.
The CABLE ATTACHMENT
POINT
(2)
must face towards
the rear of the BIDET.
Install FOAM GASKET
(3)
and
FLANGE
(4l
onto drain body
from above BIDET and tighten
FLANGE
(4)
firmly.
TIGHTEN LOCKNUT
Tighten LOCKNUT (1) firmly with Adjustable
Wrench or Channel Locks.
FLANGE GASKET
Check DRAIN FLANGE in BIDET to ensure that
WHITE FOAM GASKET
(3)
is fully compressed
and not visible.
Fig. A.
POP-UP KNOB m must be fully down.
Fig. B.