Mounting with intercom, Mounting – Aiphone My-Cu User Manual
Page 10
Attention! The text in this document has been recognized automatically. To view the original document, you can use the "Original mode".
MOUNTING---------------------
I Mounting MY-CU and MYH-CU
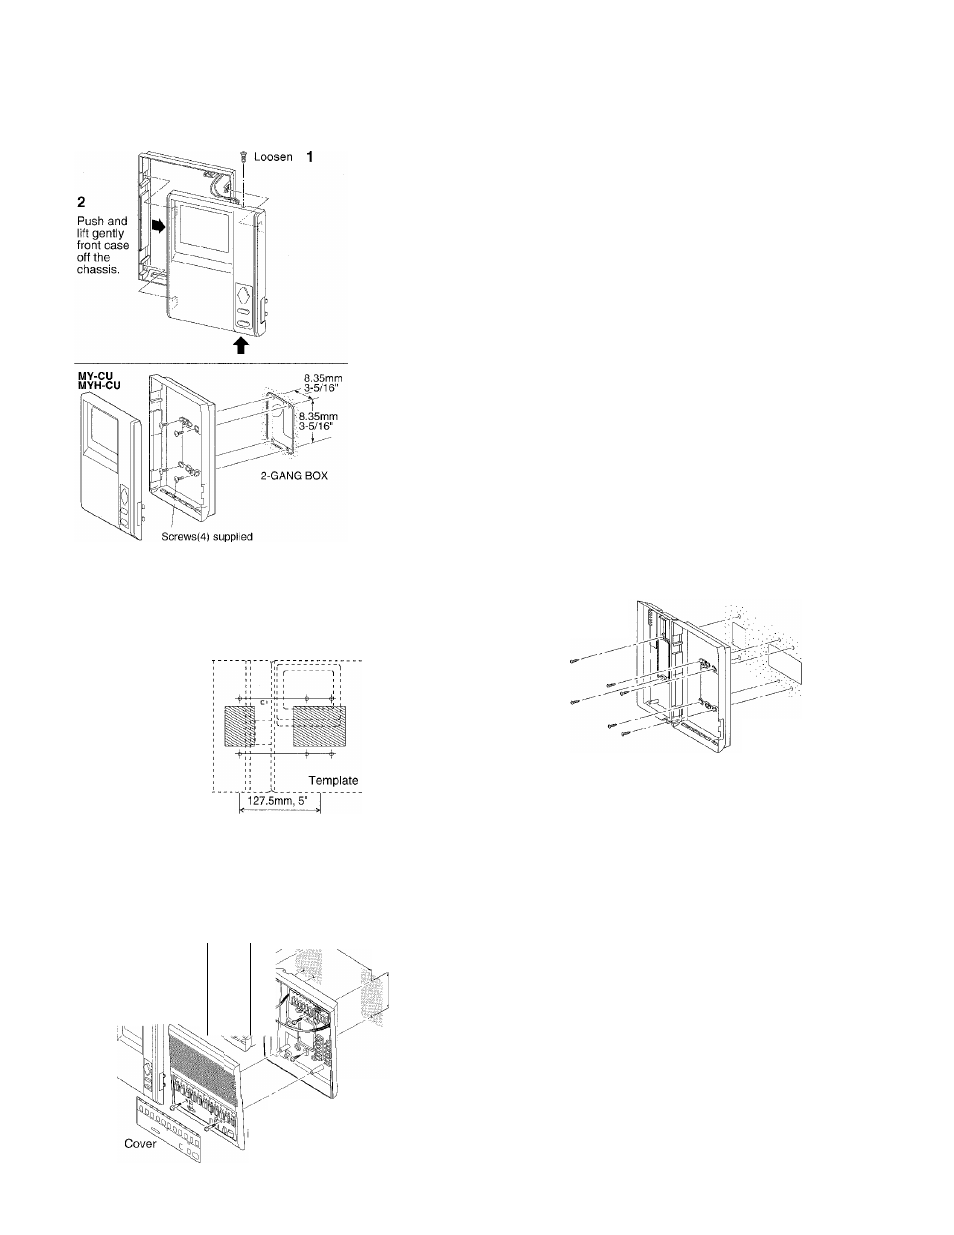
Mounting with intercom
For IE-1GD(U),
fE-2AD(U)
or TD-H/A or B
template supplied to wall.
Two unit or box centers
To mount the MY(H)-CU monitor, separate the terminals-
mounted chassis from front case.
1. Loosen a screw on top of front case.
Press on bottom, right hand, and the front case slightly
moves up.
2. Then, press on center of left side, which unlocks from
chassis.
3. Lift gently front case, then it separates.
4. Disconnect video-monitor. Pull off the holder and set
monitor aside.
5. Attach chassis to wall at 4 points.
6. Make wire terminations directly on 6 screw terminals.
7. On MY-CU only, wire with jumpers on audio terminals
D1, D2 & E.
8. Pin the holder, reconnect and mount front case, justly
aligning to lock.
★ Do not connect any wires at any other point than on
terminals.
For IE-8MD
and IE-8HD
intercom
chassis
MY-CU
MYH-CU
Chassis
Before actually mounting the unit, attach the supplied template to wall. For MY-CU/IE-8MD
combination, attach two chassis to wall. First, mount the intercom chassis (or bracket) to wall or single
gang box, and MY-monitor chassis can adjustably be mounted to its right side.
Chassis
MYH-CU
monitor 3~5 cm,
./1
11
IW
203 mm, 8" measured between
A K two unit or box centers.
83.5 mm,
3-5/16"
Chassis
LEF-5, 10, 10S
ntercom
• For MYH-CU and LEF-5,10,10S
Mount MYFI-CU to the left of LEF-5,
10, 10S intercom, keeping a space of
3 ~ 5 cm (1-1/4" ~ 2") for brightness/
contrast adjustment.
-10-