SINGER W1640 User Manual
Page 30
Attention! The text in this document has been recognized automatically. To view the original document, you can use the "Original mode".
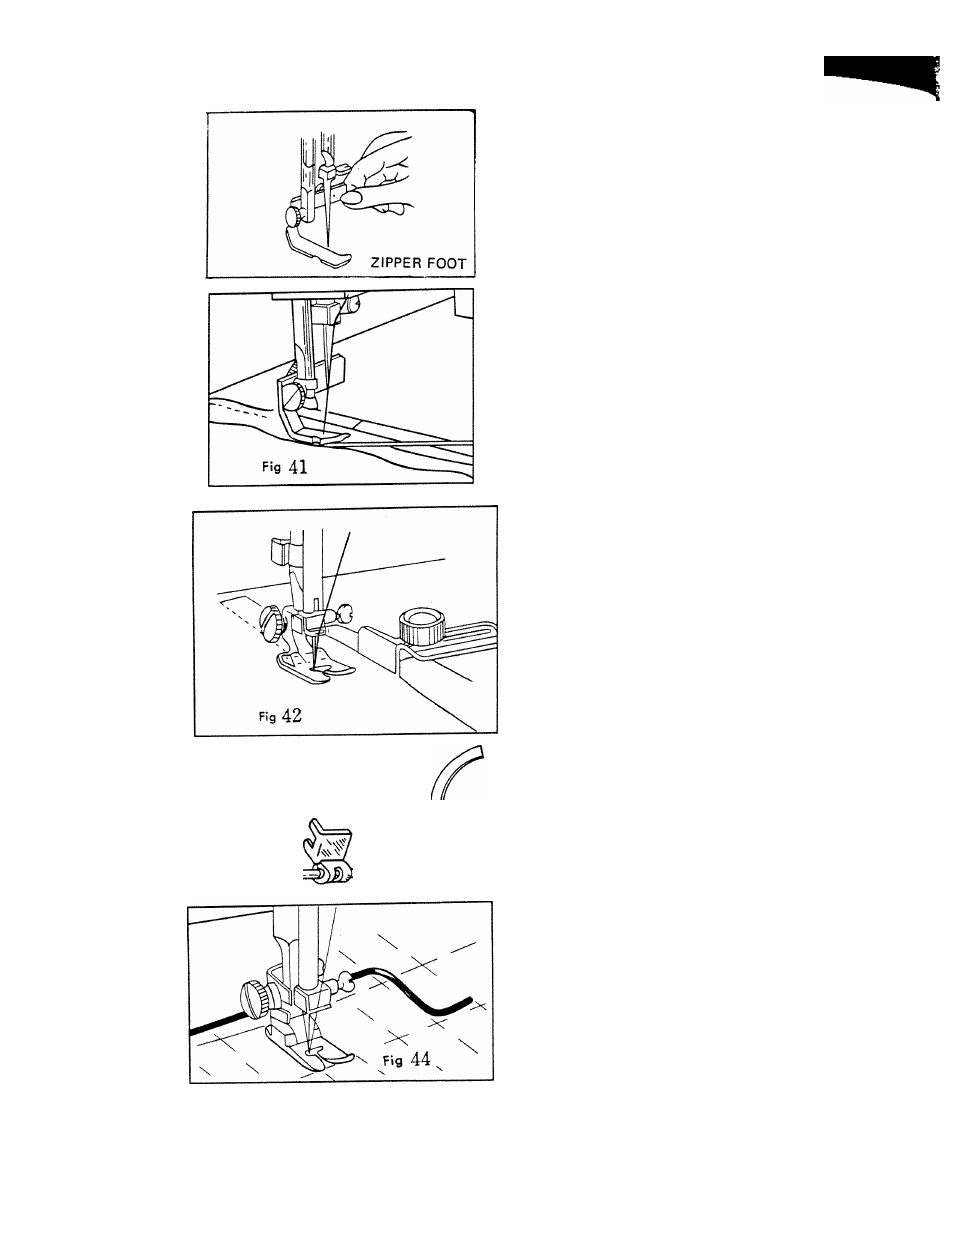
Fig 43
sii'
ADJUSTABLE CORDING AND
ZIPPER FOOT
The zipper foot allows you to stitch
right next to a raised area such as a
zipper or cording. (Fig. 41)
Attach zipper foot and set dials for
straight stitching. To adjust zipper
foot for side of needle: loosen screw
at back of foot and slide foot to the
side so that needle passes through
notched side of foot. Lower needle
slowly to be sure it will not hit zipper
foot, and tighten thumb screw. Zipper
package will contain easy to follow
instructions for stitching.
CLOTH GUIDE
This attachment is most convenient
for guiding the fabric to keep the
stitching parallel to edge of the fabric.
(Fig. 42).
Use for stitching seam widths that
are wider than markings on needle
plate, and for making wide hems.
Also use as a guide for blindstitching.
Fasten cloth guide to machine by
inserting thumb screw into hole in
bed of machine. Adjust cloth guide
to desired distance from needle and
tighten screw.
QUILTING GUIDE (Fig. 43)
Use for stitching parallel lines without
marking fabric when quilting, shirring,
smocking, or making rows of decorative
stitches.
Loosen presser foot thumb screw and
insert prongs of guide between screw
and presser foot. Slide end of guide
to the distance you wish to space the
rows of stitching. Lower presser foot
and stitch first row.
Move fabric over until guide rests on
first row of stitching and stitch second
row. Continue stitching rows in same
manner. (Fig. 44)
-26-