Buttonholes – SINGER W1640 User Manual
Page 27
Attention! The text in this document has been recognized automatically. To view the original document, you can use the "Original mode".
BUTTONHOLES
jurn Hand Wheel toward you and raise needle to its highest position.
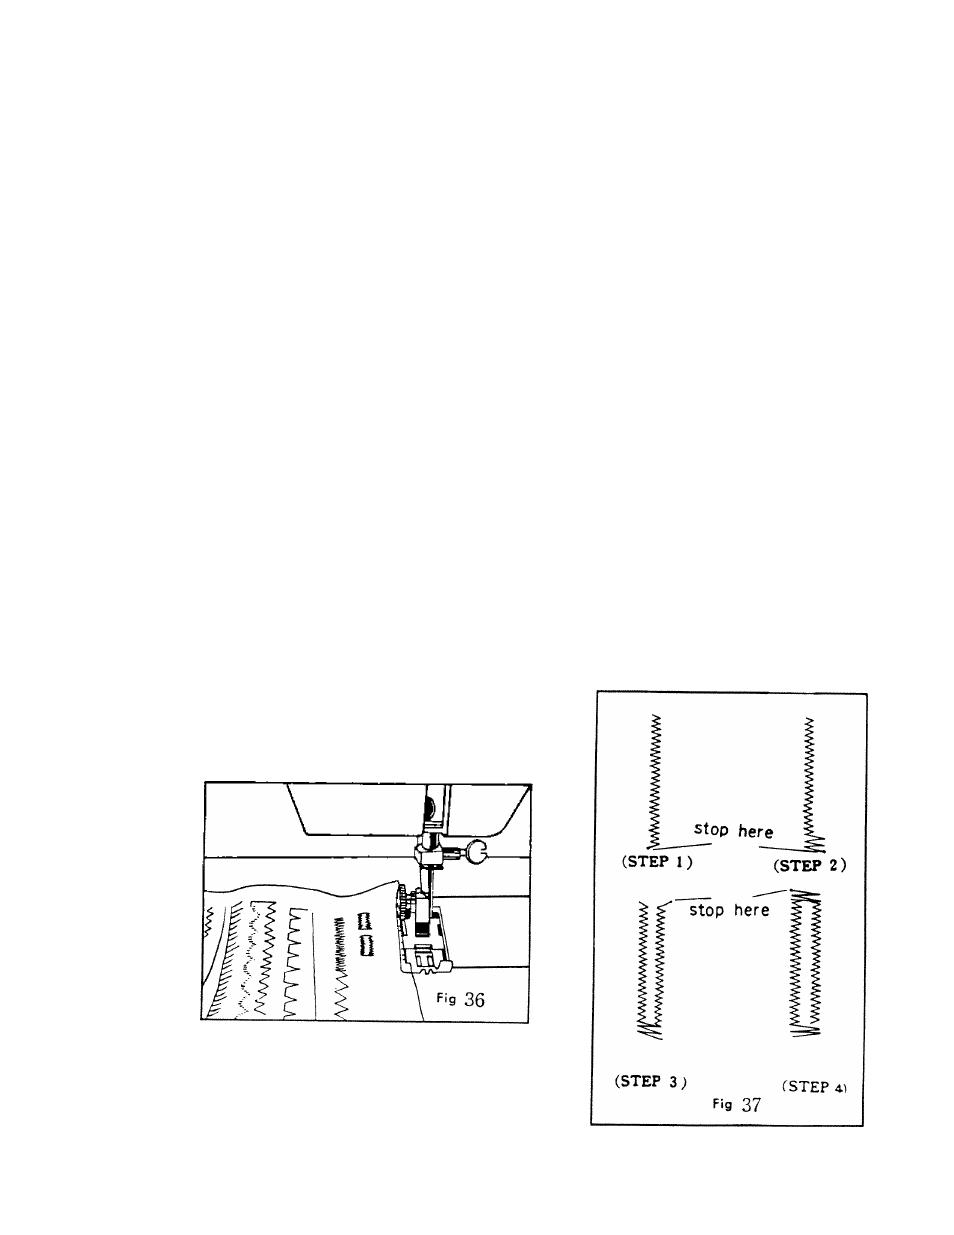
Attach buttonhole foot shown in Fig. 36.
Turn Thread Tension Dial clockwise between 5 and 4 to slightly tighten thread
tension.
Set Stitch Length Dial (A Fig. 35) to buttonhole symbol, and Stitch Width
Dial (B Fig. 35) to Button Hole Symbol..
Mark fabric, with pencil or tailor's chalk, center line of buttonhole and
length of the buttonhole desired. 3/8"-1/4" lonaer than outside diameter of
the button.
Place fabric under buttonhole foot with center line marked on fabric in
center of buttonhole foot.
Turn Stitch Selector (C) to marking No. A position, and start to sew
left side along line.
Stop with needle on left side of stitch (Step
1
, Fig.
37
)
Raise needle, and turn Stitch Selector (C) to marking No. B " U". Sew a
few stitches to make bar tack. (Step 2).
Turn the Stitch Selector (C) to marking No. C " □ " Sew the right side.
of the buttonhole guiding fabric so machine sews parallel to the left side
(Step 3).
Turn Stitch Selector (C) to marking No. B"Q'.' Take a few stitches making
the bar tack to close other end of buttonhole. (Step 4).
Cut slot in center of buttonhole with seam ripper.
NOTE. Make sure Stitch Selector (C) is firmly positioned in either marking
C " iGl ", B " n " or A ' ' c ", and always make a practice button
hole on a scrap of the same fabric you are sewing.
1.
2
.
4.
5.
6
.
7.
8
.
9.
10
.
11
.
-23-