SINGER W1640 User Manual
Page 12
Attention! The text in this document has been recognized automatically. To view the original document, you can use the "Original mode".
THREADING MACHINE
Section 3
Rear View of Machine
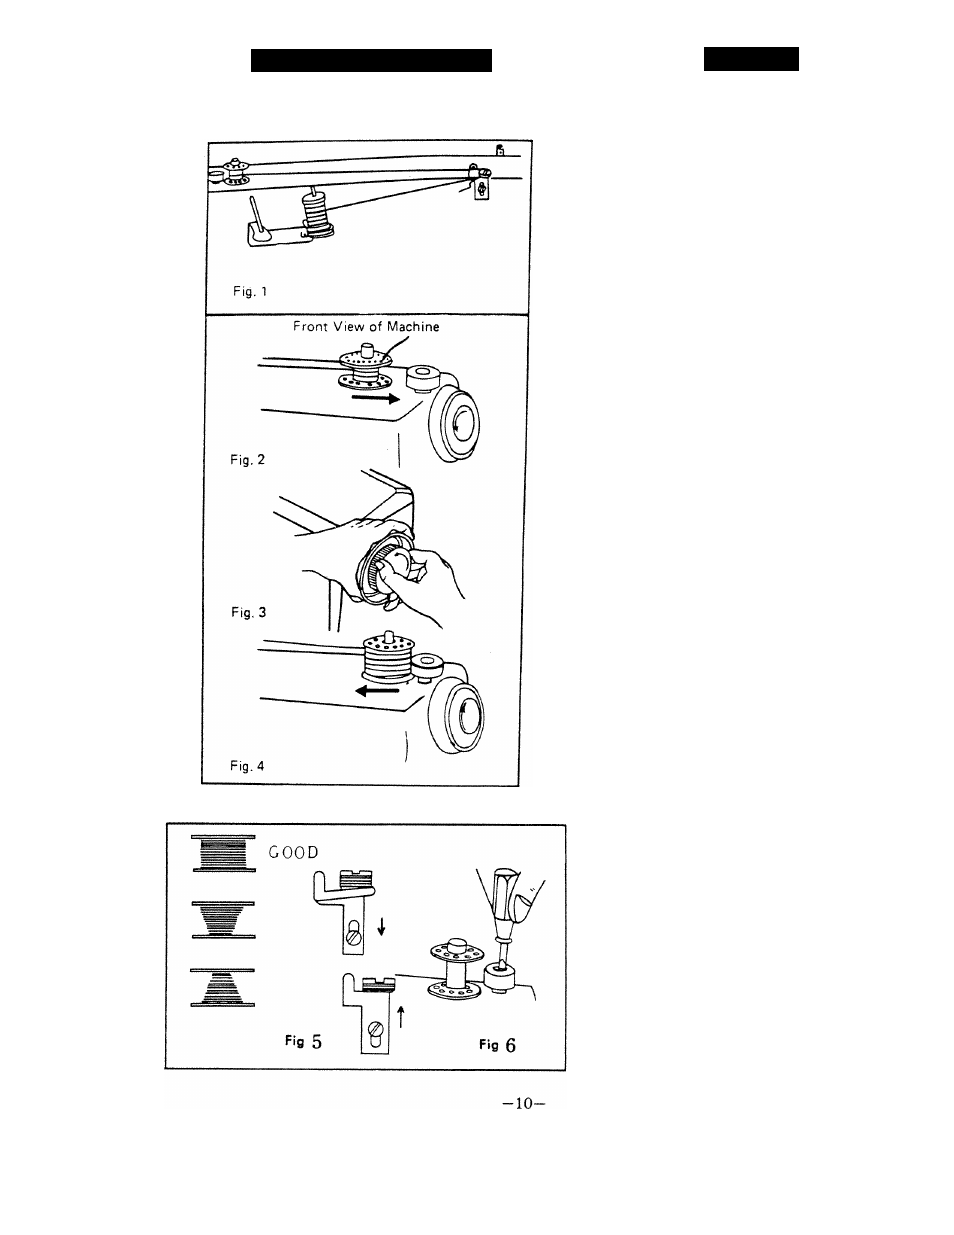
WINDING BOBBIN
Place spool of thread on spool pin and
thread as shown in illustration. Be
sure thread goes under tension disc on
Bobbin Winder Thread Tension. (Fig.
1
)
Put thread through one of the holes in
empty bobbin from inside to outside.
Push bobbin down firmly on bobbin
spindle at top of machine with slot in
bobbin fitting into spring on bobbin
spindle. Push bobbin and spindle to
the right. (Fig. 2)
Release sewing mechanism by holding
Hand Wheel and turning Stop Motion
Knob toward you (Fig. 3). Hold end
of thread and press down on foot
pedal as when sewing. Release end
of thread as soon as winding starts.
Run machine slowly to wind bobbin
evenly.
Bobbin winder will stop itself when
bobbin is full. Pull bobbin and spindle
back to the left until a click is heard.
(Fig. 4) Break off thread and remove
bobbin. Tighten Stop Motion Knob.
Winding Bobbin Evenly
If
bobbin
winds
unevenly,
adjust
thread guide by loosening screw at
base of guide:
•
if more thread winds at top of
bobbin, shift thread guide slightly
downward.
•
if more thread winds at bottom of
bobbin, shift thread guide slightly
upward. (Fig. 5)
• after adjustment tighten screw.
Bobbin Winder Stop
For a fully wound bobbin, the
knob should just slightly overlap
edge of bobbin.
If too far out, thread will extend
beyond bobbin. Loosen screw at
top
of
knob
and
turn
plastic
knob
to
adjust;
tighten
screw.
Knob can also be adjusted to ex
tend farther into bobbin for less
amount of thread. (Fig.
6
)