I'oot, V-,, , .4, 4 f 'hlt l>ai)s – SINGER W6105 User Manual
Page 4: R-oo, Scrfwdrivfks, Sewing machine if 1, T„t ) (hm]' [4, Eedle
Attention! The text in this document has been recognized automatically. To view the original document, you can use the "Original mode".
ACCESSORIES
SEWING
MACHINE
If 1
/
eedle
T
„T )
(HM]' [4 ]
4 HOBHINS
(i in muchiiie)
4 NhHDUfS
Si/e 14
SrRAK.in snrni
I'OOT
zk
;-
zag
['O
ot
c
J
/
V-,, ,
.4
4 f 'HLT l>AI)S
(or '111 read Spool Pins
IIEMMHR
foot
Zin'I KI ooi BlilTONhoUiFOOT lUITTON SI «IN,;
r-OO]-
non I CIUDH
‘SCRFWDRIVFKS
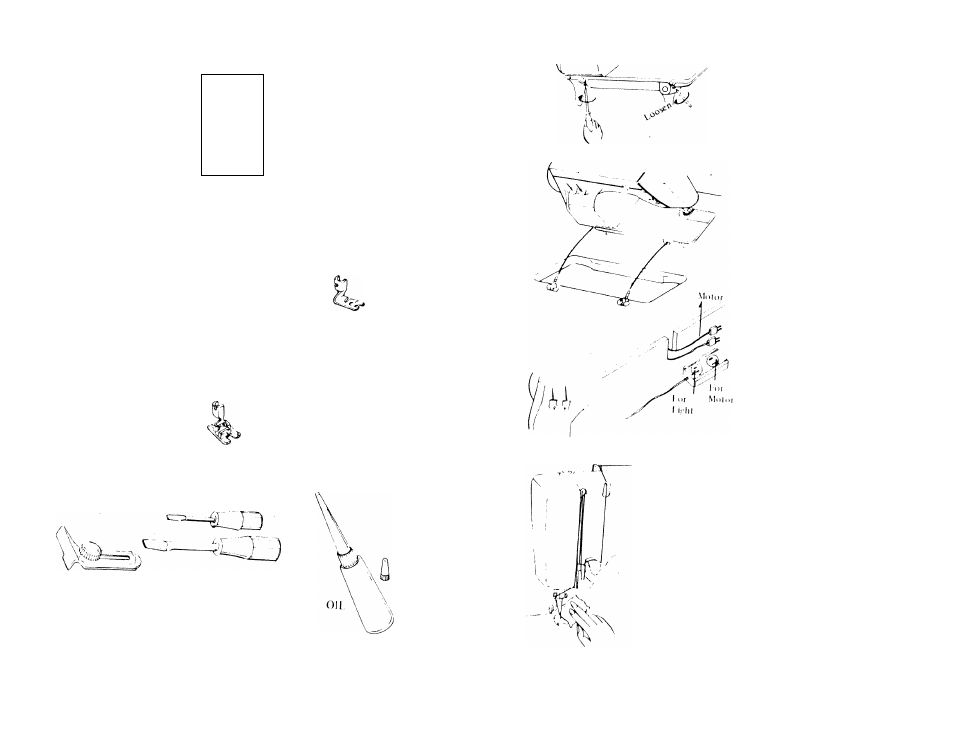
INSTALLING MACHINE
^4
hu
new machine can be installed i,
a cabinet or portable case.
I » place in cabinet or case;
• I oosen two set screws on back ot
machine bed until lu.les are clear.
I 'll lip hinge pins located at back
'X cabinet or ba,se o| puriatile case,
• ilnld machine in a tilled back po-
I'Kion and carelull> lower it down
h'l'li binge pins are inserted
into the lioles.
Iigliten both set screws secmcly
wnii screw driver.
Lor portable case, insert motor and
'iglit cords through slot in partition
ol case.
• nit
machine forward until it rests
tiimly in cabinet or case.
Hug electrical cords into sockets lo
cated inside cabinet or case. Cord
H entitled witli “motor” tag must be
P ugged into socket marked “motor”
11 lagged cord goes into “light” .socket,
'■'•ice foot control on (loor or pull
4>'vcn knee lever in cabinet. Place fell
P‘1 :> ocated m'' accessory bo.x over
III
lead spool pins.
L'lig cord into any 110-120 volt
electric socket.
Your machine has been oiled during
manutacturing
and
testing
Before
sewing wipe off any .surplus oil which
'»‘IV soil remain on machine, especially
‘"‘"'»‘I needle and fabric feed Sew
'’‘ivL and lorth .several times on a scrap
'‘ilHic betöre you begin sewing a
garment,
^