Keep stitching straight, Pin basting, Keeping stitching straight pin hasting – SINGER W6105 User Manual
Page 13
Attention! The text in this document has been recognized automatically. To view the original document, you can use the "Original mode".
blHLHING UPS
Wlienever you start to sew - -
• Check tliat levers and dials are set
correctly tor the stitch you want -
stitch pattern, width, and length.
• Use proper needle and thread for
your
fabric.
Needle
sliould
be
straighi, sharp, and inseried pro
perly. Change your needle frequeni-
ly-
•
Test machine stitch on double
thickness ot a scrap of the fabric
you plan io use. Adjust machine for
length
of
stitch,
tension
and
pressure if necessary.
• Place fabric under presser foot with
bulk of material to the left of
needle. Full thread ends behind
presser foot.
• To prevent liglitweiglit fabrics from
being drawn into needle hole when
you begin stitching, start about 'A''
from edge of fabric.
• To reinforce ends of seams, begin
and end by backstitching about '/
2
"
from edge of fabric.
• Regulate speed of machine by in
creasing or decreasing pressure on
loot control. Run machine at a
slow even speed.
•
Allow tahiic to teed lorward with
the movement of the fabric feed.
Don’t pull 4)r hold labric back as
needle may bend or break. Instead,
guide fabric gently with your liand
in front of presser foot.
• Wlien finished stitching, turn hand
wheel toward you to raise needle to
its highest position betöre removing
labric from under pressci foot, l>u||
threads over thread culler located
at back of presser bar, and press
threads down to cut.
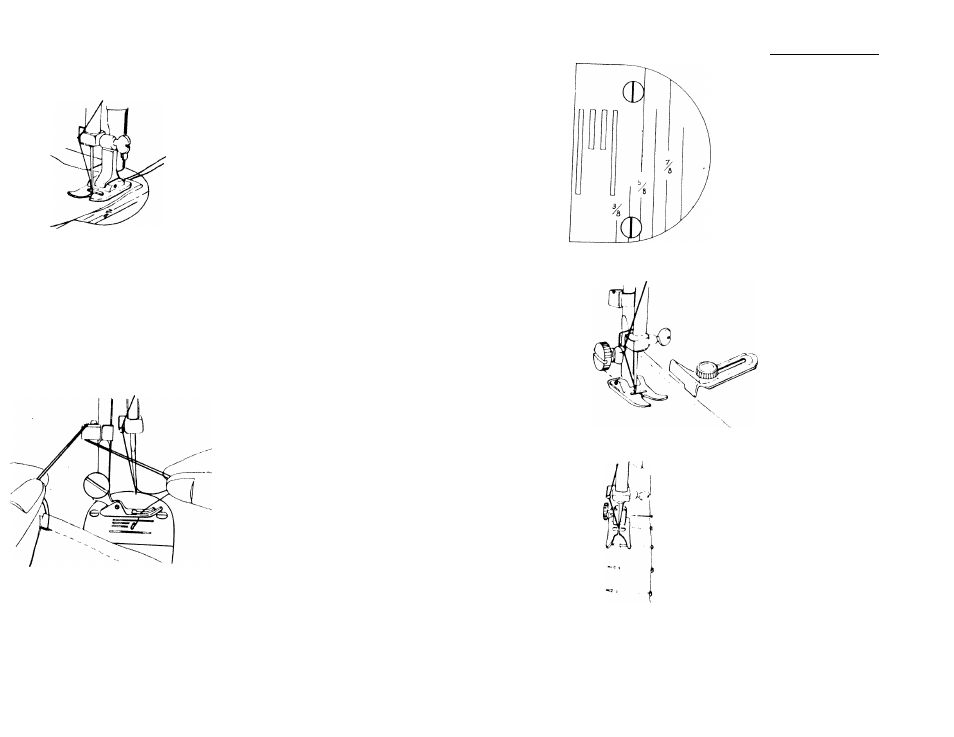
Keep Stitching Straight
Ir> help keep your stitching straight
whether stitching seams or doing
dec-
rat ive stitching:
Needle Plate -
Use markings on needle plate as a
guide tor stitching.
Most common measurement is 5/8”
wliicti is used lor stitching seams.
Simply line edge of fabric up wiili
markings on plaie to keep stitching
straight and seam width even.
• Cloth Guide Attachment - -
Use as a guide for stitching seams
hlindstitching, and topstitching
Can be adjusted up to 1-5/8” fron
needle.
hasten cloth guide to machine b>
inserting ihmub screw into one ol
the two threaded holes in bed ol
machine. Adjust cloth guide to
dcMirnl distance from needle and
iigliieii ihiuiih screw.
Pin Basting
I’lace pins at right angles to pres,sei
loot with pin just nipping into fabric
at stitching line. Never place pins on
underside of fabric in contact with
labric teed or so presser foot rides ovei
head of pin.