4 u { w – SINGER W6105 User Manual
Page 21
Attention! The text in this document has been recognized automatically. To view the original document, you can use the "Original mode".
Stitching Buttonhole
STlil’1 - Turn stitch width knob to »1 to
stitch left side of buttonhole. Place
fabric under buttonh(jle foot so needle
enters fabric on mark at end farthest
from you.
Stitch left side of buttonhole the
desired length. Raise needle to its hig
best position.
STIiP 2 - Turn stitch width knob to #2 for first
bartack. Make 5 or 7 stitches. Raise
needle to its highest position.
S'fliPi - Turn stitch width knob to to stitch
right side of buttonhole. Machine will
stitch in reverse. Stitch right side the
same length as left side. Rai.se needle to
its higlrest position.
Slilcti
Widlh
r
STPP4
Siiteli
l.cigUli
Turn stitch width knob back to #4
for second bartack. Make
5
or 6
stitches’ to complete buttonhole.
furn stitch width knob to straighi
stitch symbol, and turn stitch length
knob to 0 so machine does not feed.
Make 2 or stitches to securely fasten
stitches. Draw upper thread through
to under side.
Cut buttiinhole open using embroidery
scissors or seam ripper, being careful
not to cut stitching on either side.
Place a pin acorss each end of button
hole to protect end stitching.
31
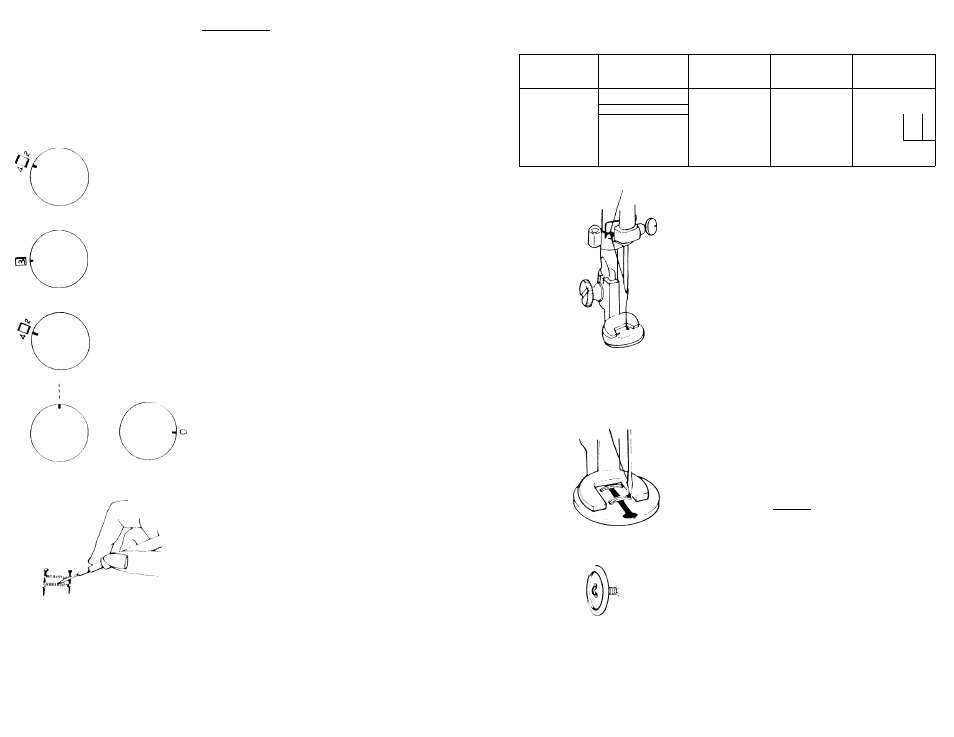
BUTTONS
Machine Setting
Presser
Stitch
Stitch
Stitch
Fabric
[’’oot
Pattern
Width
Length
Feed
, 4 u
{ W
Darn
Sew
#
_
Blind Kcpolur Slreich
Sitivii Smth SiUch
/ \
Q
Button Sewing
Foot
0
You can sew both two and four hole
buttons with your machine.
Change presser foot to the button
sewing foot and be sure to lower fabric
feed by pressing down DARN button.
Place button under button sewing
foot. Turn stitch width knob until zig
zag stitch is same widtli as the holes in
the button. Turn hand wheel toward
you and test carefully that the needle
goes through the center of first one
hole and then the other.
Hold both threads behind presser foot
and sew 5 to 6 stitches.
Turn stitch width knob to straight
stitching aiul take about 3 stitches to
lock the thread.
hor a four hole button, lift presser
foot slightly ami move fabric to permit
stitching the remaining two holes.
Hooks and snaps can also be sewn
following the same prcxiedure.
Thread Shank
Sew-through buttons on coats and
jackets should have a thread shank to
make them stand away from the fabiic.
Place a straight pin or sewing machine
needle on top of button between the
holes, and sew over the pin or needle.
Pull thread to back of button and
wind aiound stitches to form a firm
shank, lie thread ends securely.
38