Adjusting stitches to suit stretch fabrics – SINGER 9618 User Manual
Page 29
Attention! The text in this document has been recognized automatically. To view the original document, you can use the "Original mode".
ADJUSTING NEEDLE THREAD TENSION
Correct
tension
is
important
because
too
much or too little will weaken your seams or
cause your fabric to pucker.
Zig-Zag stitching requires less needle thread
tension than straight stitching.
Make a test sample with the fabric and thread
you plan to use so that you can adjust the
tension properly.
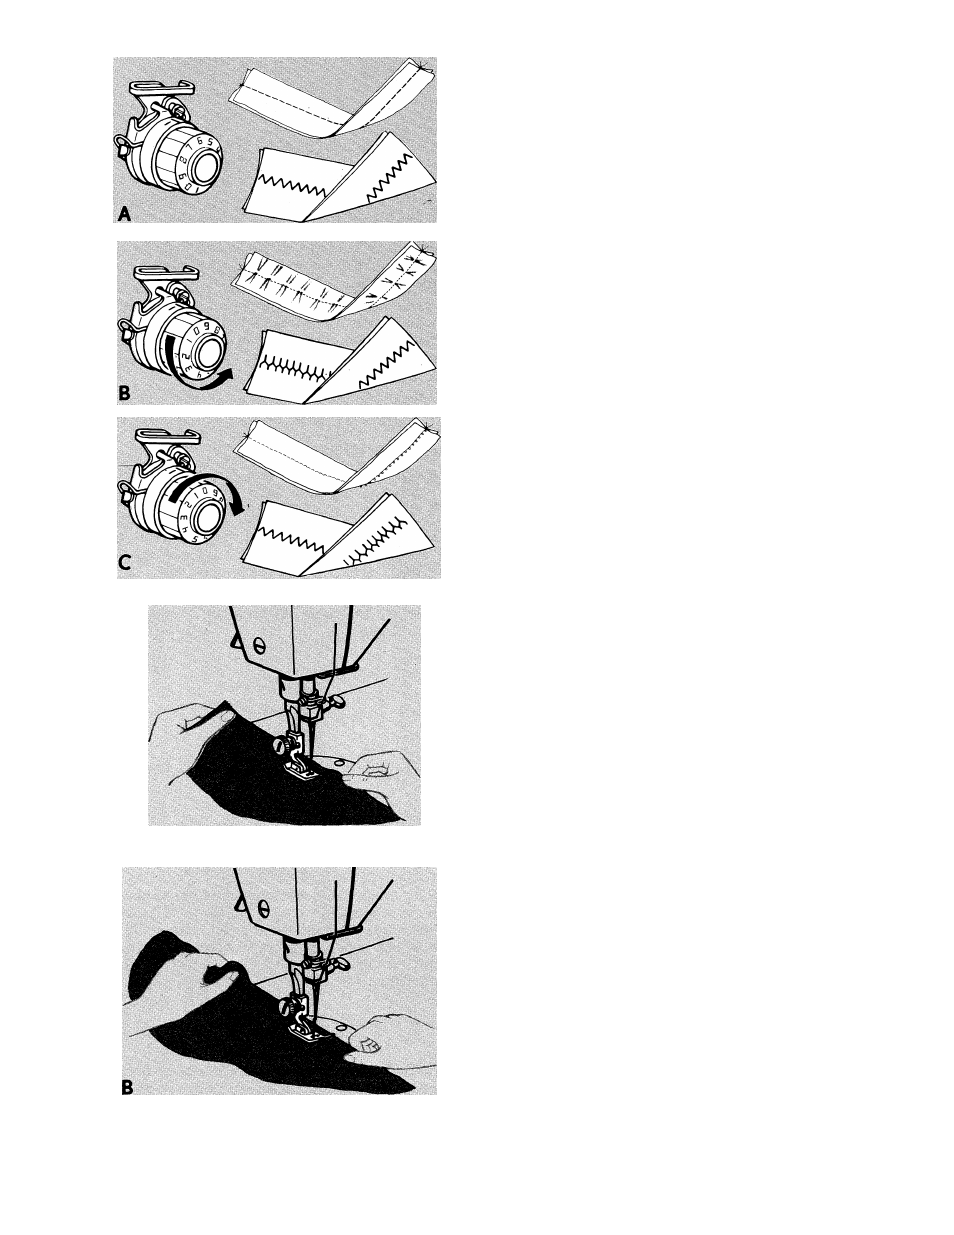
A well balanced stitch, as shown In illustration
A, will have the needle and bobbin threads
locked between the two layers of fabric with
no loops on top or bottom and no puckers.
The
tension
dial
regulates
the
degree
of
tension
on
your
needle
thread.
Set
it
according to the type of thread and fabric you
use. The numbers on the dial eliminate guess
work.
If the fabric puckers B, decrease tension. If
the stitches in your test sample look loose C,
increase needle thread tension.
• To decrease tension, turn dial to lower
number.
• To increase tension, turn dial to higher
number.
Adjusting stitches to suit
stretch fabrics
GUIDING AND SUPPORTING FABRIC
Most fabrics of stretch or knit construction
need only to be guided in front of the presser
foot when you use one of the stretch stitches.
Some fabrics - nylon tricot and elasticized
fabrics, for example - do require support while
being stitched.
For nylon tricot and similar synthetic knits,
apply gentle tension by holding the seam in
front and back of the presser foot as you
sew (illustration A).
For elasticized fabric, stretch lace, and knits
with an unusual amount of elasticity, apply
firm tension in front and back of the presser
foot to stretch the seam as the stitches are
being placed (illustration B).
CAUTION: Do not pull the fabric while you are
stitching as this may deflect the needle, causing
it to break.
27