SINGER W710 User Manual
Page 22
Attention! The text in this document has been recognized automatically. To view the original document, you can use the "Original mode".
51
55
56
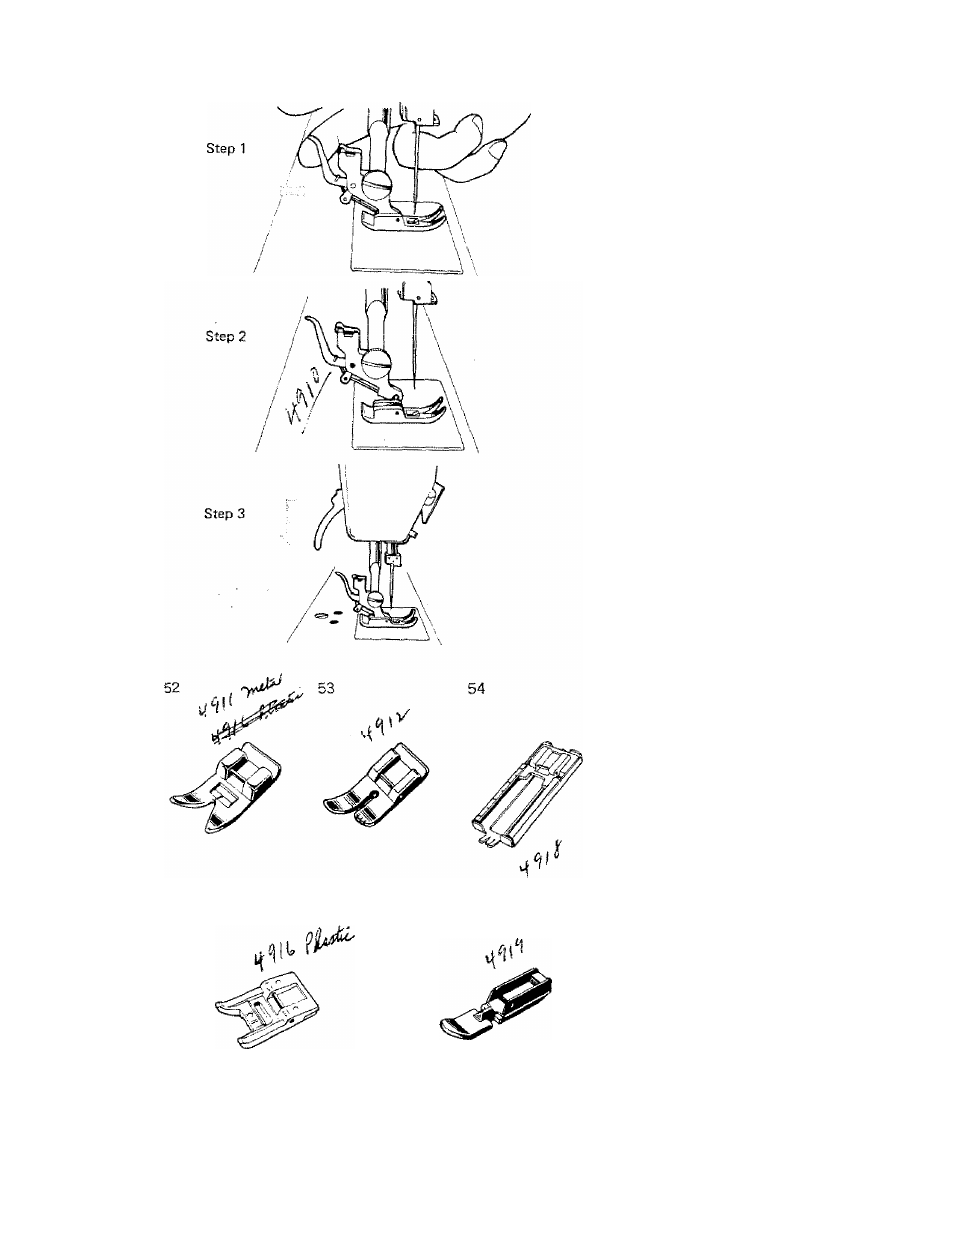
THE PROPER PRESSER FOOT
• Changing the Foot
Pui! the presser foot shank iever
toward you to remove the foot.
(Fig. 51 — Step 1) To attach
place the desired foot under the
shank and lower the presser bar.
(Step 2) Foot will be locked
automatically. (Step 3)
• The All Purpose Foot •F‘
77'/
This foot (Fig. 52} is flat on the
bottom and has a wide hole to
accommodate wide stitches. This
foot should be used for all
normal sewing.
• The Straight Stitch Foot
This foot (Fig. 53) is fiat on'the
bottom and has only a small hole
to accommodate only straight
stitching. It may be used on
sheer or soft fabrics for more
control when the all purpose
foot allows the fabric to be
pulled with the needle.
• The Buttonhole Foot ifR/ S
This foot (Fig. 54) has a frame
which
holds
the
fabric
taut
enough
to produce
a good
buttonhole.
The
markings
on
the side allow exact buttonhole
length to be made.
• The Embroidery Foot
This foot (Fig, 55) has a wide
groove carved out on the bot
tom, This groove allows the foot
to pass over dense stitches such
as the
satin stitch without
catching on the stitch.
It is
transparent to make the stitch
more visible. It has two small
grooves in the front to make
cording easier. Do not use this
foot for normal sewing of light
weight fabrics. Since it is groov
ed it will not hold the fabric taut
enough
to produce
a good
straight stitch.
• Cording and Zipper Foot
This foot (Fig. 56) is very narrow,
with needle opening cuts at its
right and left sides to sew in
zippers and insert cording.
21