Cleaning and oiling the shuttle area – SINGER W310 User Manual
Page 36
Attention! The text in this document has been recognized automatically. To view the original document, you can use the "Original mode".
CLEANING AND OILING THE
SHUTTLE AREA
The stitch forming mechanism occasional
ly becomes clogged with loose threads
and lint. This will interfere with the
efficient
operation
of
the
machine.
Cleaning and removal of the lint will
safeguard the performance.
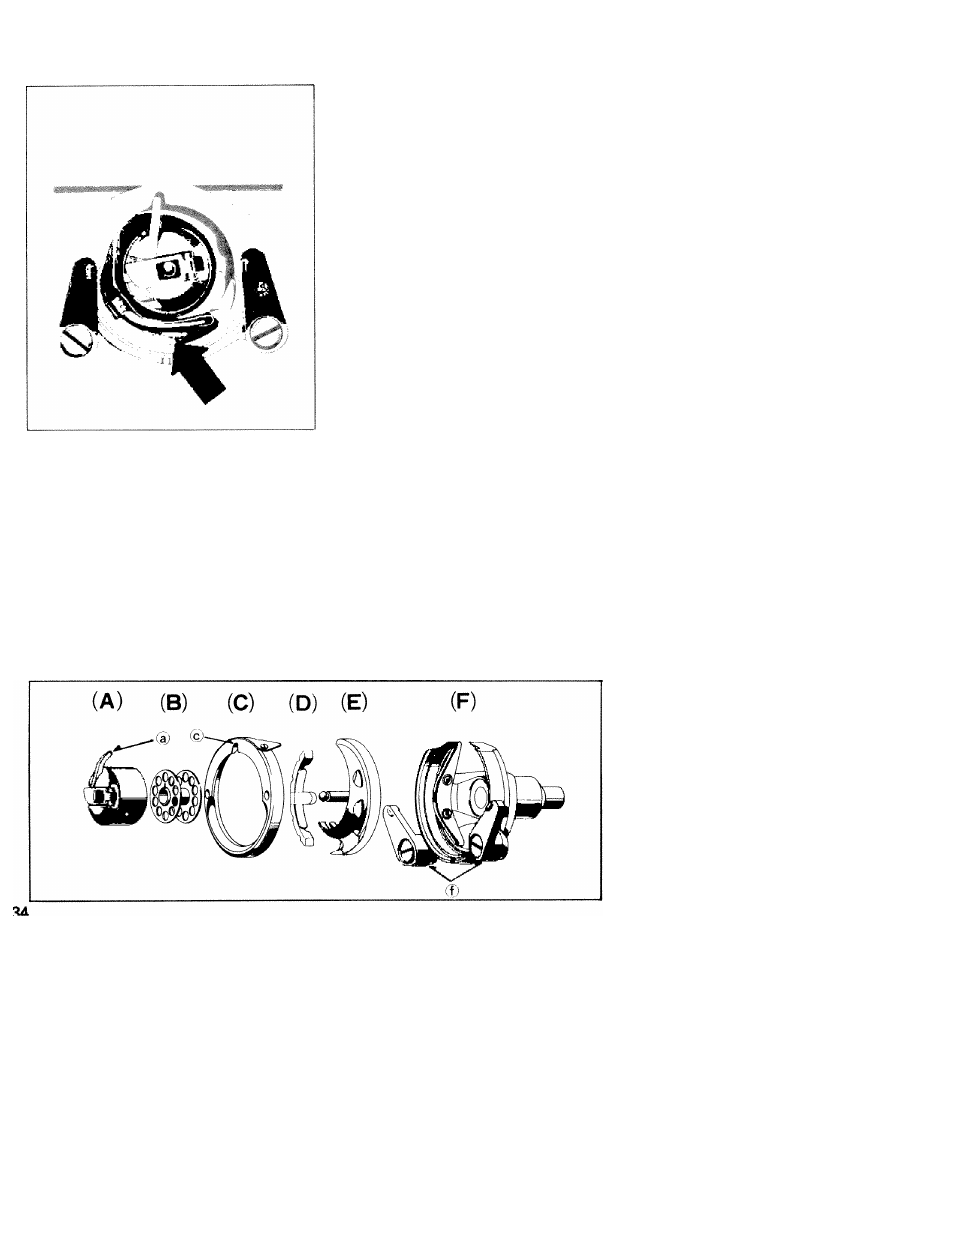
To remove the shuttle assembly, proceed
as follows:
1. Turn hand wheel until the needle
reaches its highest position. Tilt head
back on its hinges.
2. Remove bobbin case (A).
3. Turn the two shuttle race cover clamps
(f) outward and remove the shuttle
race cover (C) and the shuttle body
(E) and the lint cleaner (D).
4. Clean the shuttle race, the shuttle, and
shuttle race cover by removing all
threads, lint, etc.
When the cleaning has been completed, proceed as follows to replace the shuttle assembly:
1. Turn hand wheel until the needle reaches its highest position.
2. Place lint cleaner (D) to shuttle driver and shuttle body (E) in race (F) against shuttle
driver and adjust into position.
3. Replace shuttle race cover (C), fitting pin at lower edge into notch, and lock into
position with shuttle race cover clamps (f), making certain the clamps have been
snapped securely into position.
4. Put bobbin (B) into bobbin case (A).
5. Put the bobbin case into the shuttle, fitting tongue (a) into notch (c) of race cover (C).
6. Place a single drop of oil on shuttle body as indicated by arrow on illustration.