Adjusting the bobbin winder – SINGER W310 User Manual
Page 12
Attention! The text in this document has been recognized automatically. To view the original document, you can use the "Original mode".
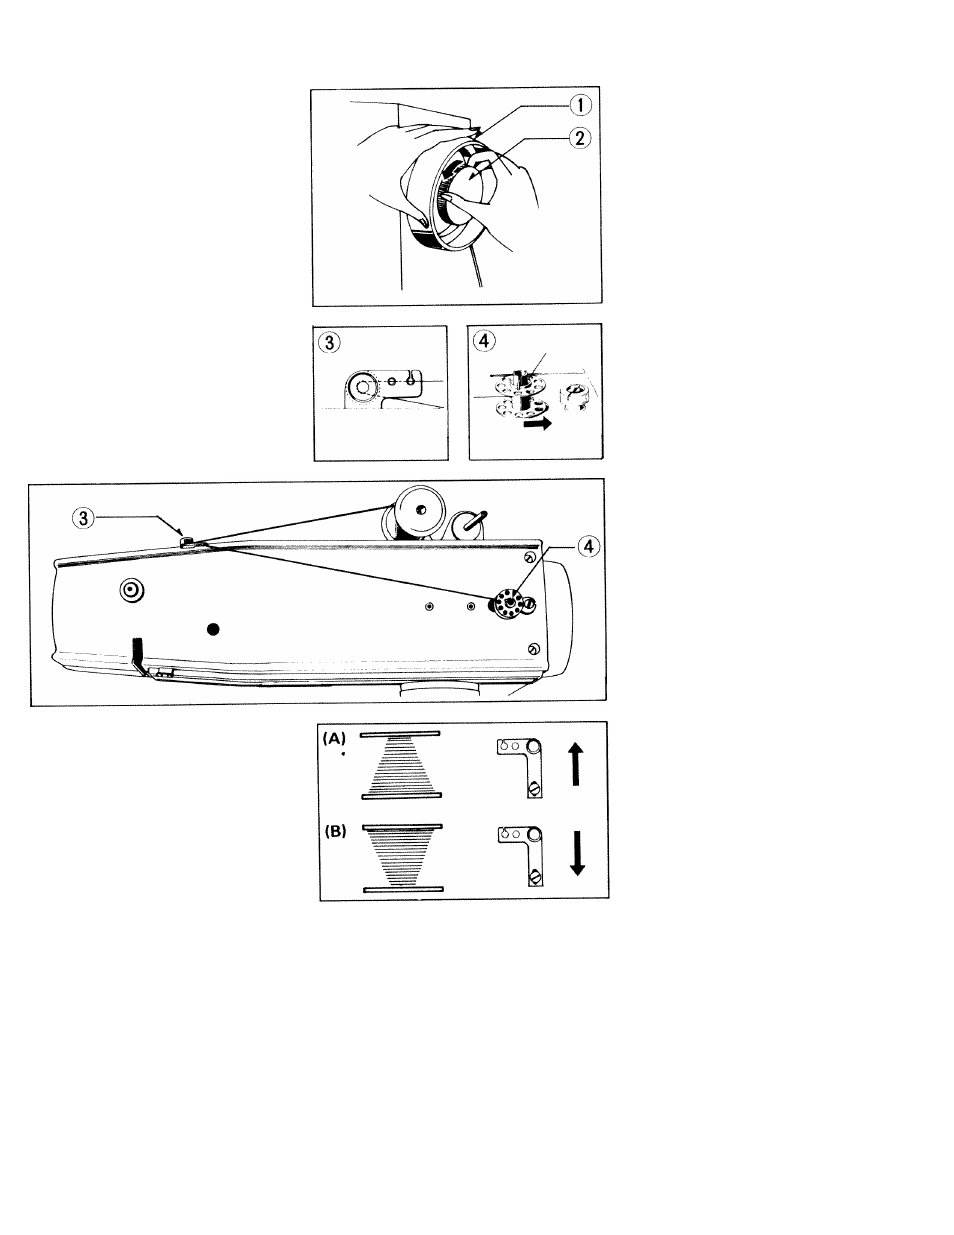
Disengage the hand wheel (1) from the
stitching
mechanism
by
turning
the
coupling
wheel
(2)
towards
you
or
counterclockwise.
Place a spool of thread on one of the
spool pins and lead the thread through
the rear Top Thread Guide (3) after wind
ing it around the Bobbin Widner Tension
Disc. Slip the end of the thread through
a hole in the rim of the bobbin and place
the bobbin on the spindle of the bobbin
winder (4), fitting the notch on the
bobbin over the small spring on the
spindle.
Push the bobbin winder to the right, and
hold the thread end loosely, then run the
machine slowly. The bobbin will stop
turning when the bobbin is full.
Cut the thread and push the bobbin
winder to the left. Remove the bobbin
from the bobbin winder.
Turn the coupling wheel away from
you until the sewing mechanism is
again engaged so that the needle moves
when you turn the hand wheel.
WINDING THE BOBBIN
ADJUSTING
THE
BOBBIN
WINDER
It may be necessary to adjust the rear
top thread guide if the bobbin winds
unevenly.
If the bobbin winds unevenly as shown
in Fig. (A), loosen the set screw of the
rear top thread guide and move the
thread guide up slightly. If the bobbin
winds as shown in Fig. (B), move the
thread guide down slightly.
in